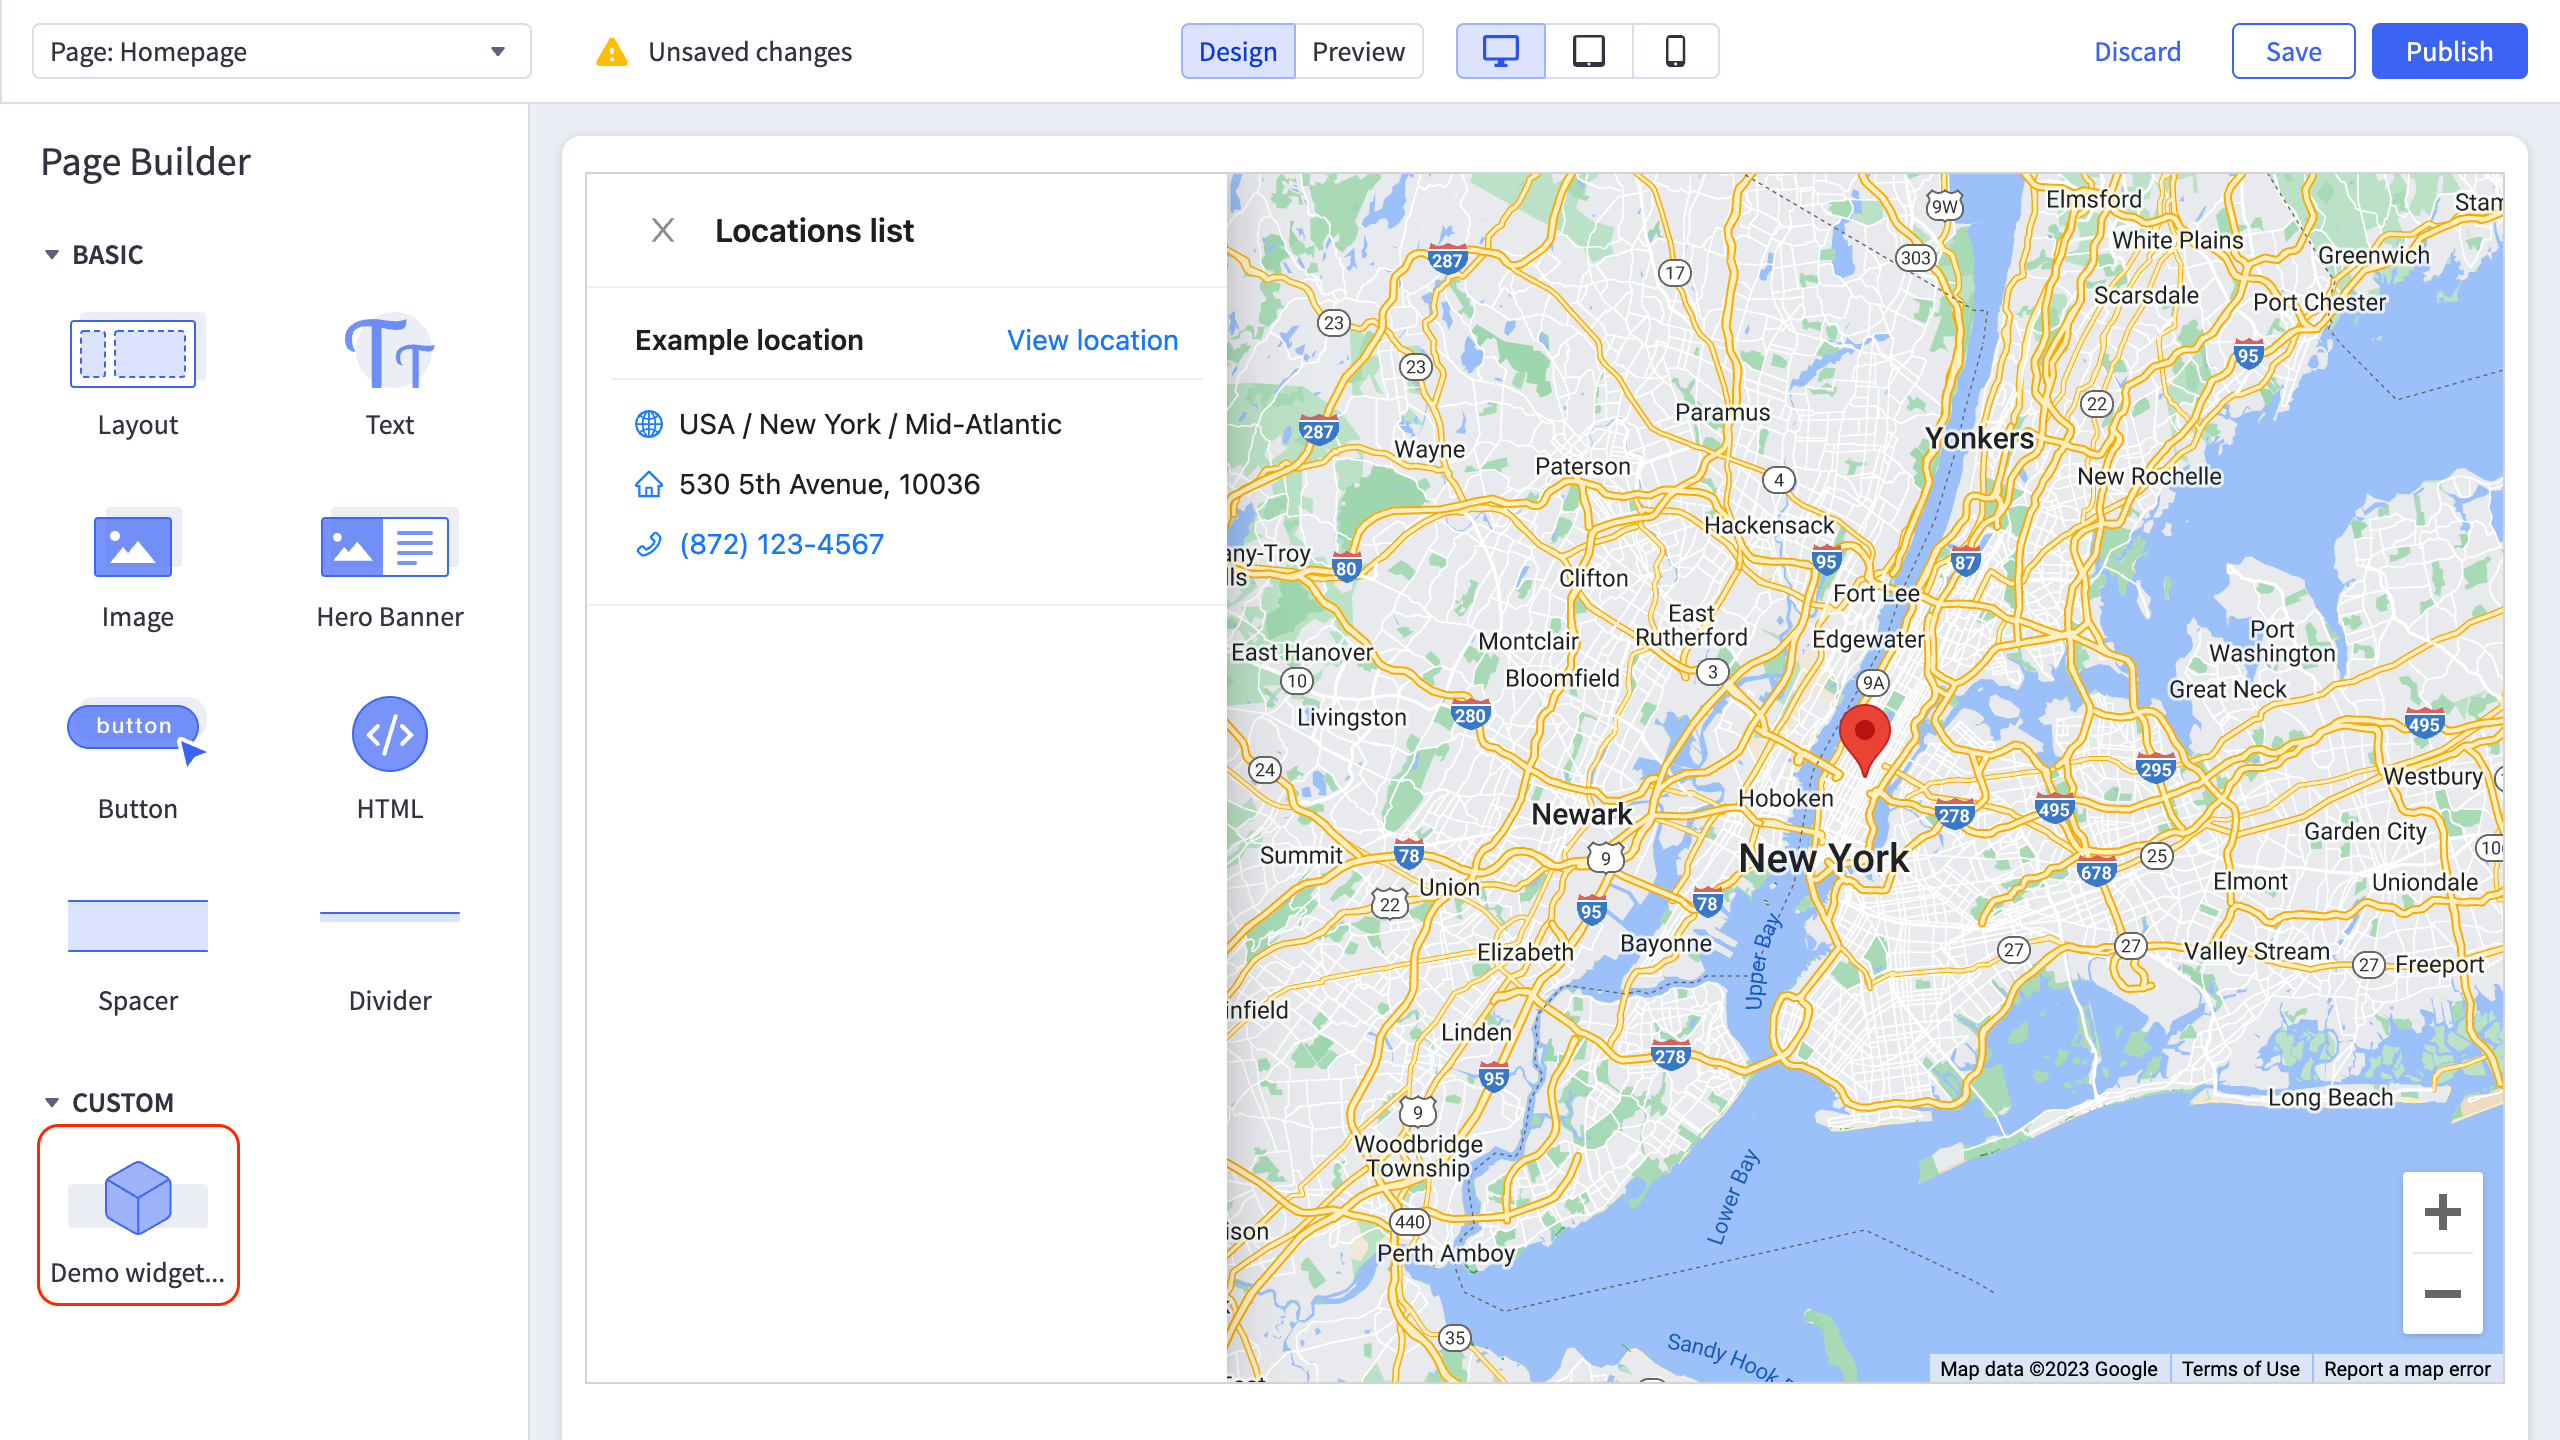
Once you've installed the Store Locator application on your BigCommerce store, you'll be redirected to the application's admin panel within the BigCommerce admin. Here, you can create and configure store locator widgets that can be used on your storefront via the page builder.
When launching the application for the first time, you'll be prompted to enter and save your Google Maps API key, which is required to proceed using the application.
You can generate a Google Maps API key by following the steps outlined in the official Google documentation, which can be found here - Use API Keys | Maps JavaScript API | Google Developers
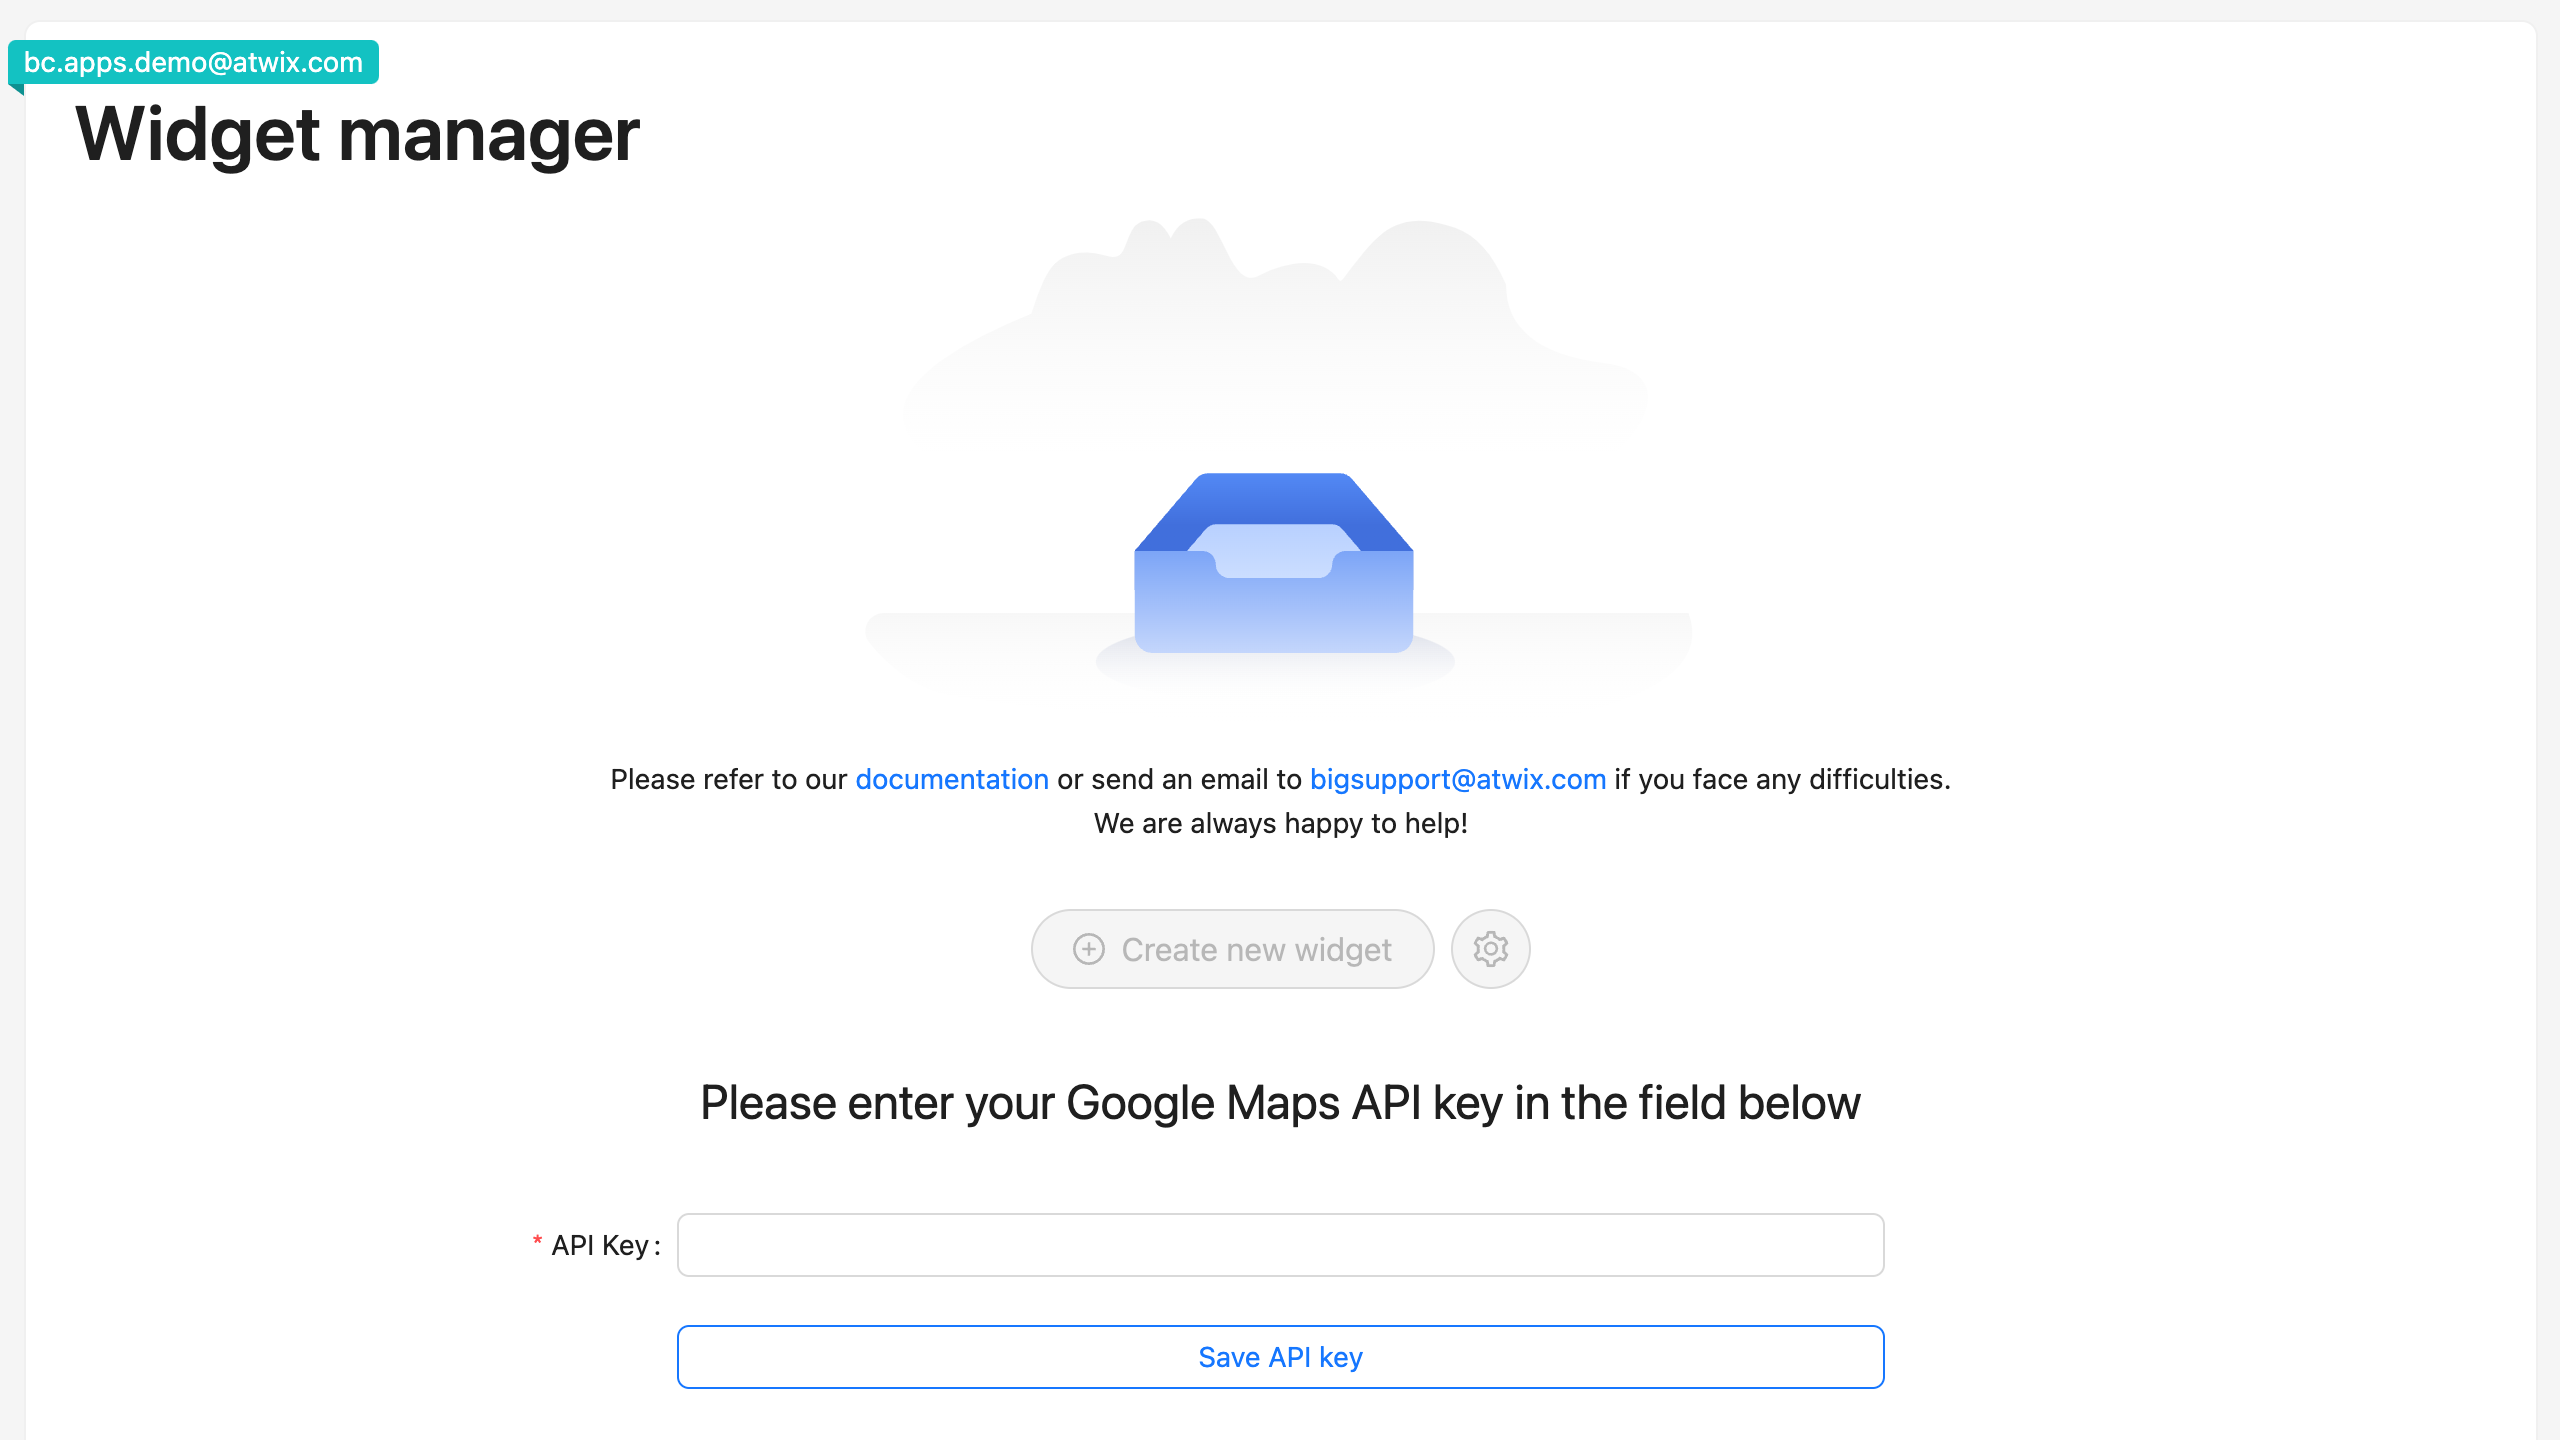
Once you've successfully saved your Google Maps API key, the "Create new widget" button will become active. You can initialize the process of creating a new widget by clicking on this button.

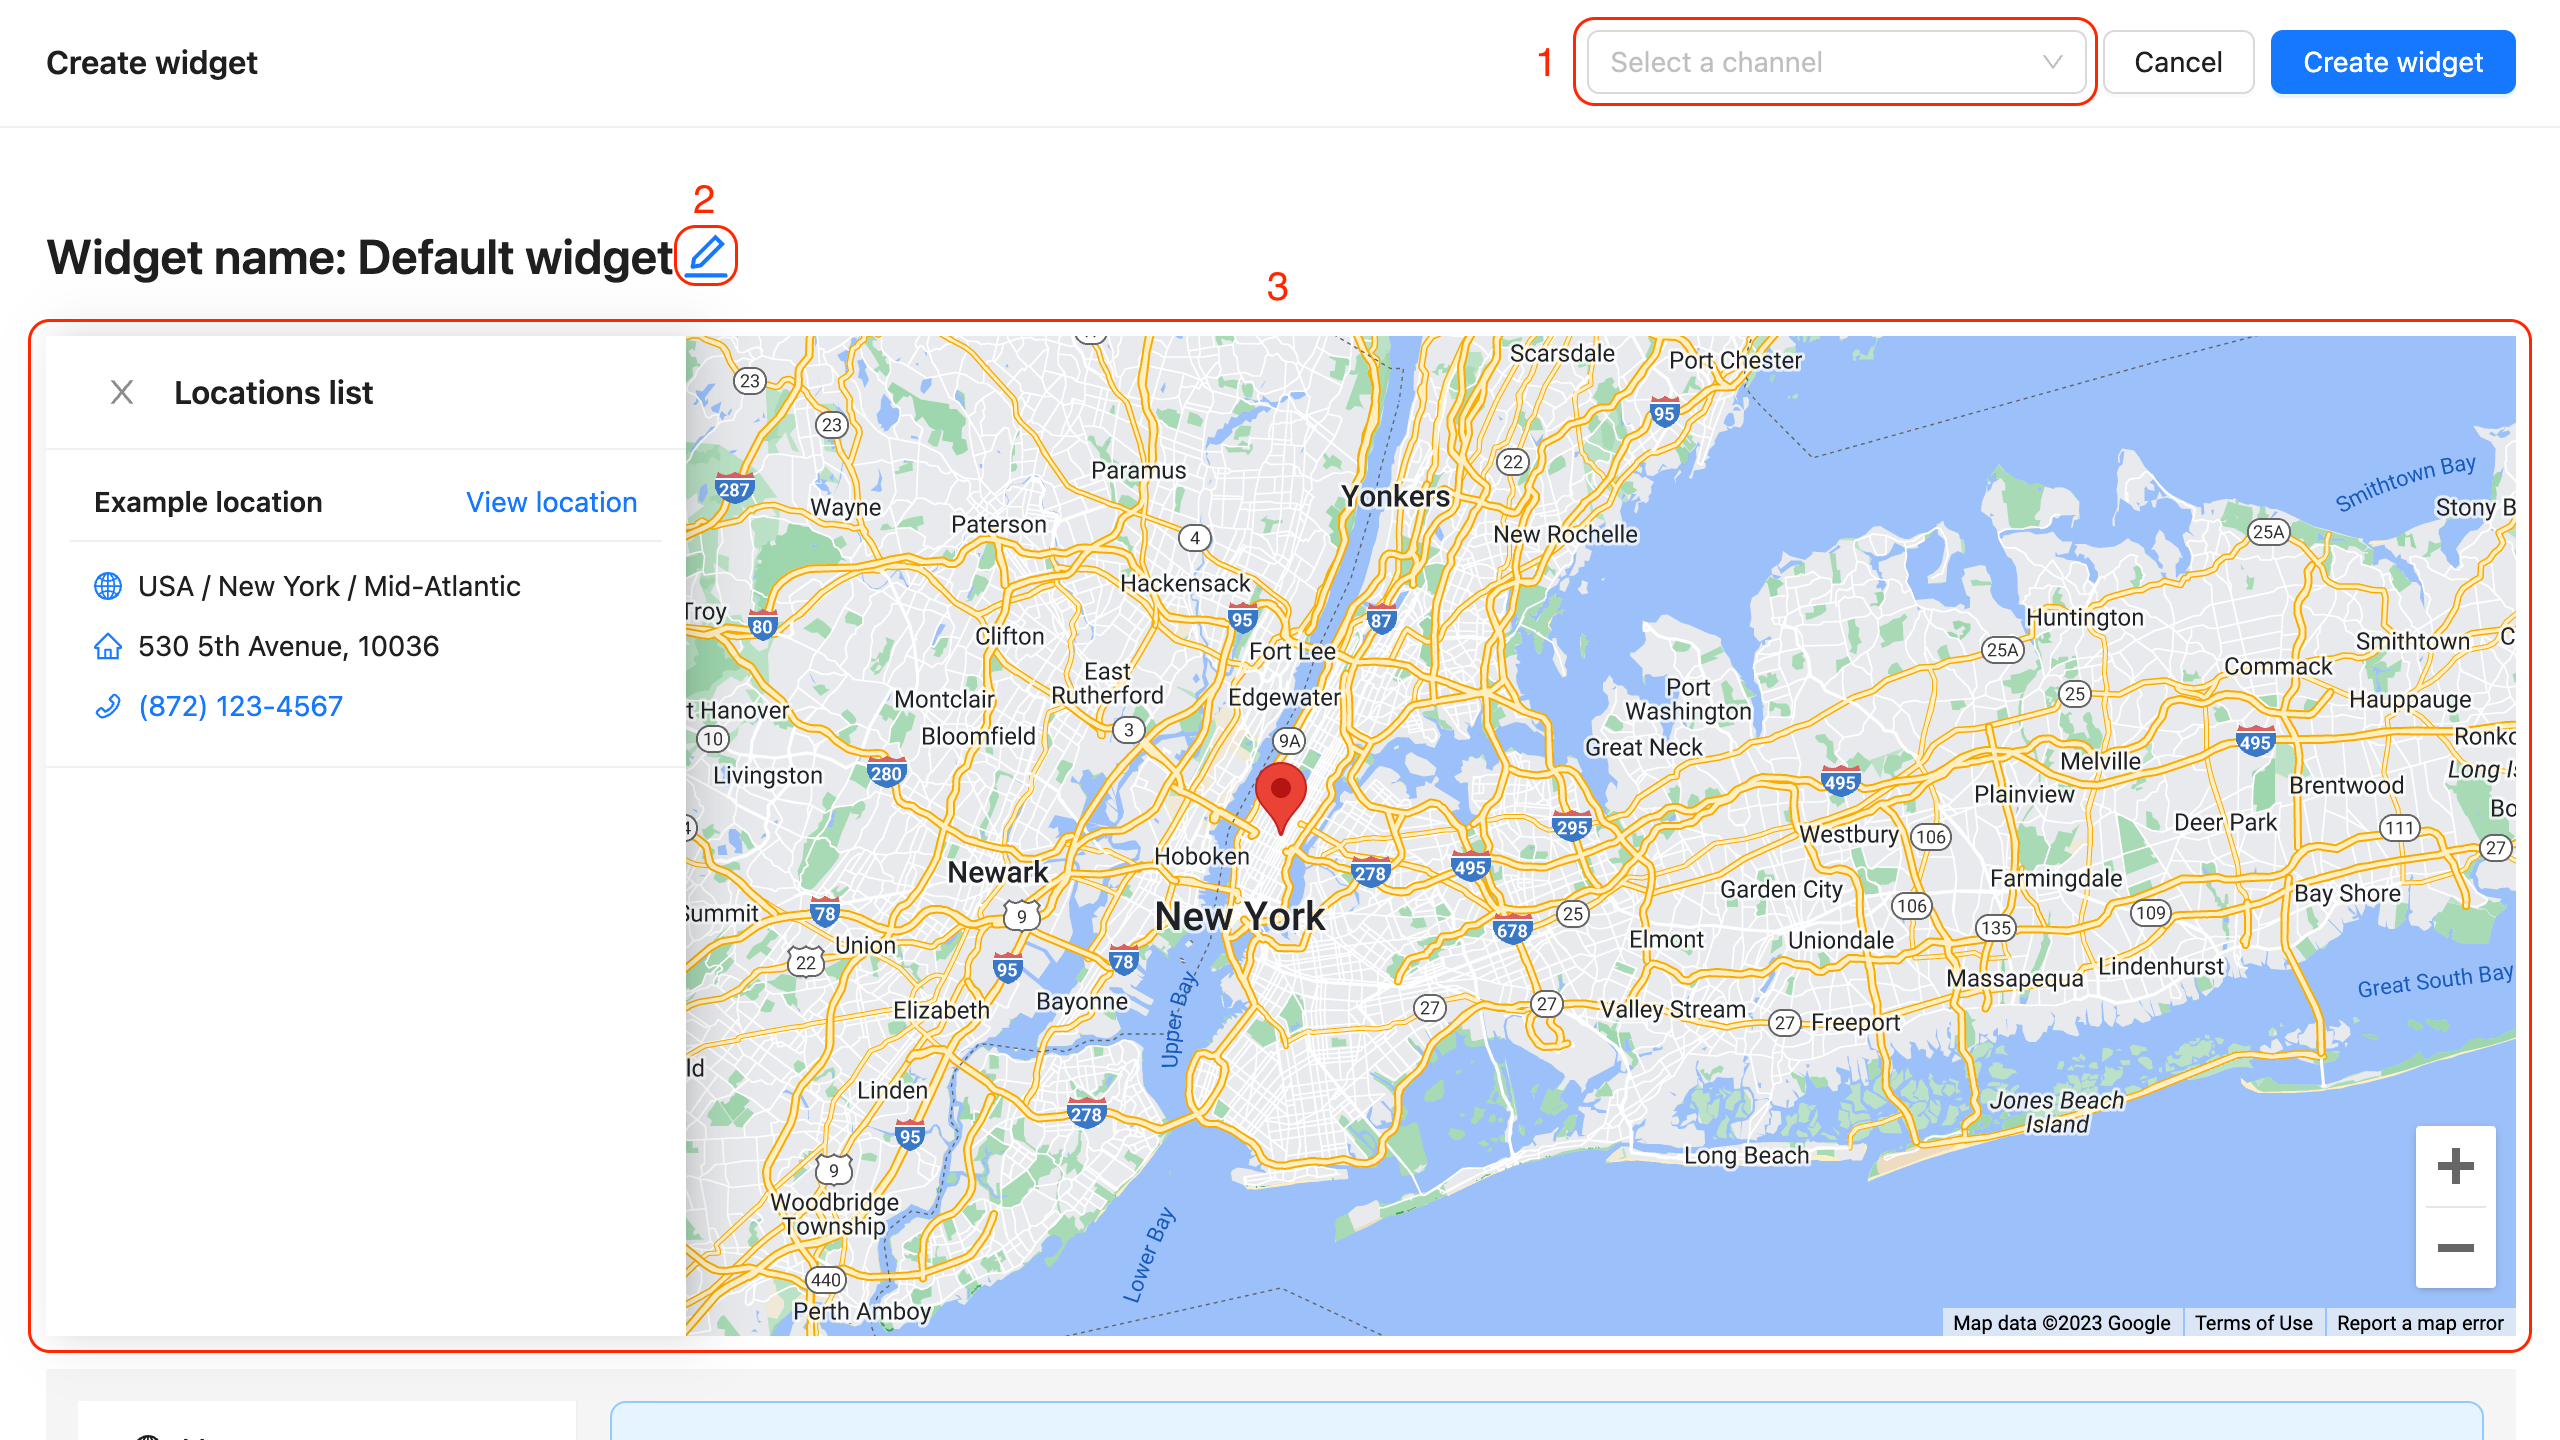
The process of creating a new widget and editing an existing widget takes place in the same window. At the top of the page, you'll find the "Select a channel" dropdown (number 1 on the screenshot). Our application supports multi-channel stores, and it's required to select the channel when creating a new widget.
To set up a widget name, click on the button marked with number 2 on the screenshot. It's important to note that all widgets must have unique names.
Below the widget name, you'll find the widget preview. Almost all changes made during the widget configuration will be reflected in the widget preview, allowing you to see how your configuration will look on the storefront.
If you don't see the initialised Google Map in the widget preview, you may need to check your Google Maps API key configuration and restrictions from the Google Console side.
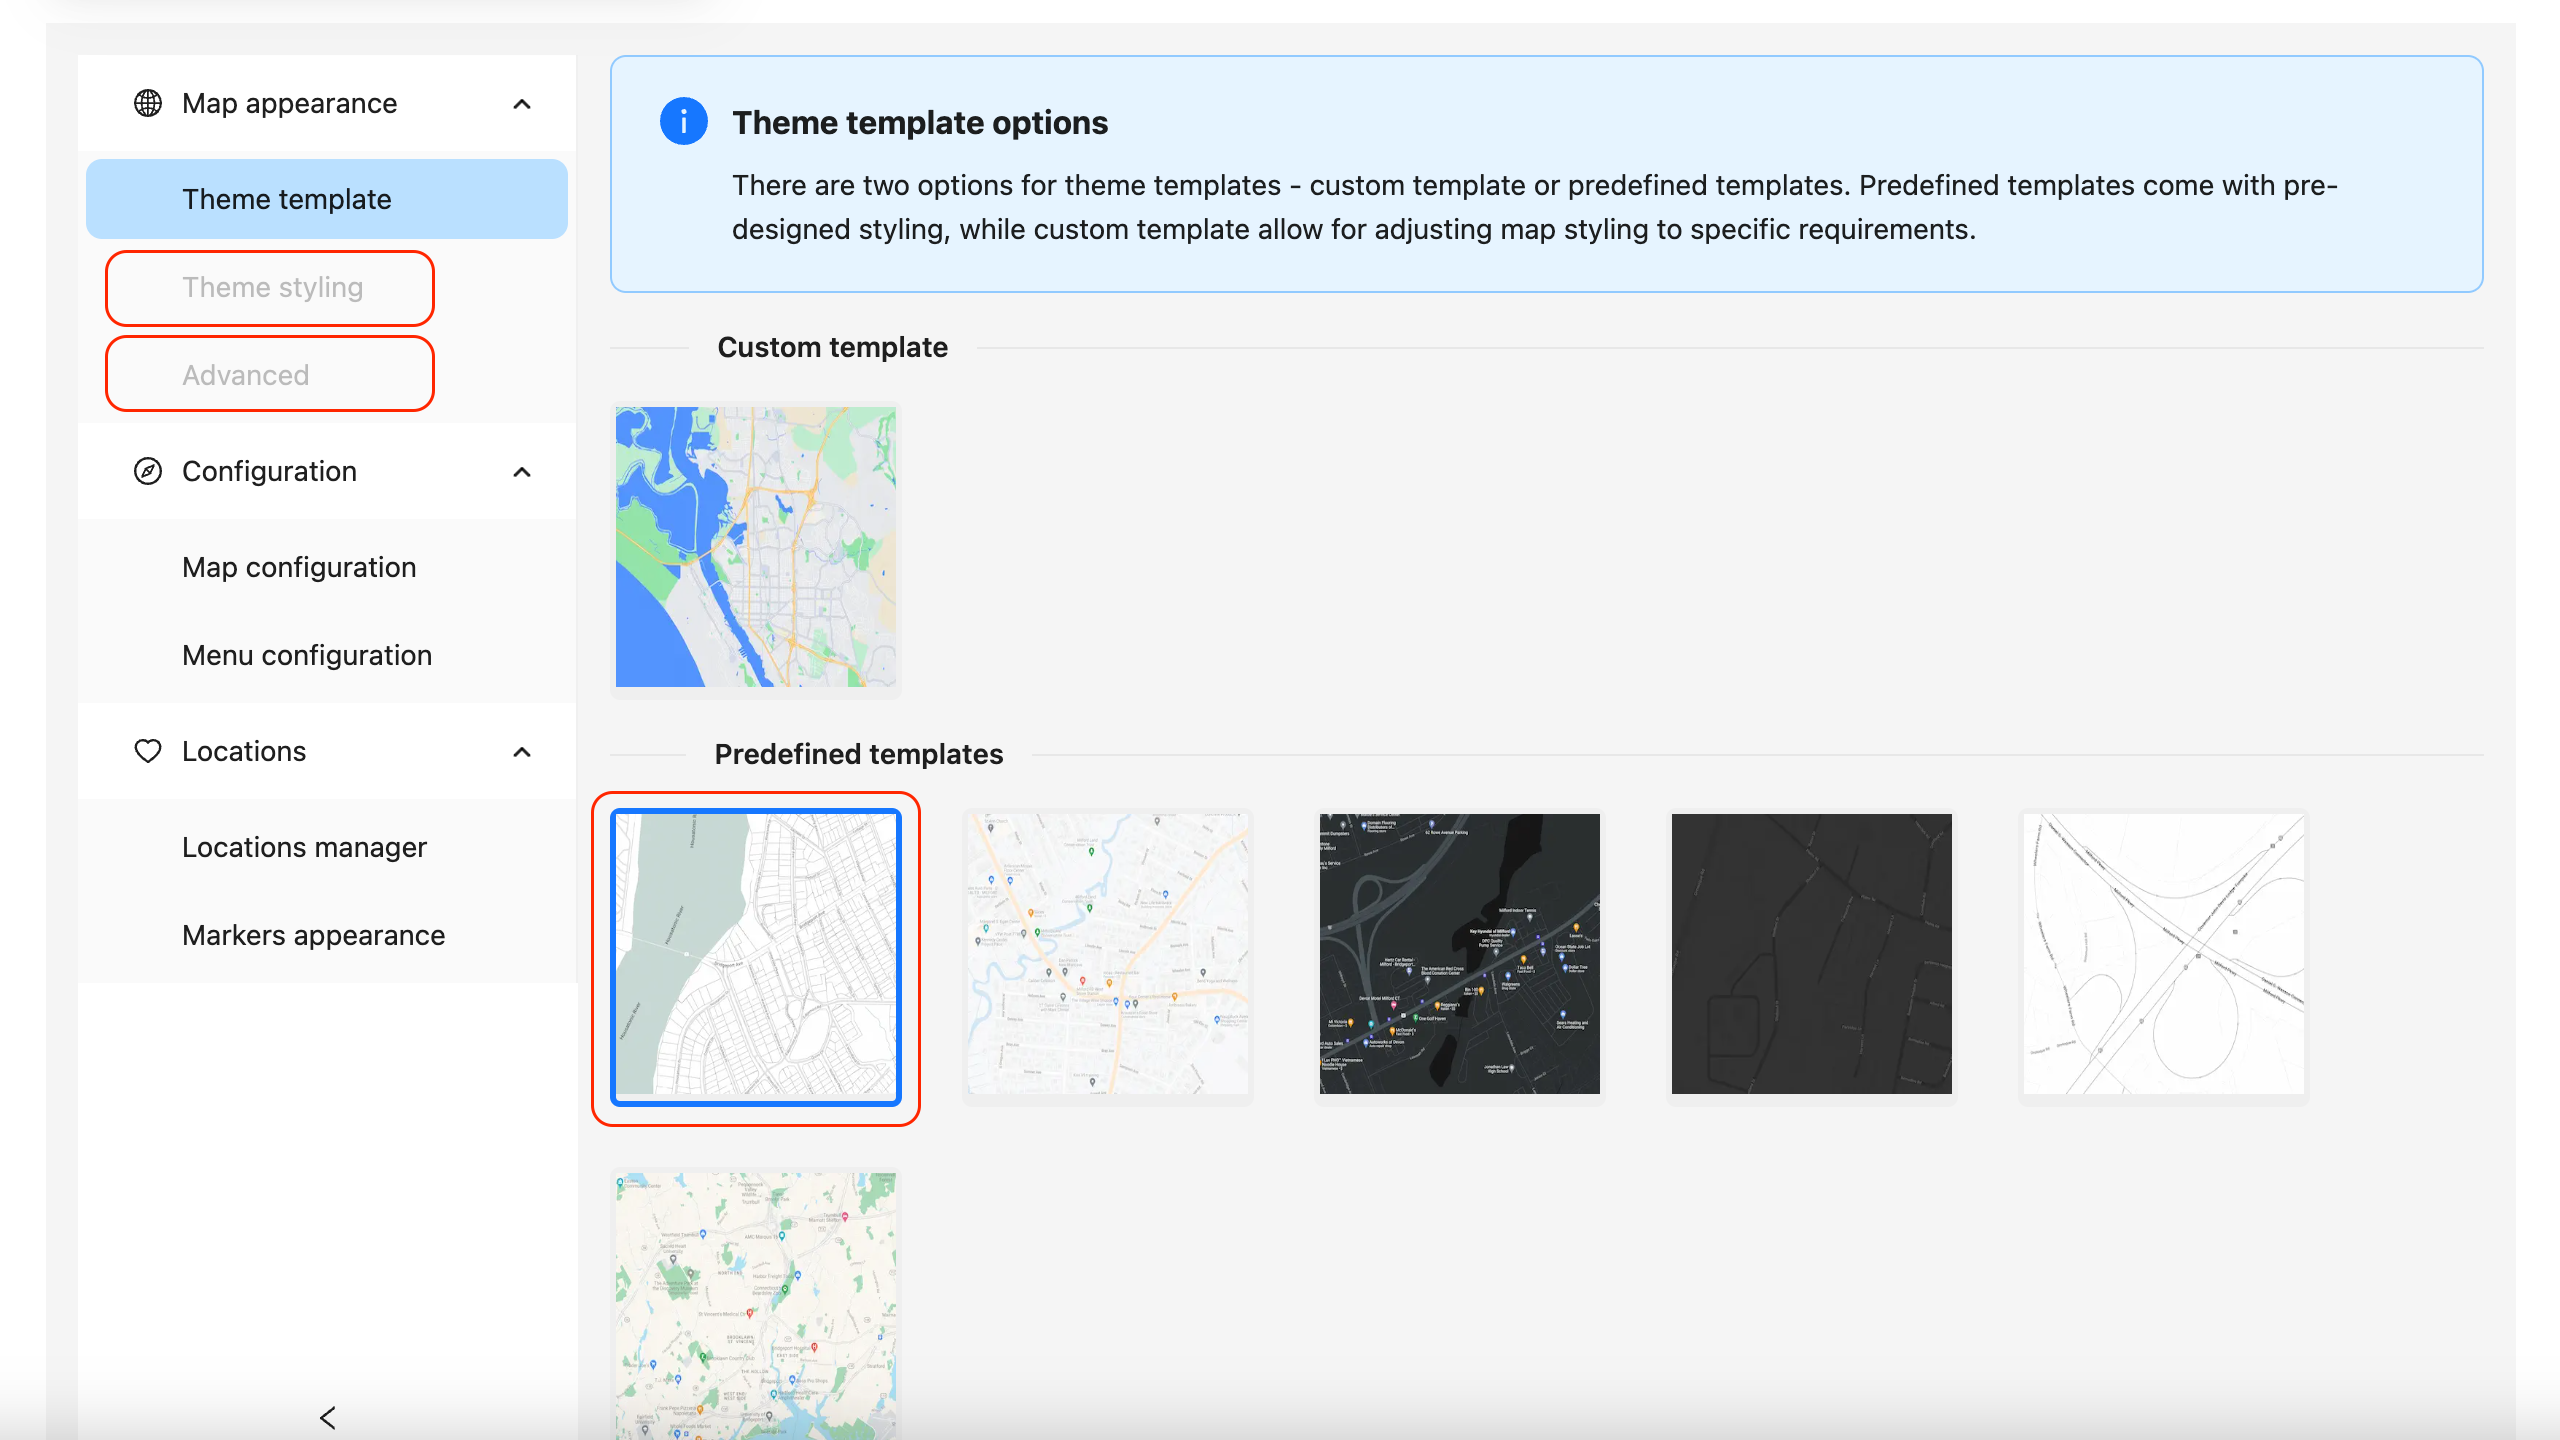
In the "Theme template" section, you can choose which theme template to use. You have the option to use a predefined template or a custom template that allows you to adjust the map styling according to your design requirements.
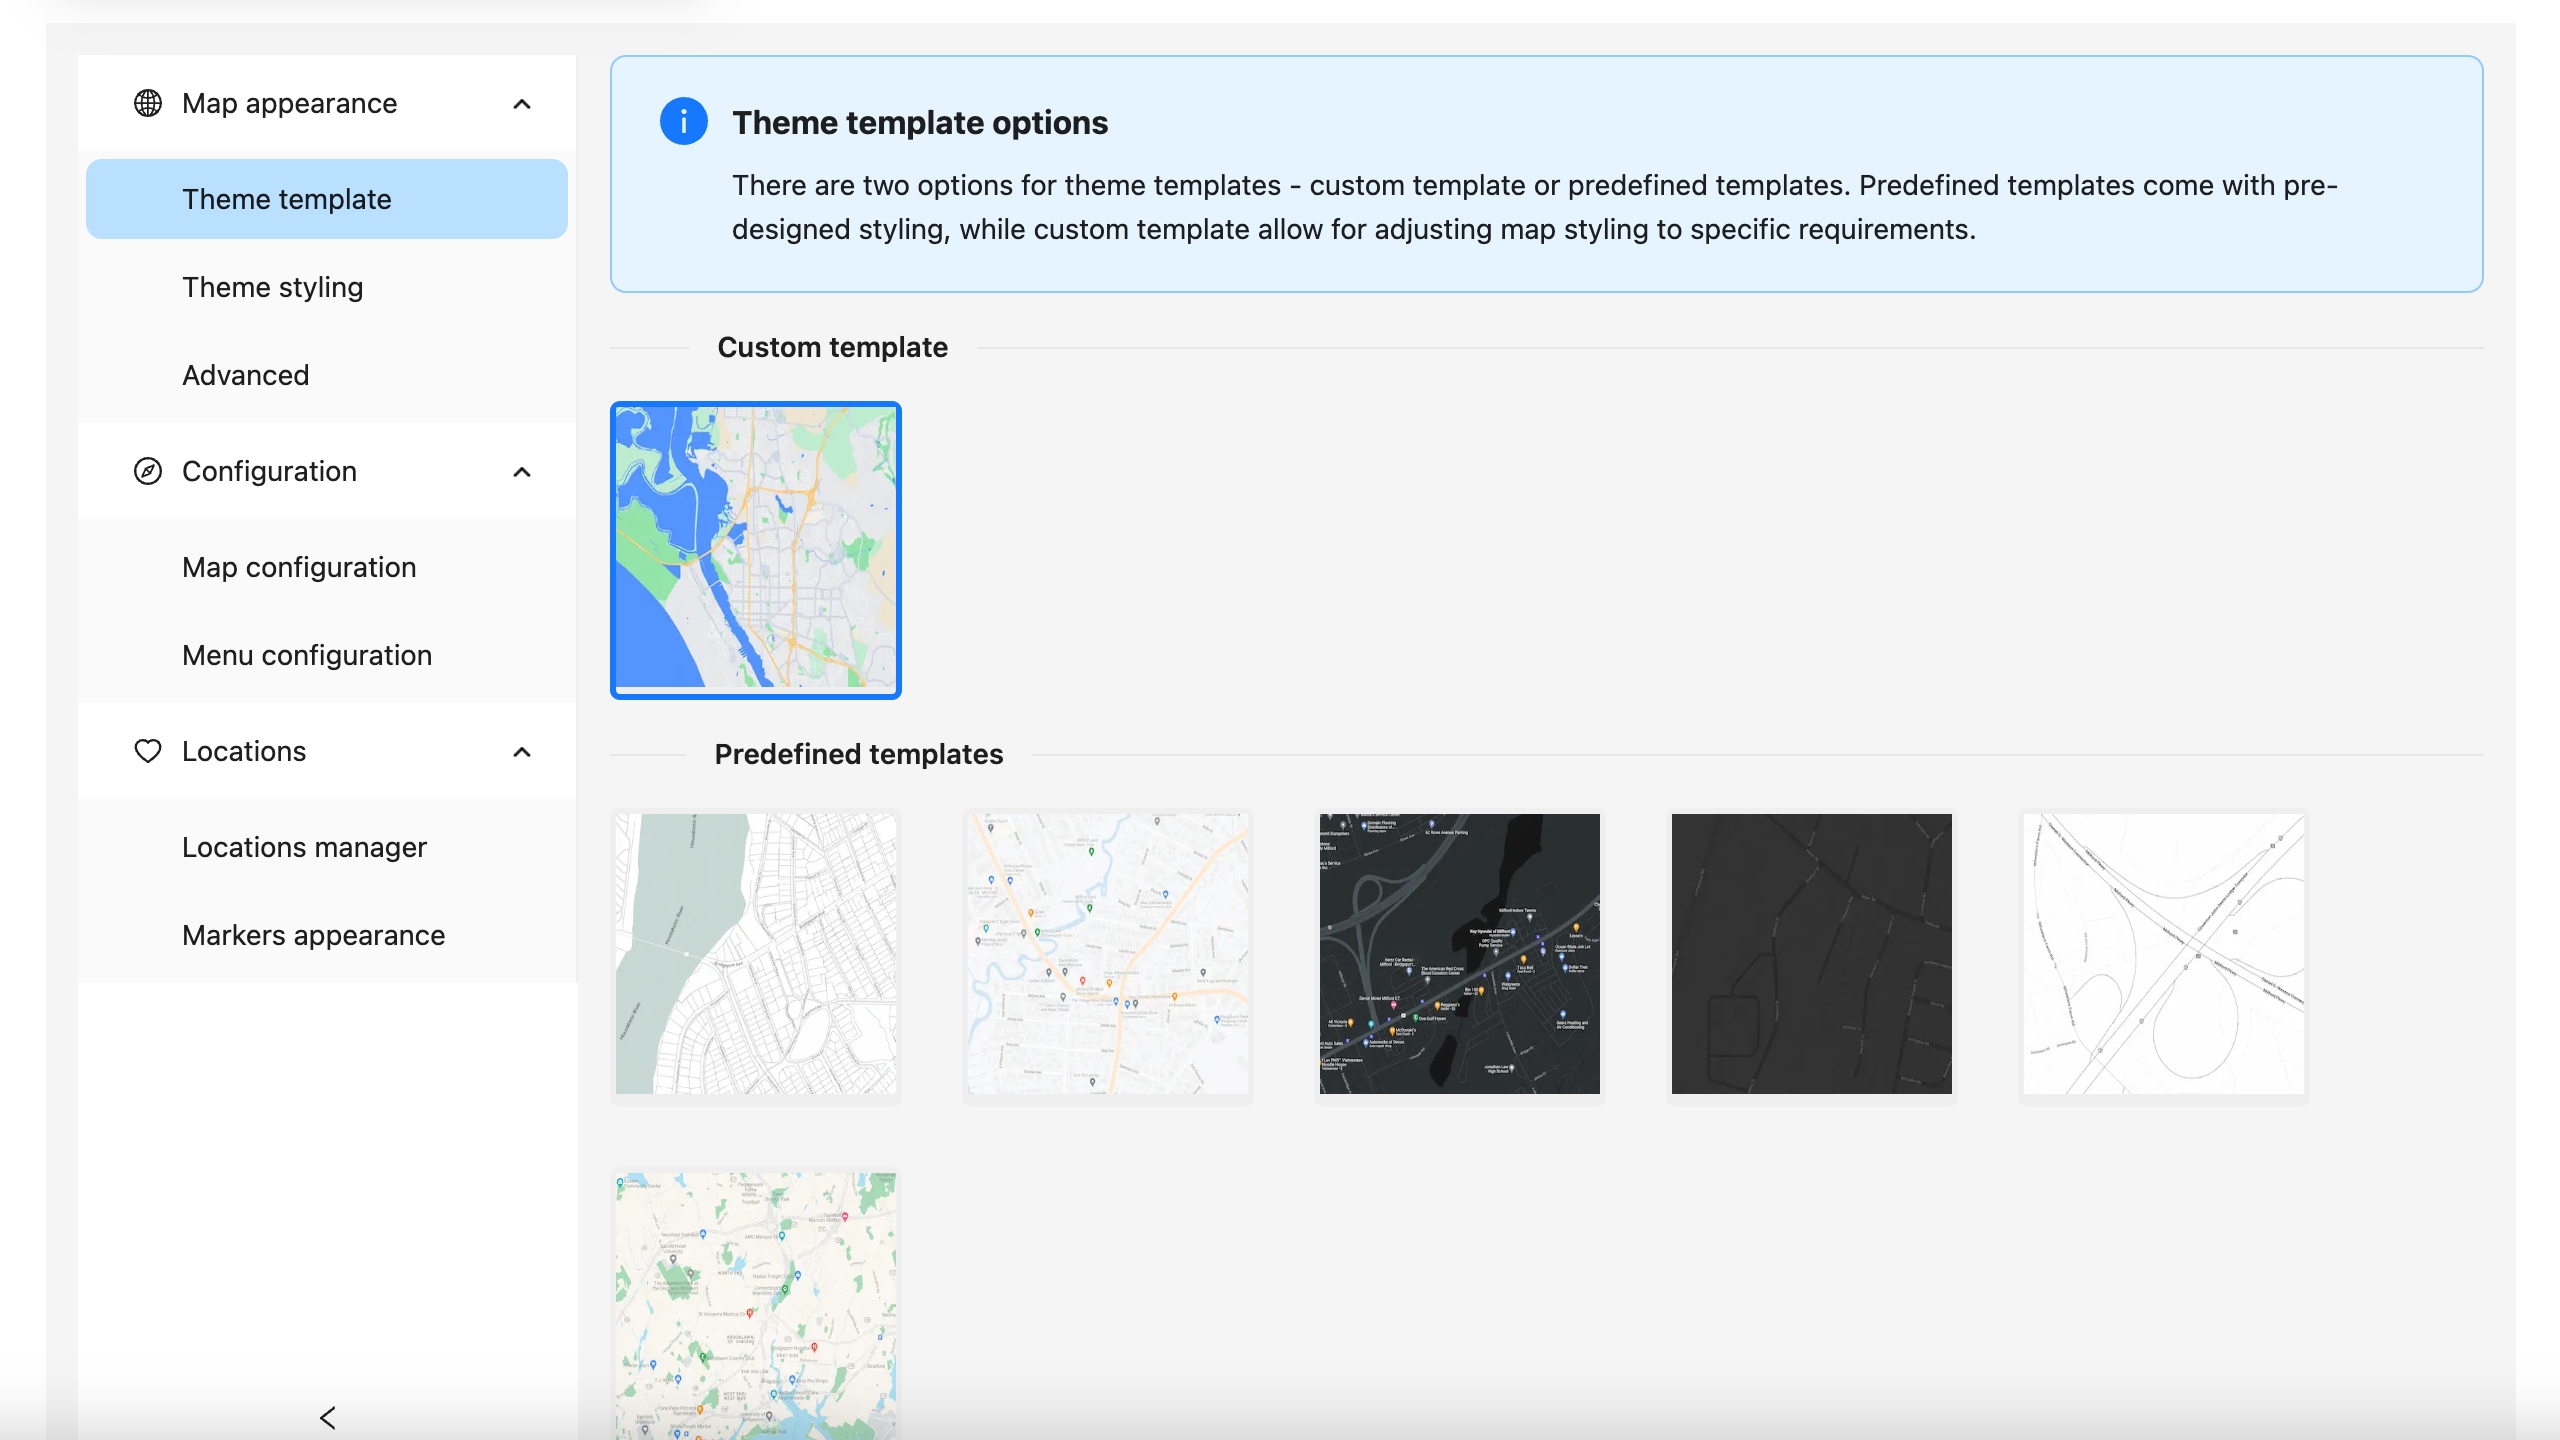
If you select a custom theme template, the "Theme styling" and "Advanced" sections will become active. You can use options available in these sections to customize the map's appearance and styling.

If you select a predefined theme template, the "Theme styling" and "Advanced" sections will be unavailable. It's not possible to customize the map's appearance and styling if you're using a predefined theme template.
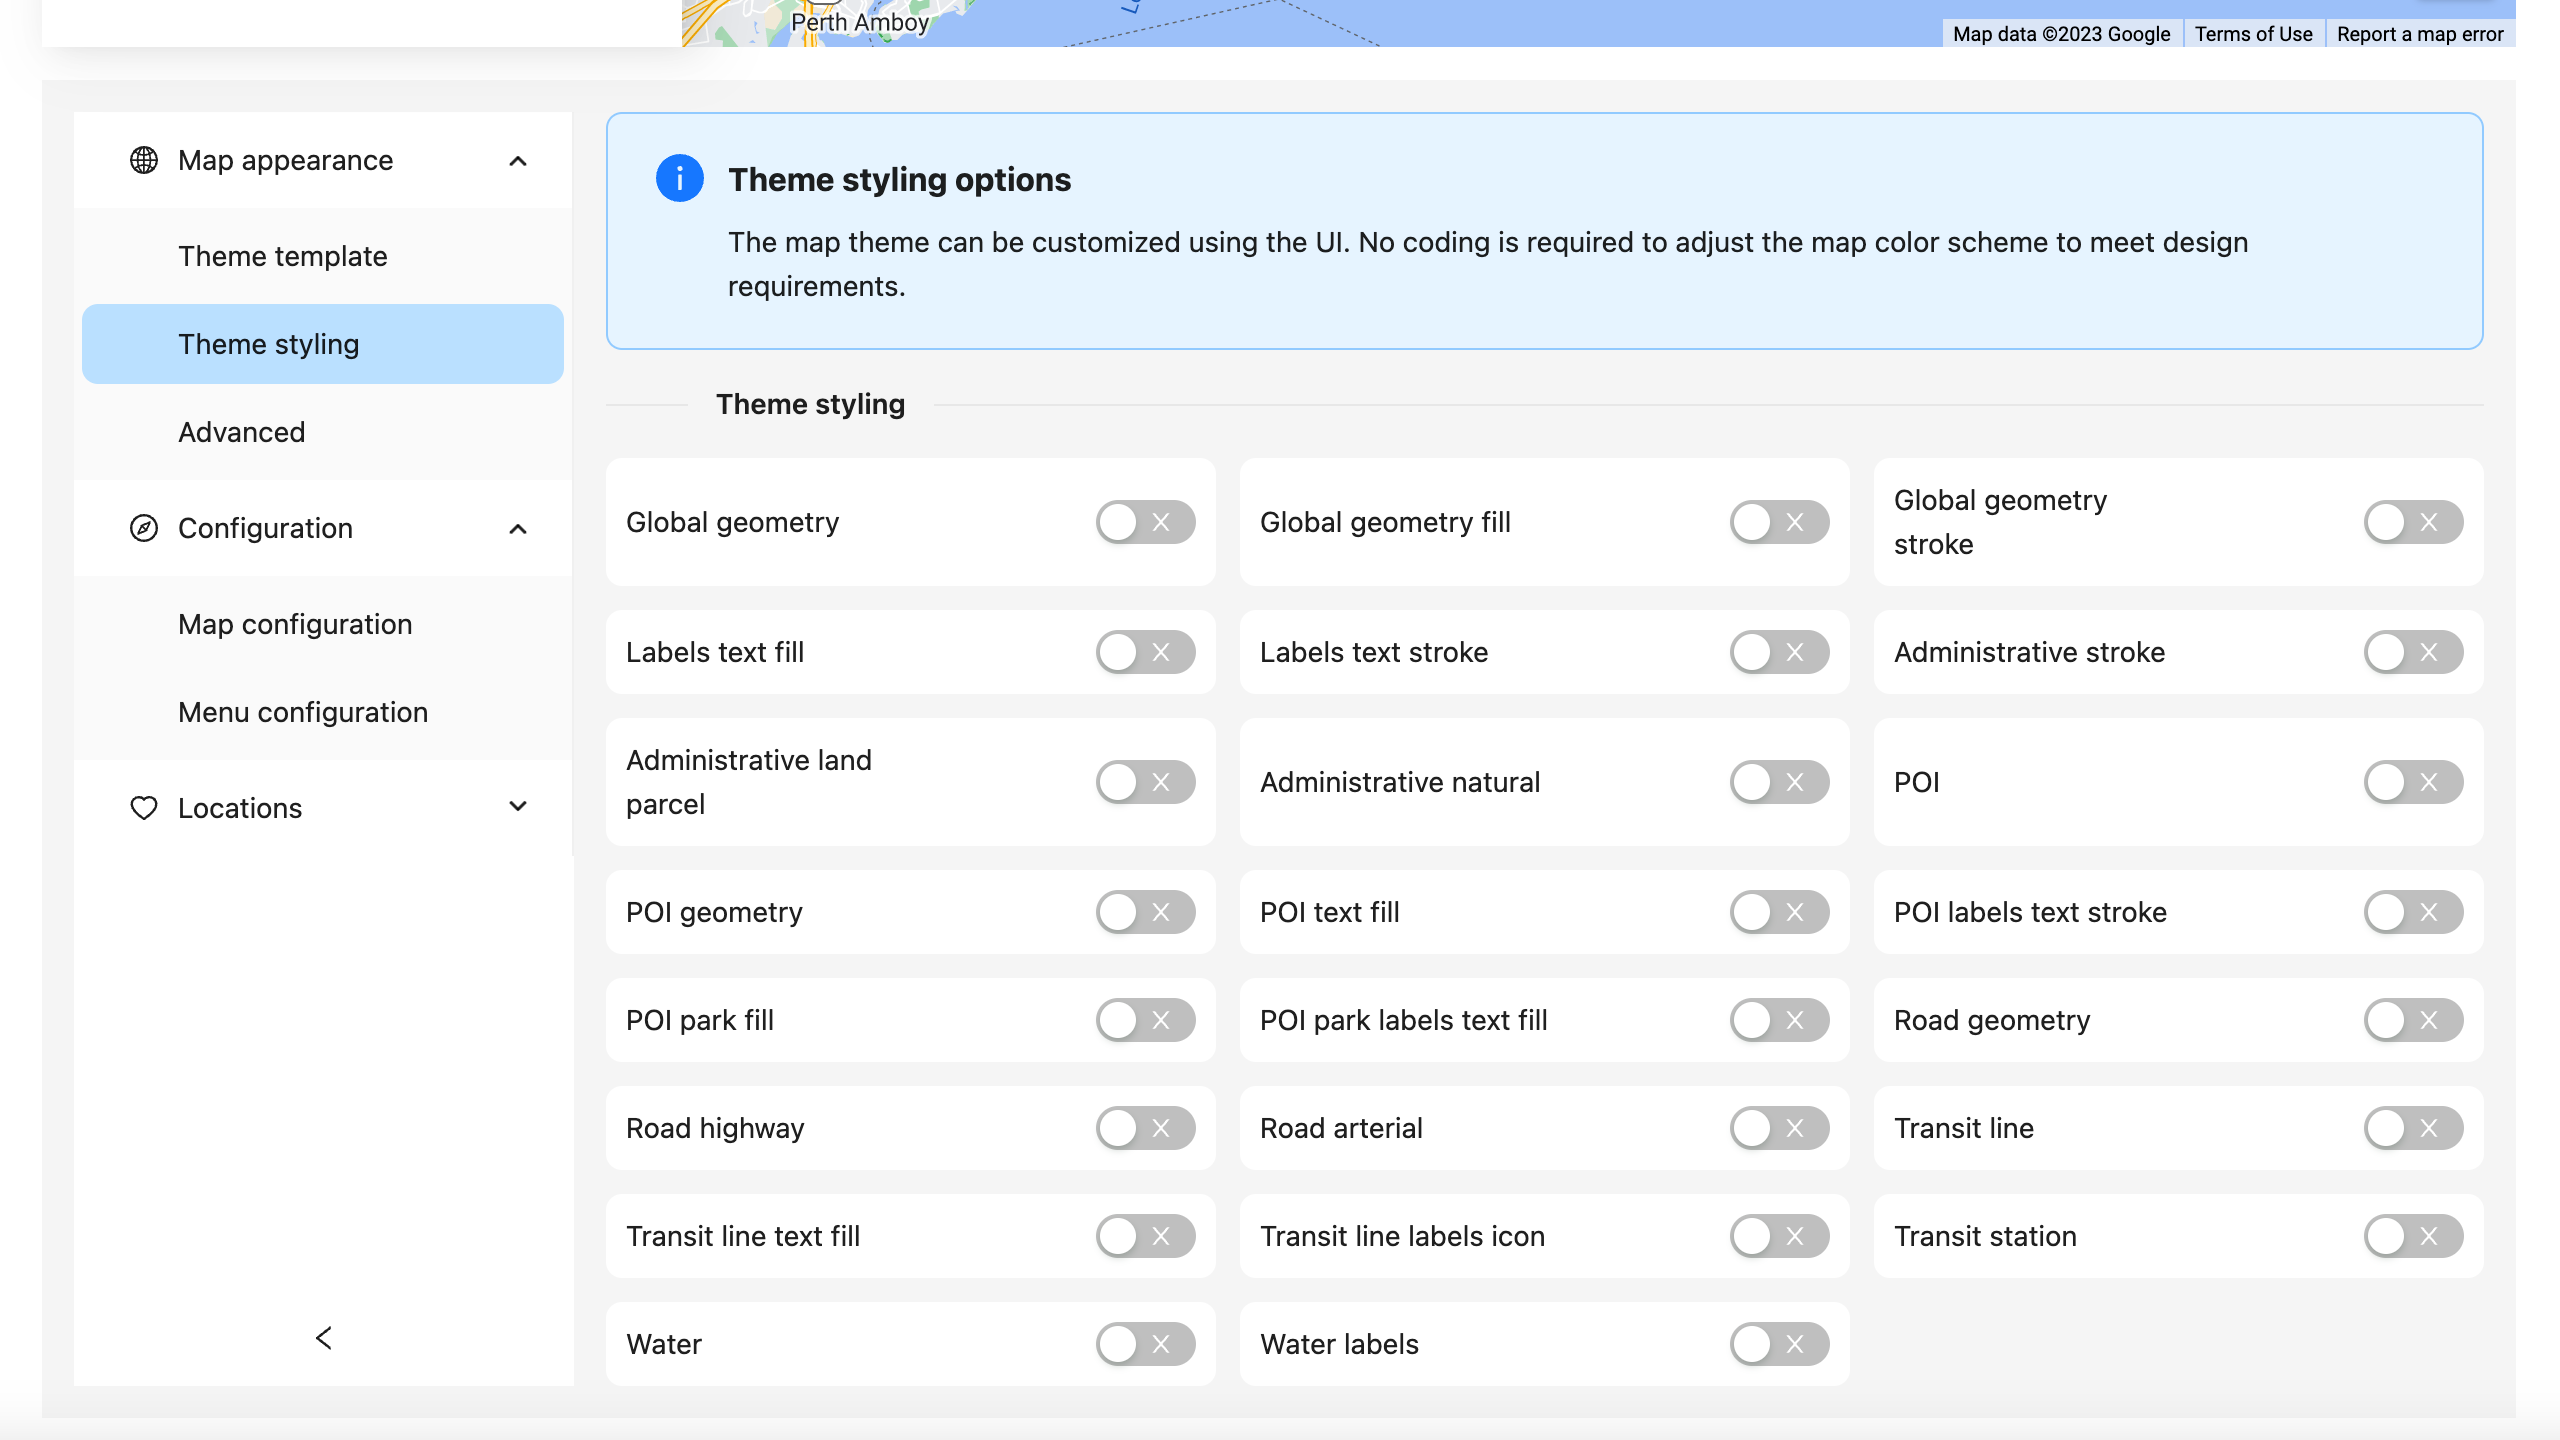
You can customize the map using the UI provided in the "Theme styling" section, and no coding is required to adjust the map's color scheme to meet your design requirements.
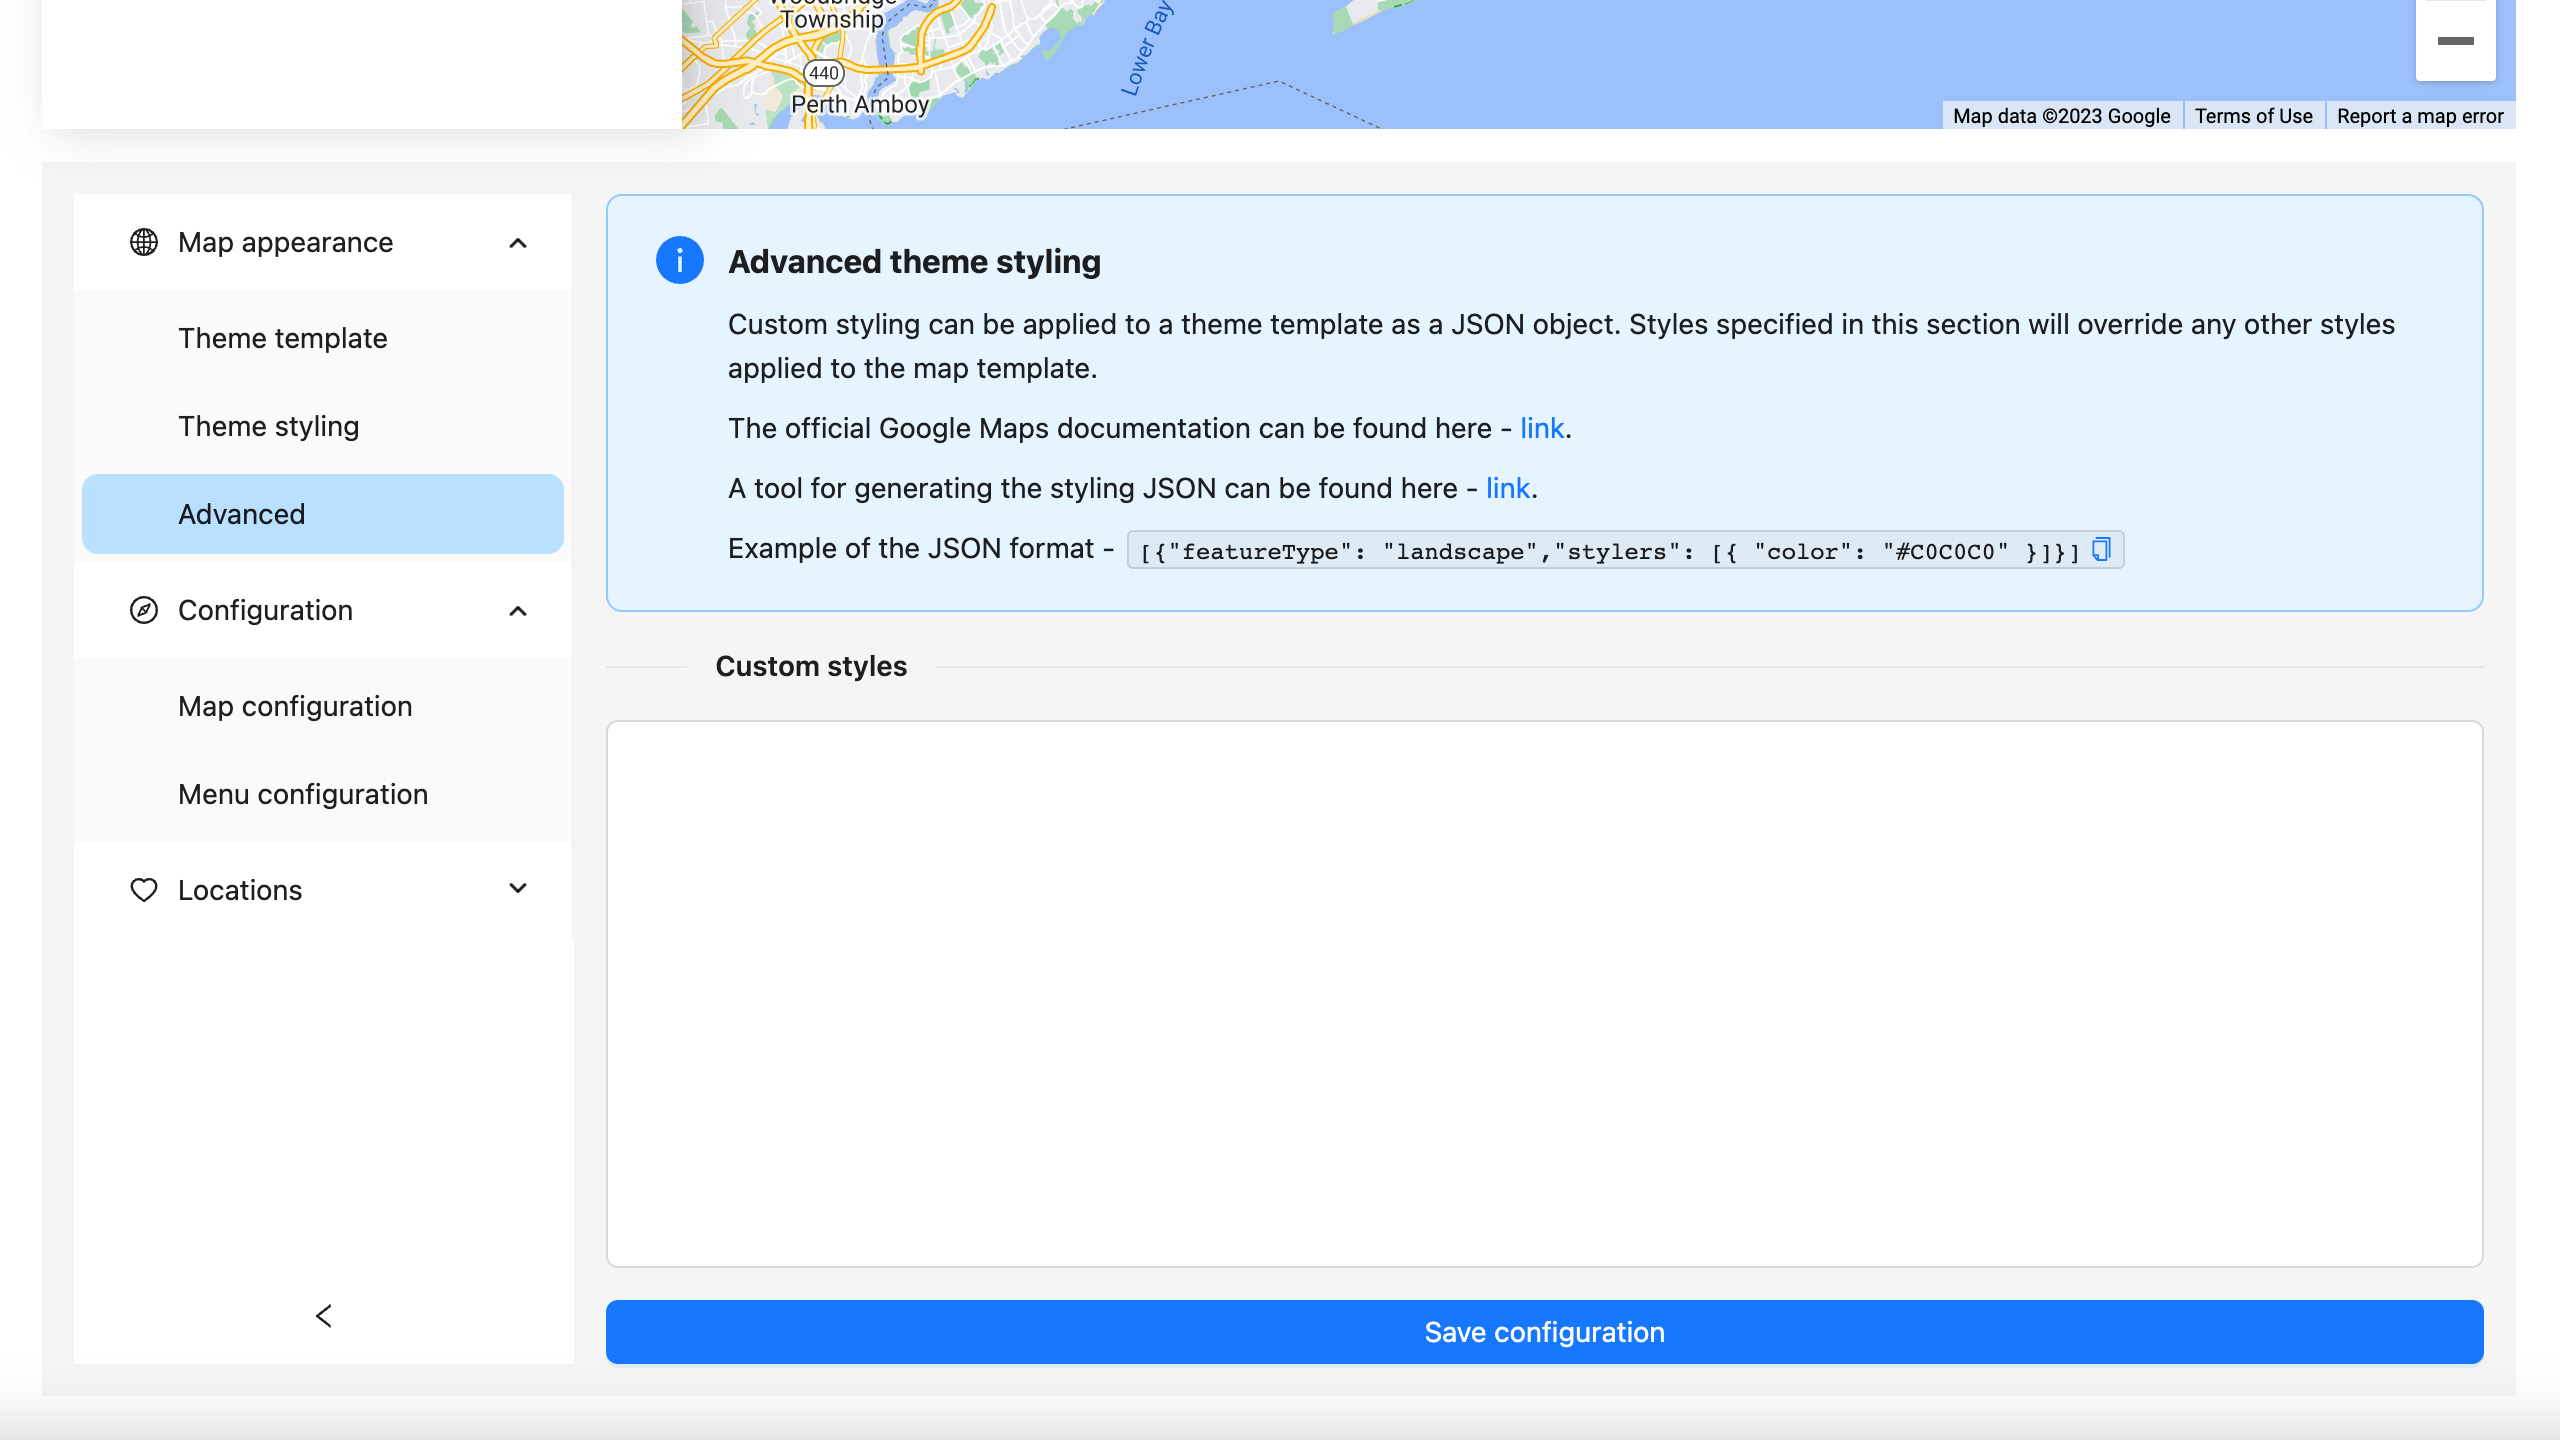
Custom styling can be applied to the theme template as a JSON object in the "Advanced" styling section. This feature allows you to completely change the map styling. Special site constructors for Google Maps styling configs can be used to generate JSON objects with styling options.
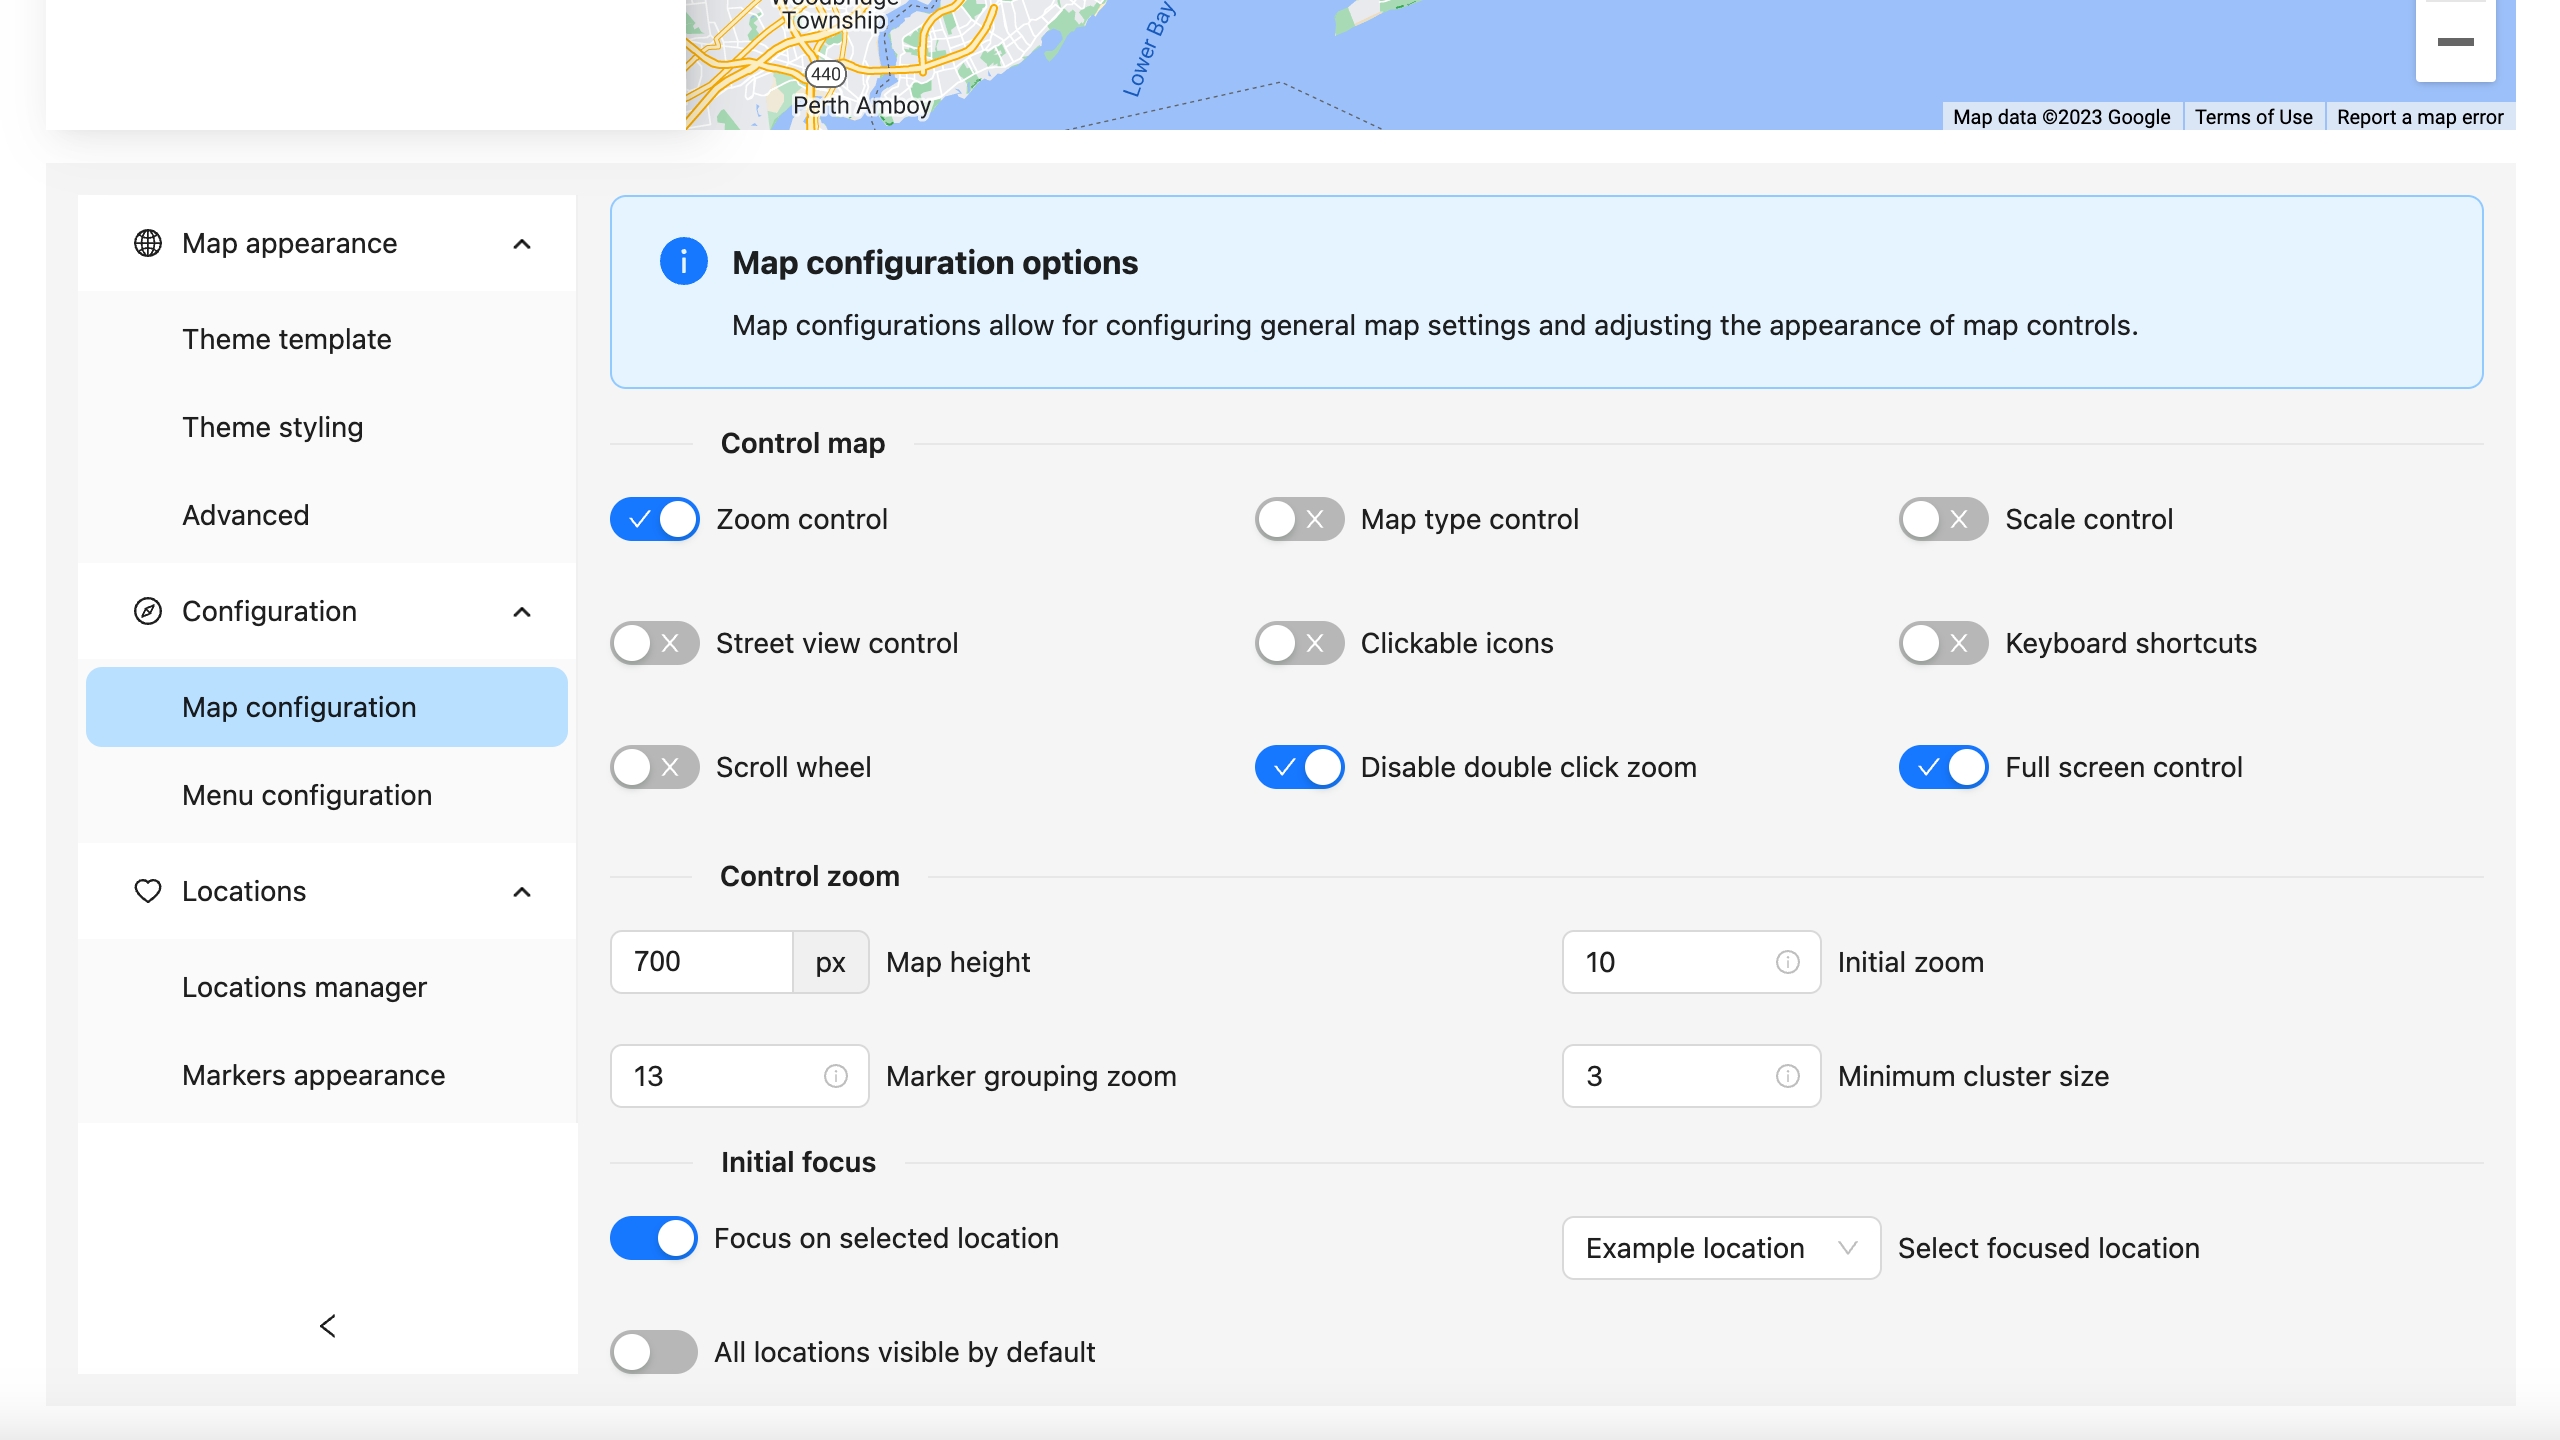
The map configuration options allow you to adjust map behaviors, enable/disable additional controls, configure zoom and clustering options, and set the initial focus options, among other things.
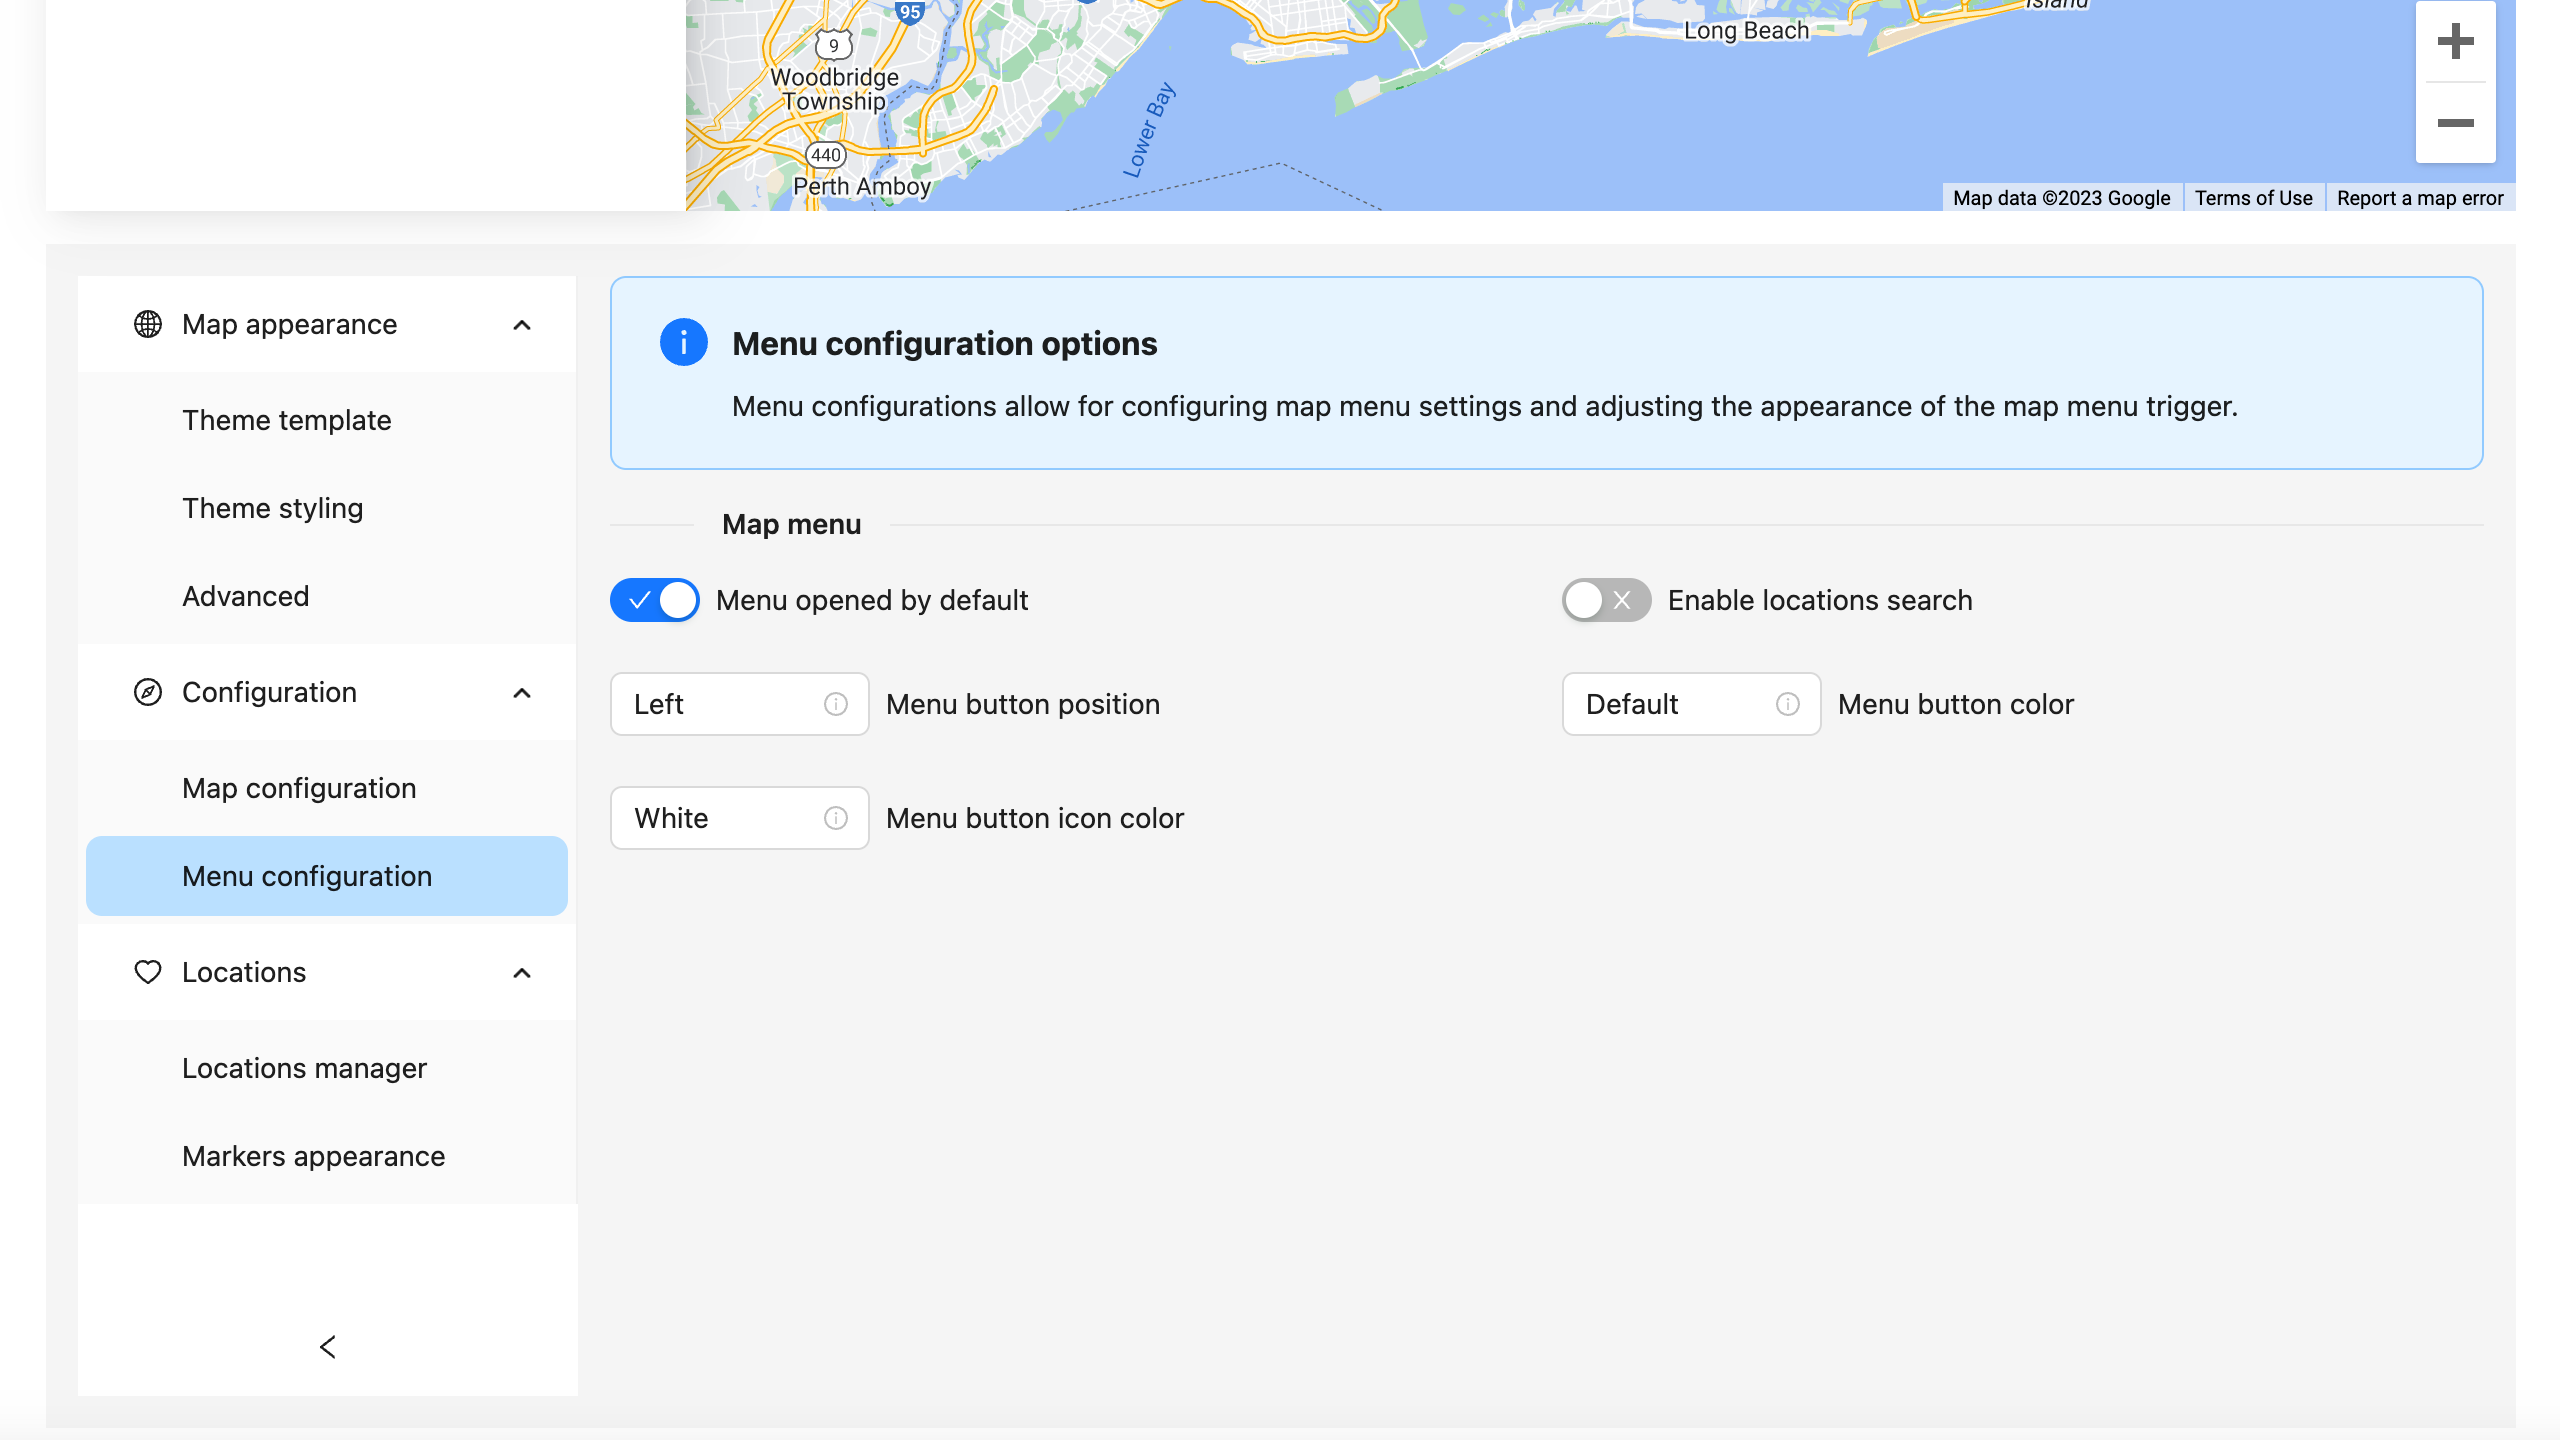
The menu configuration options allow you to adjust the map menu appearance, functionality, and default state (opened/closed).
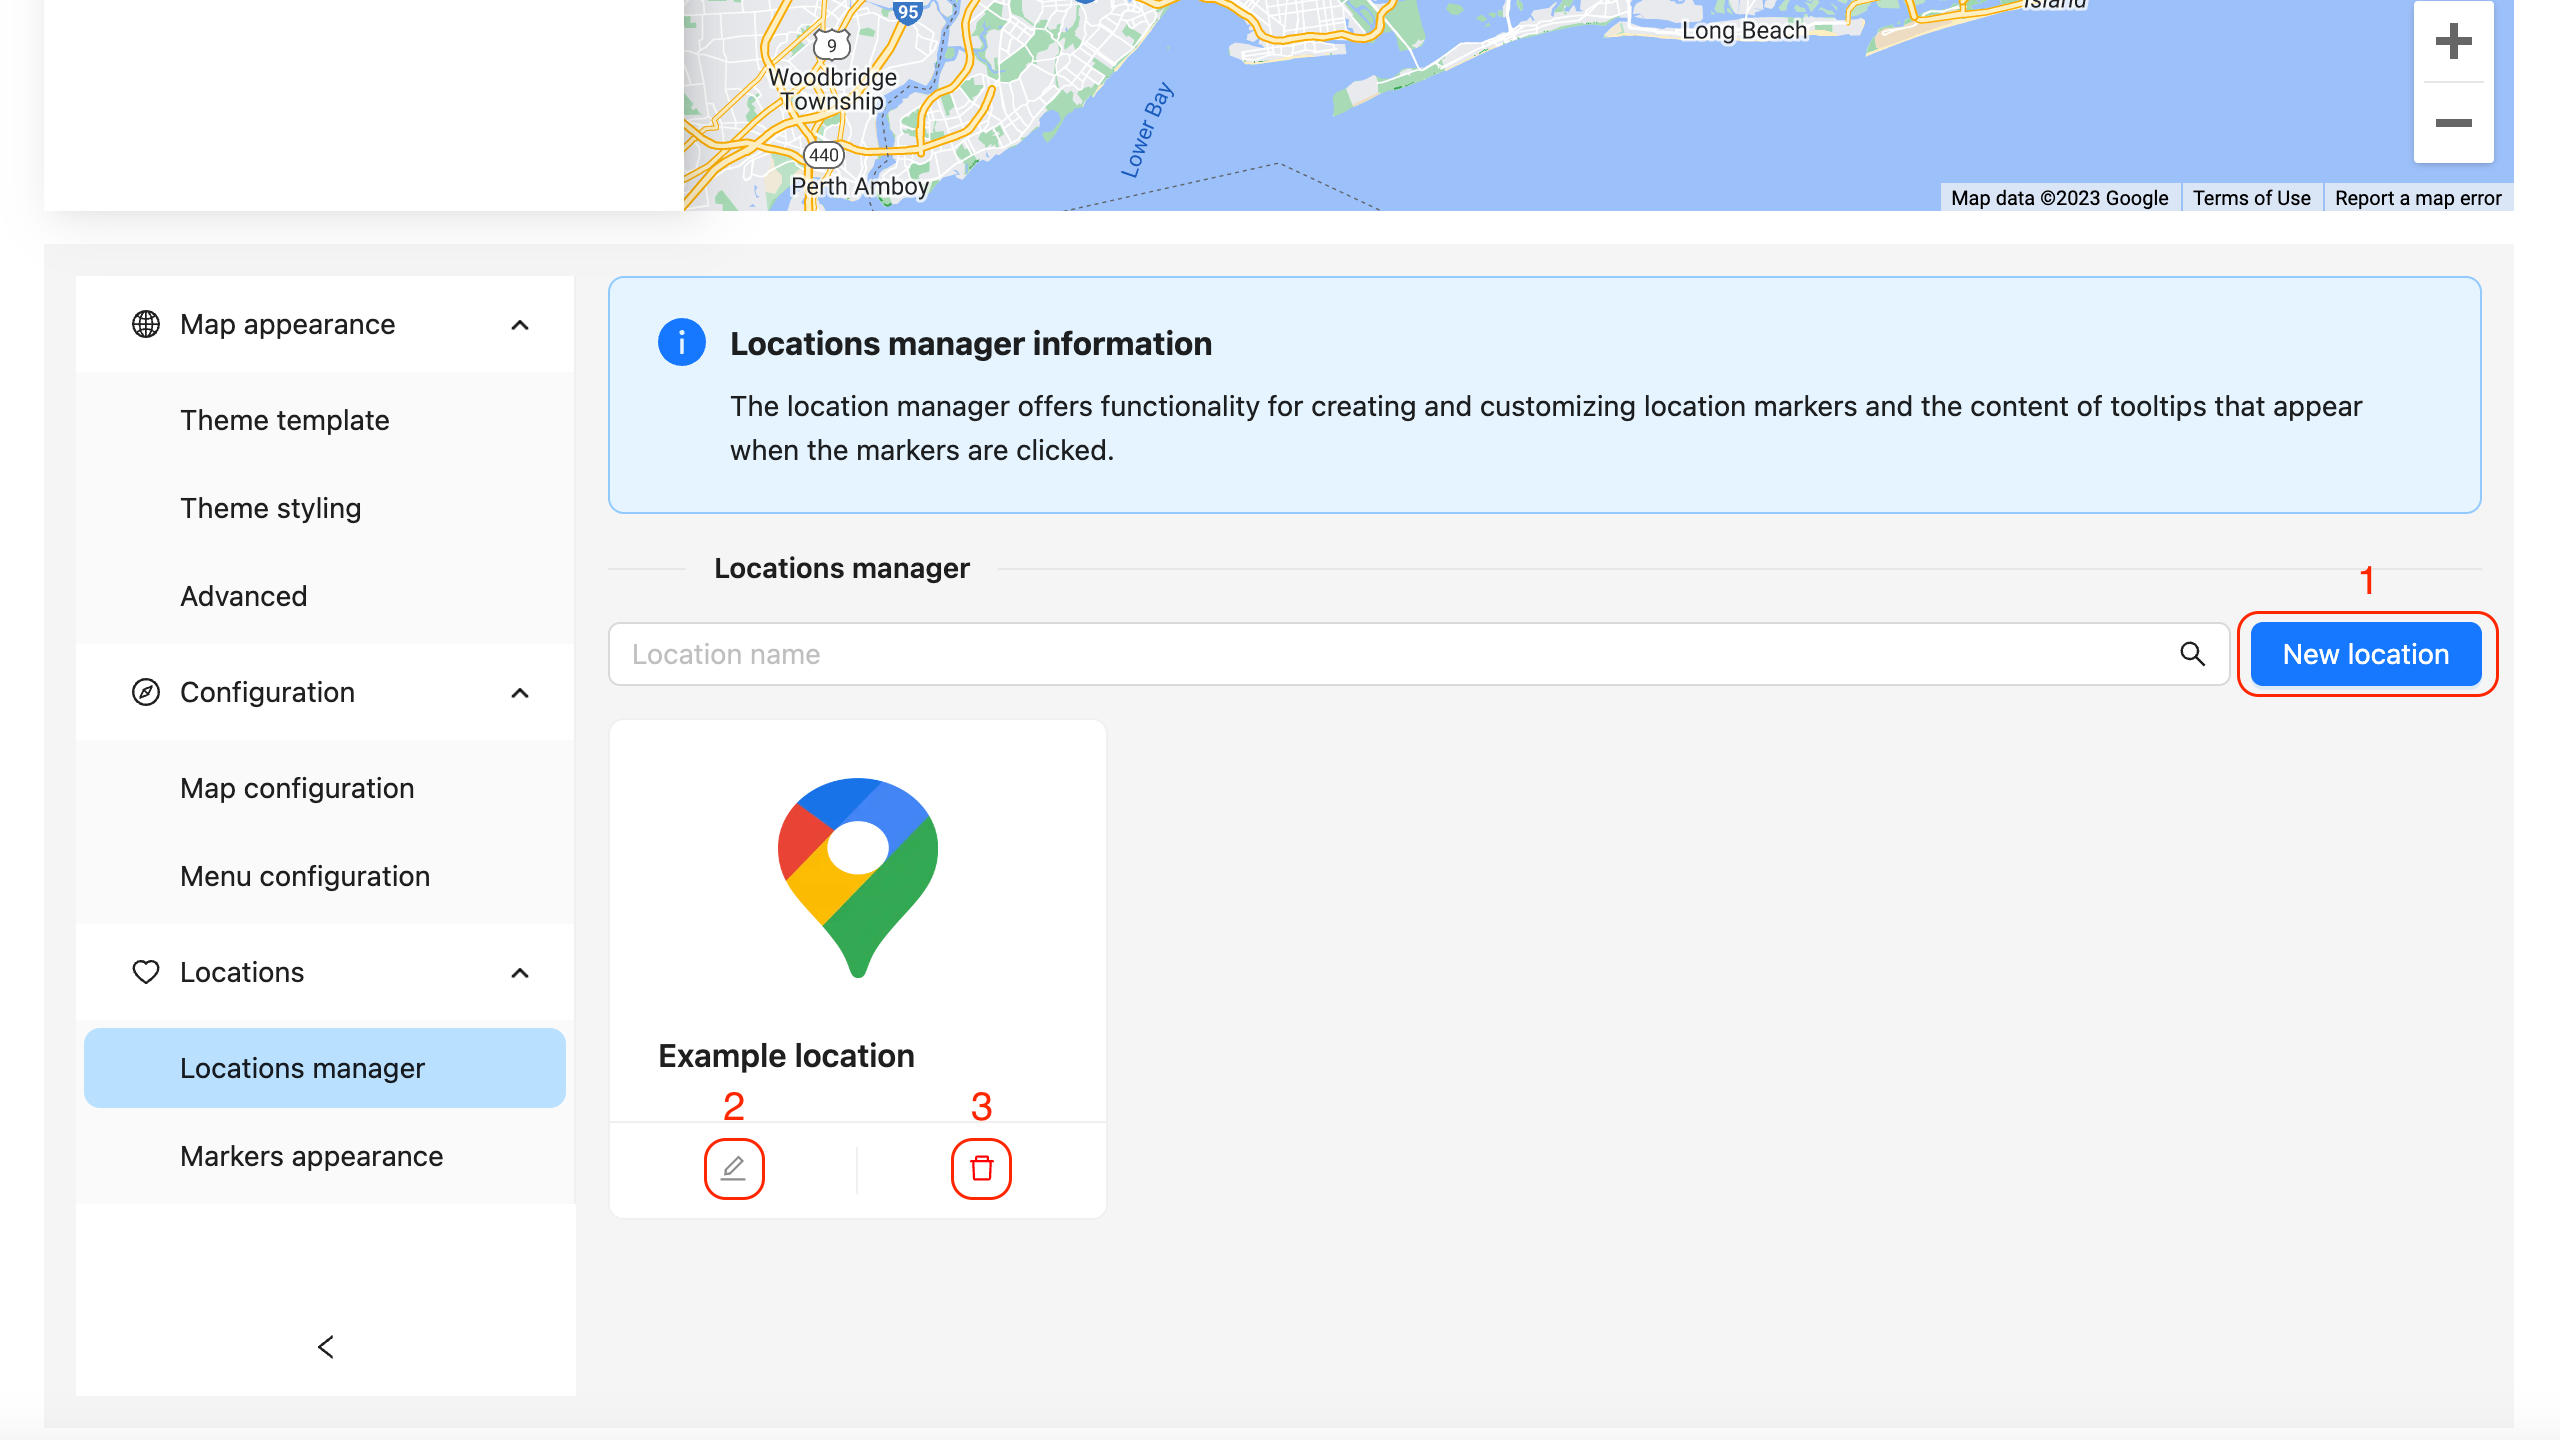
The locations manager allows you to manage the locations rendered on the map. You can add new locations by pressing the "New location" button (marked as number 1 on the screenshot), edit existing locations by pressing the "Edit" button (marked as number 2 on the screenshot), or delete existing locations by clicking the "Delete" button (marked as number 3 on the screenshot).
Please note that the last location cannot be deleted since it's required to have at least one location present.
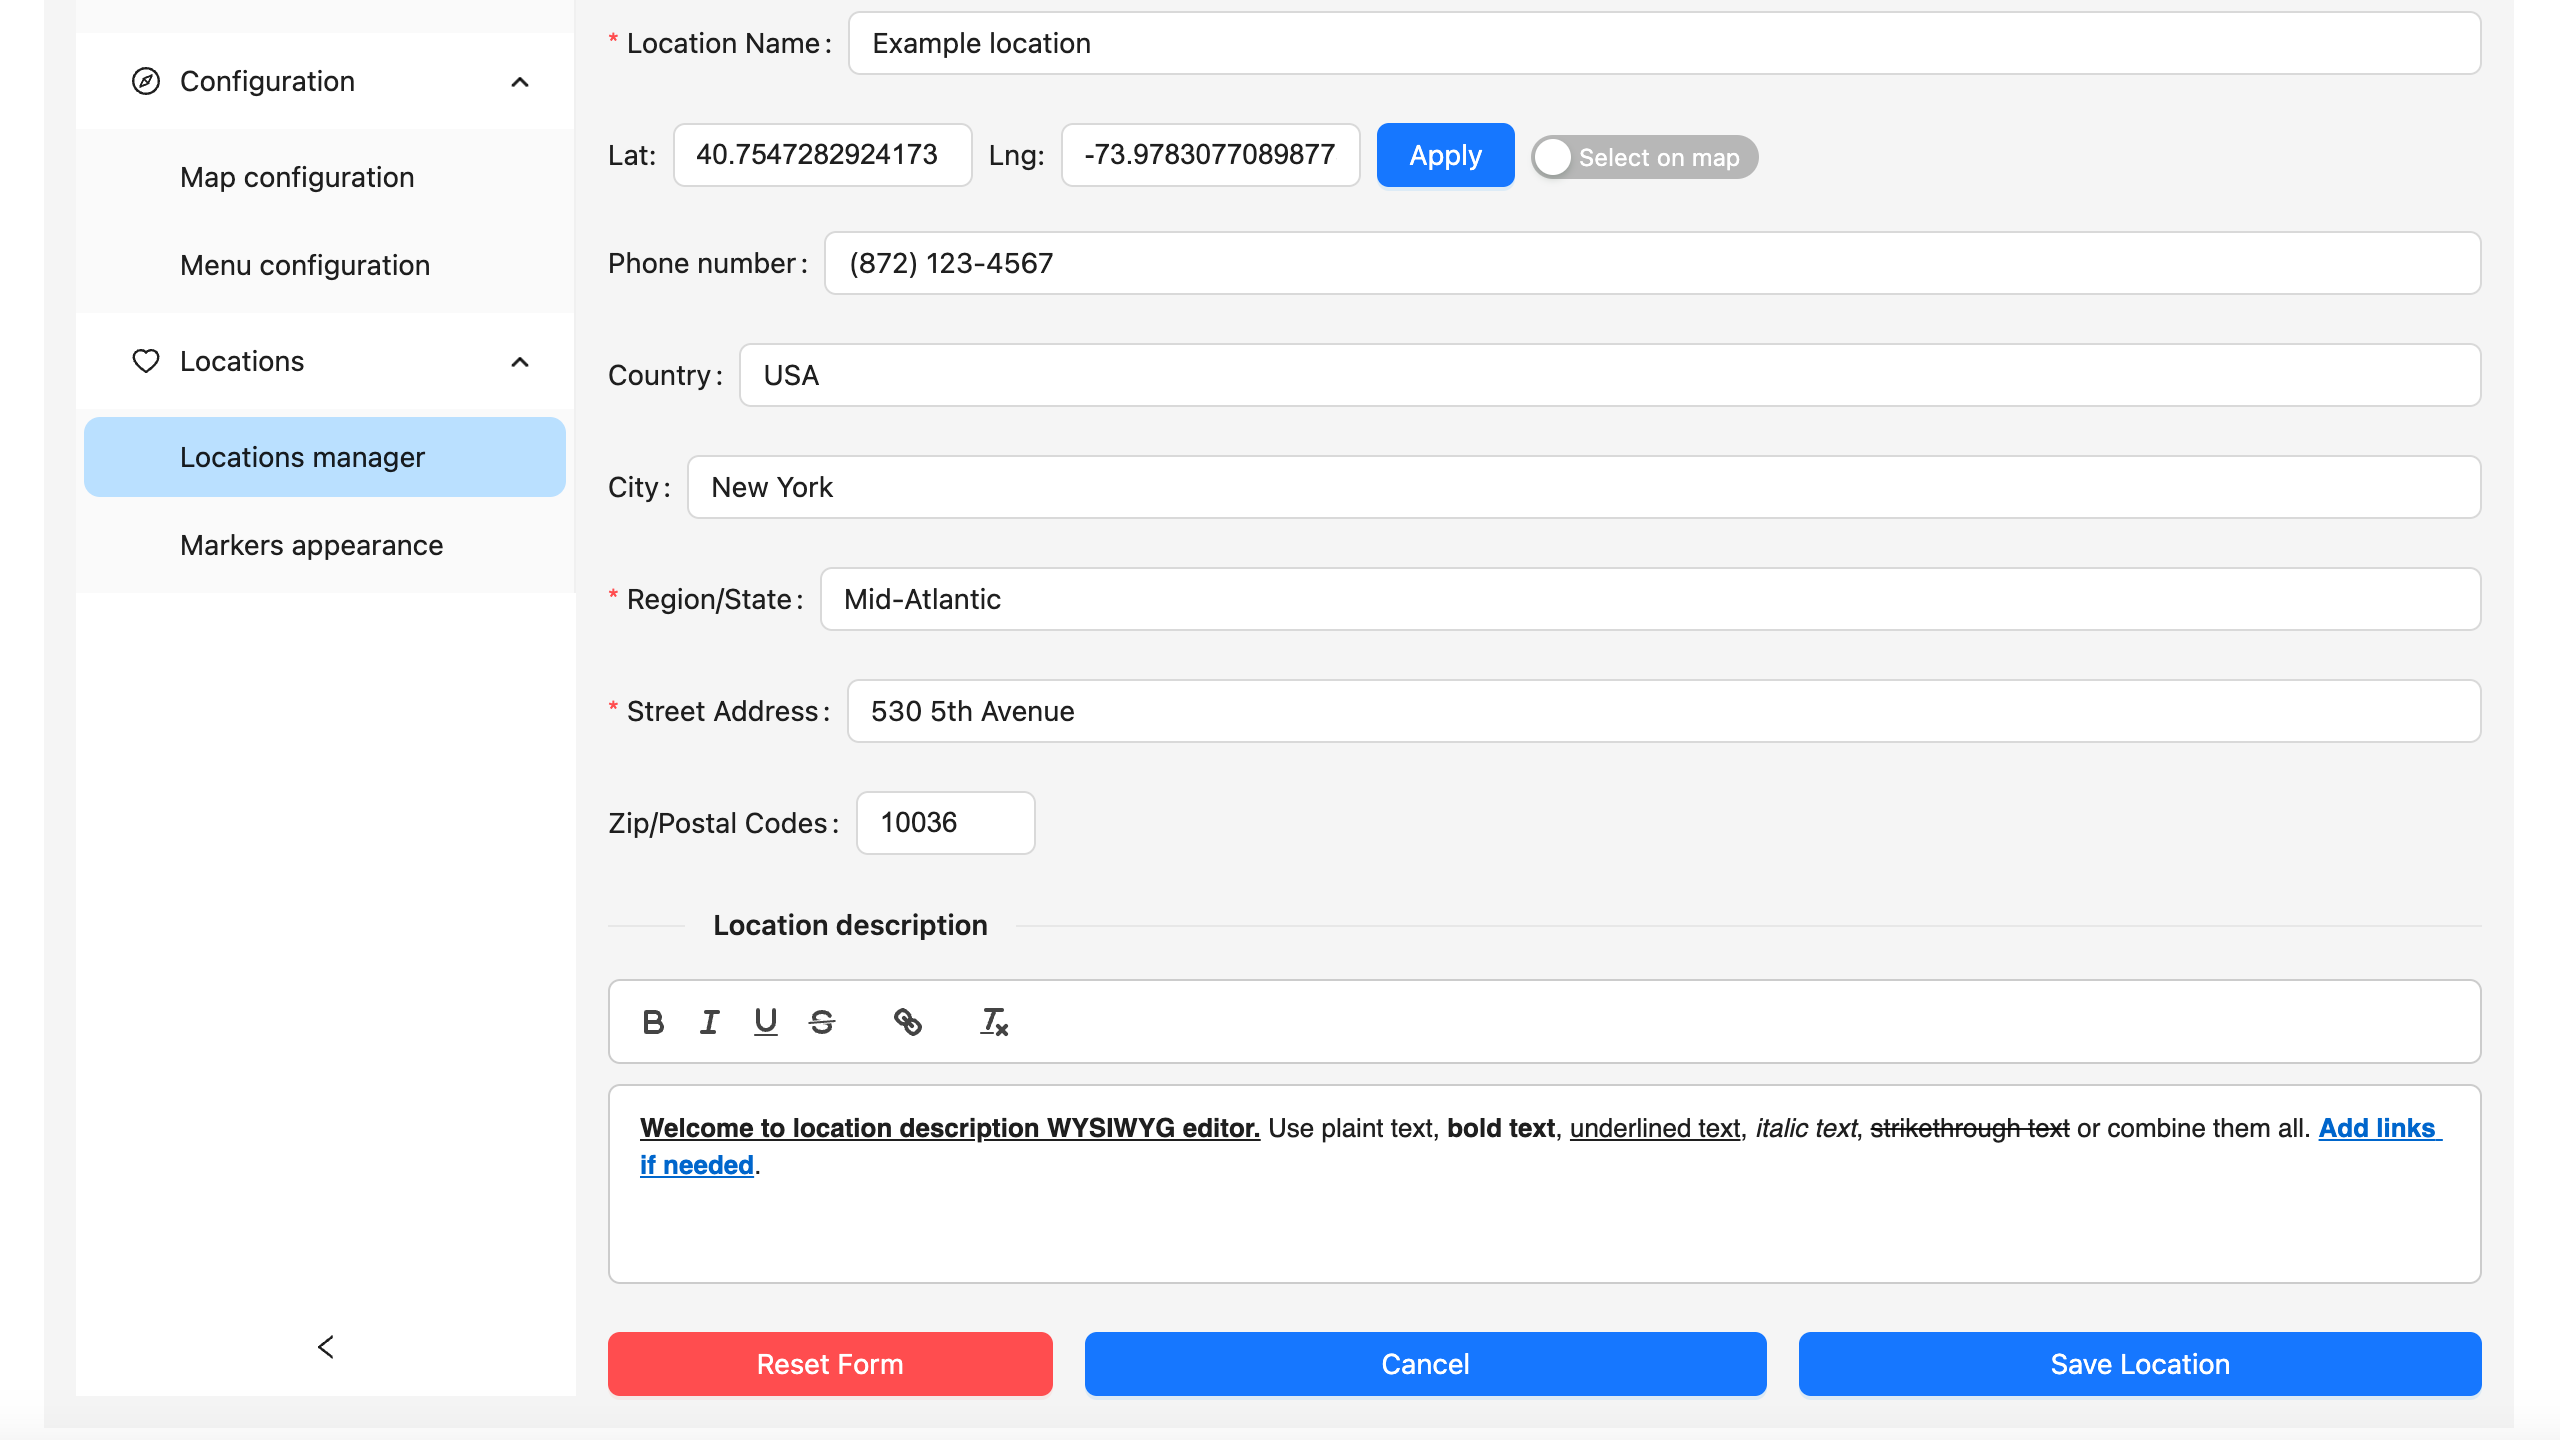
Location creation and editing are performed in the same form. You can configure the full location address, enter coordinates, or select the location on the map using the "Select on map" mode. The entered data will be visible in the location tooltip that appears when clicking on the location in the Store Locator widget.
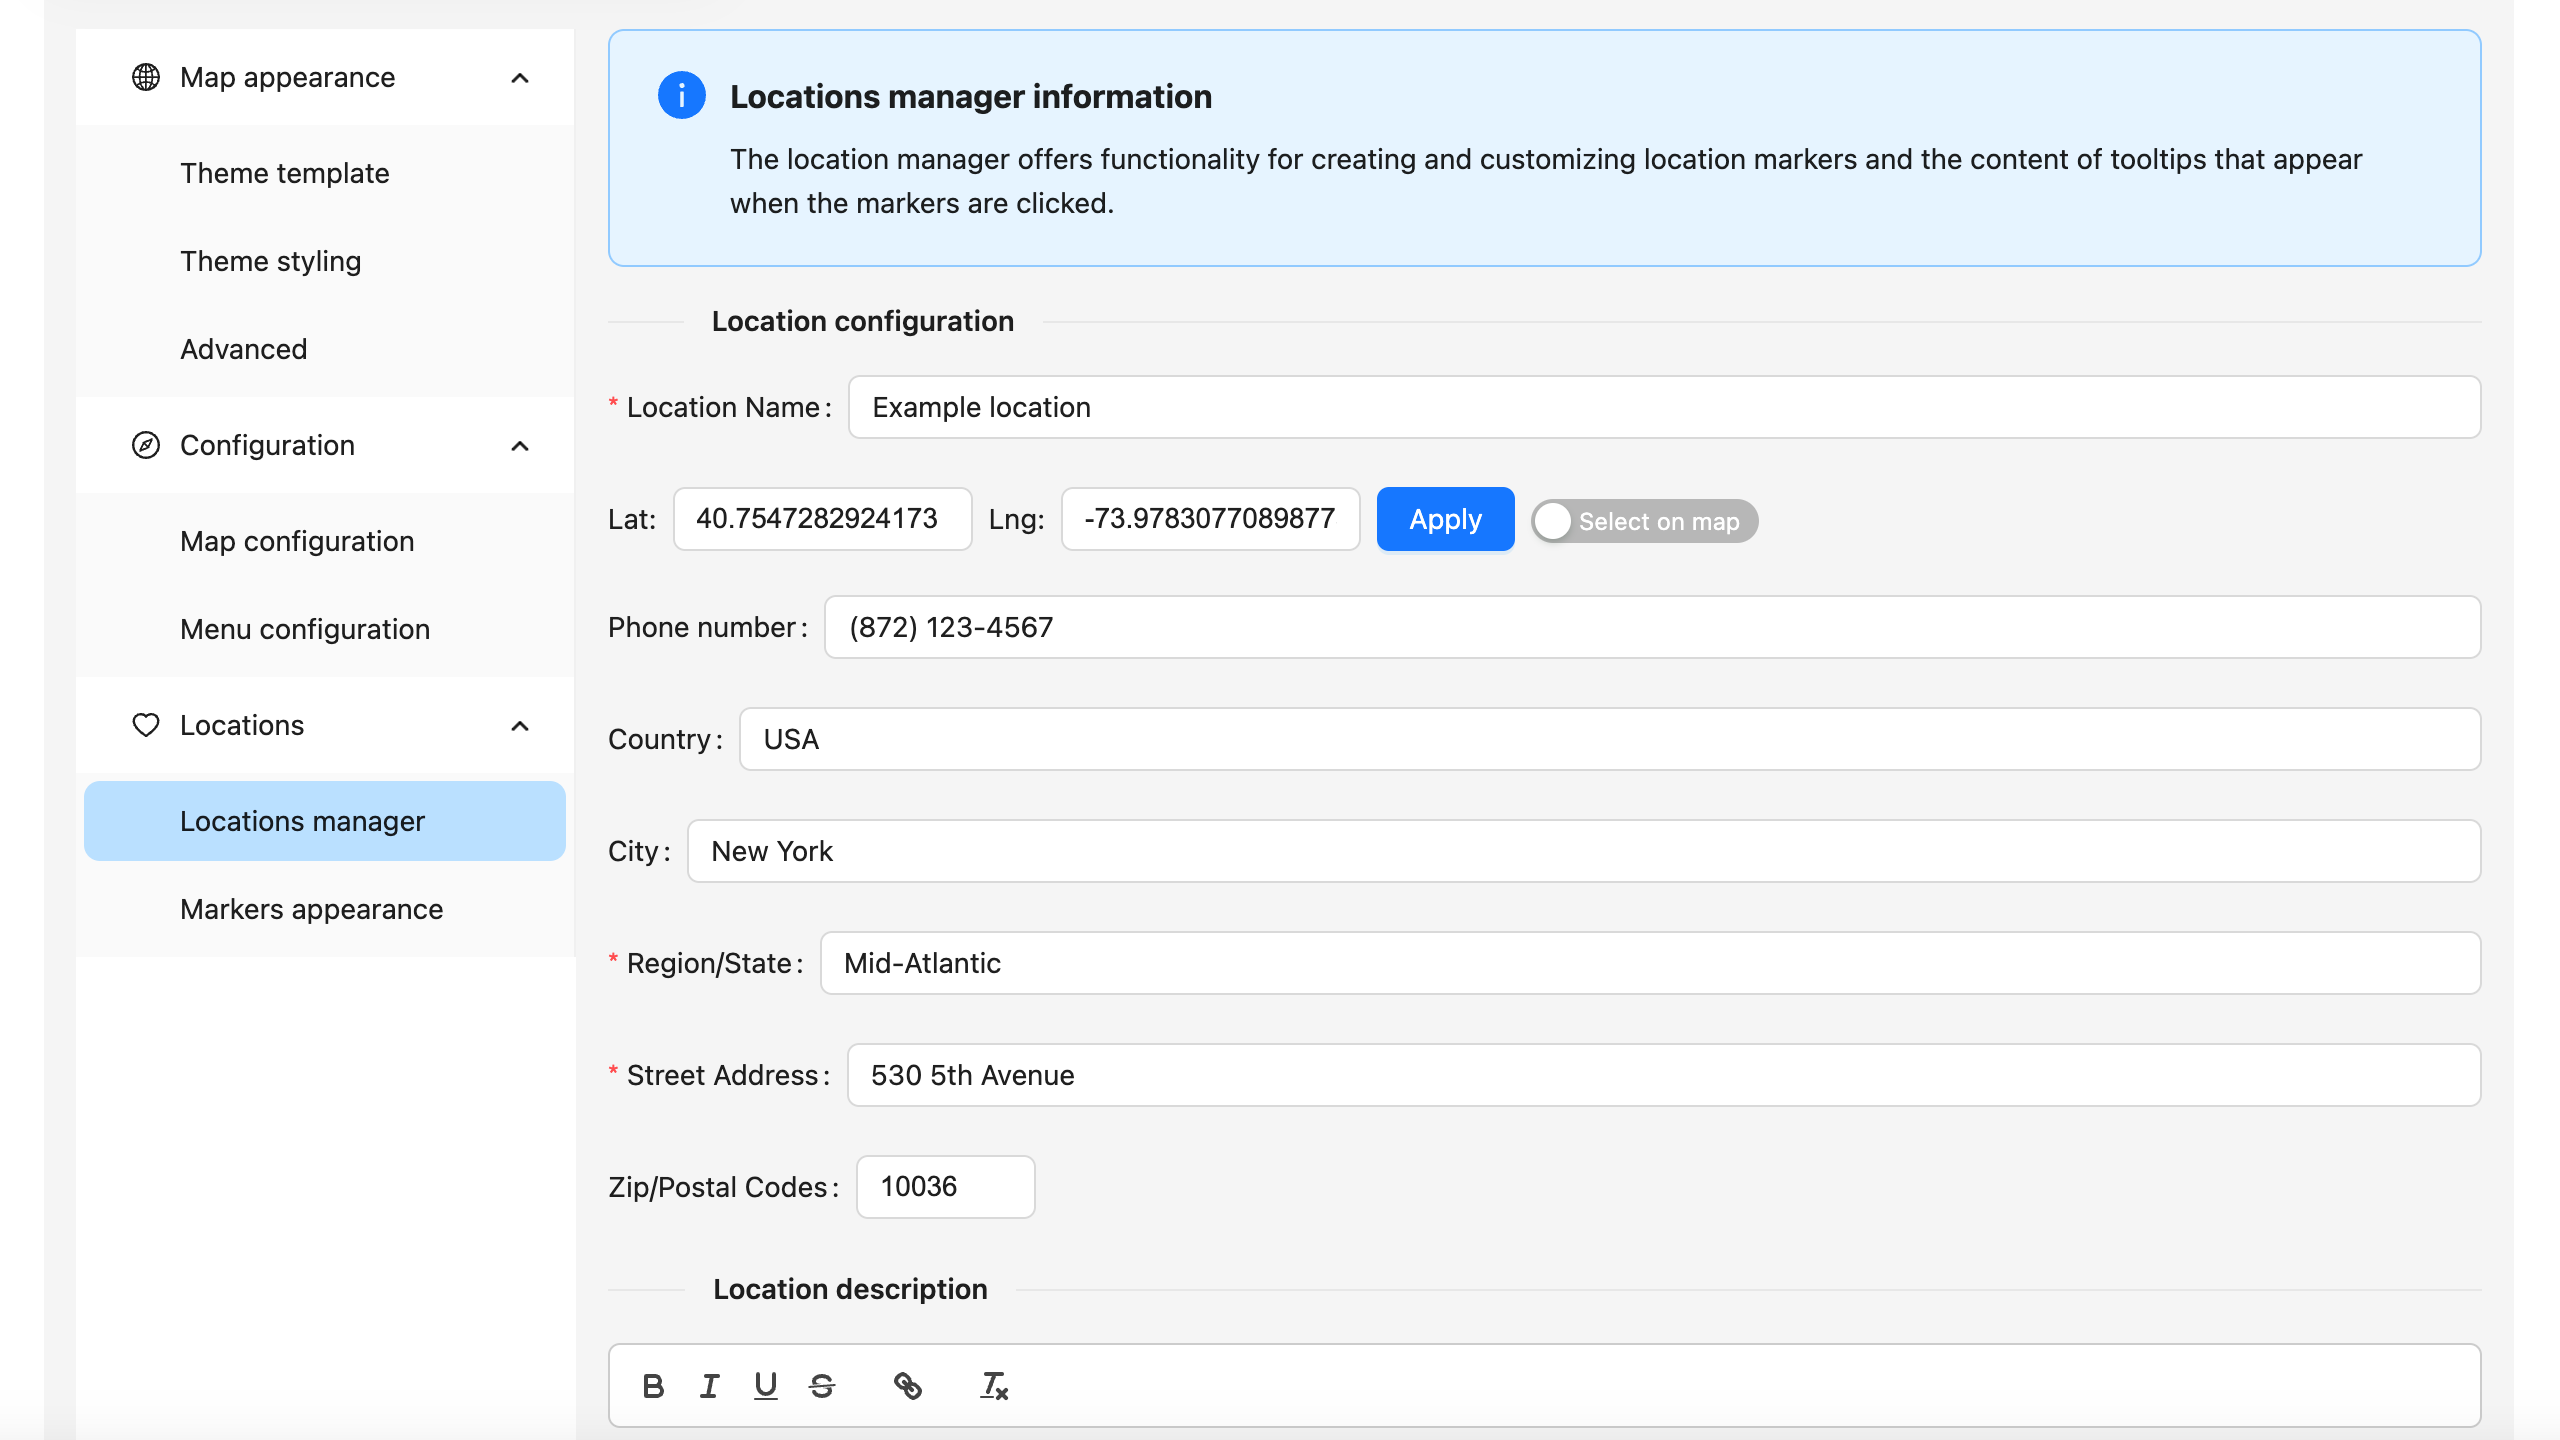
Additionally, you can add a location description using the WYSIWYG editor. It supports various text formatting options and links that allow you to create user-friendly and attractive tooltips.
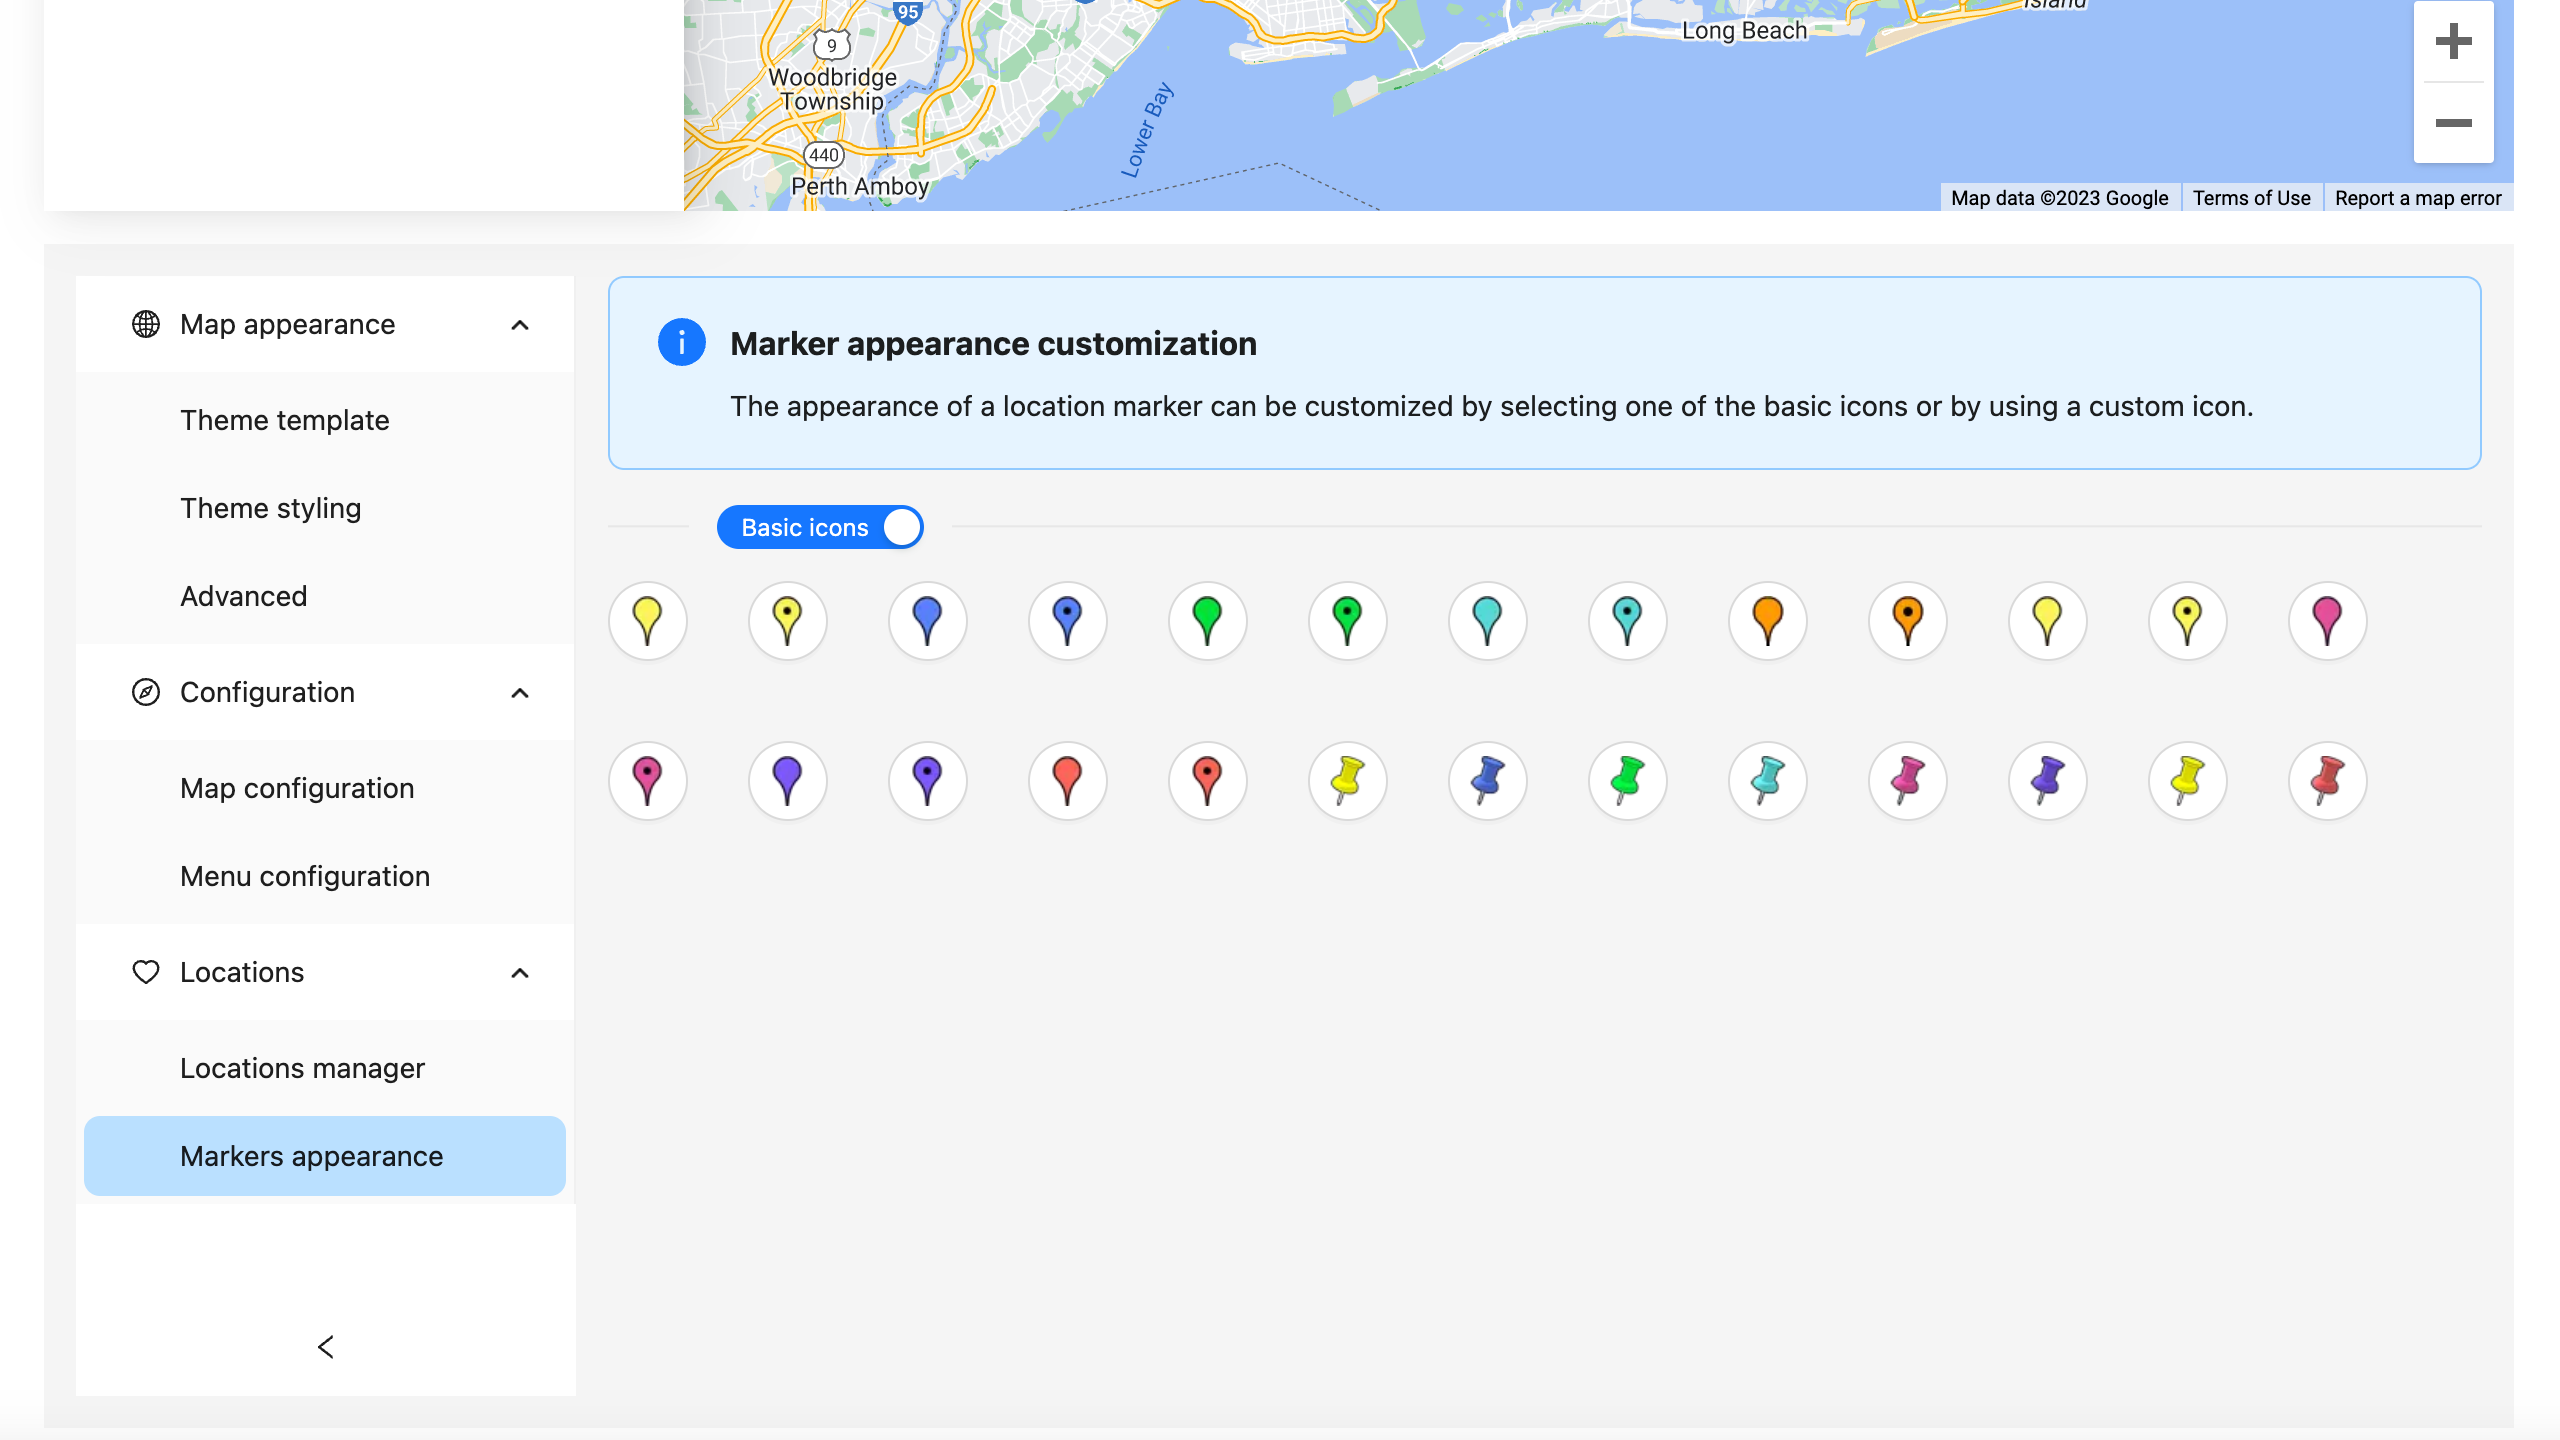
You can adjust the appearance of markers by selecting a marker icon from a set of predefined icons or by using your custom icon.
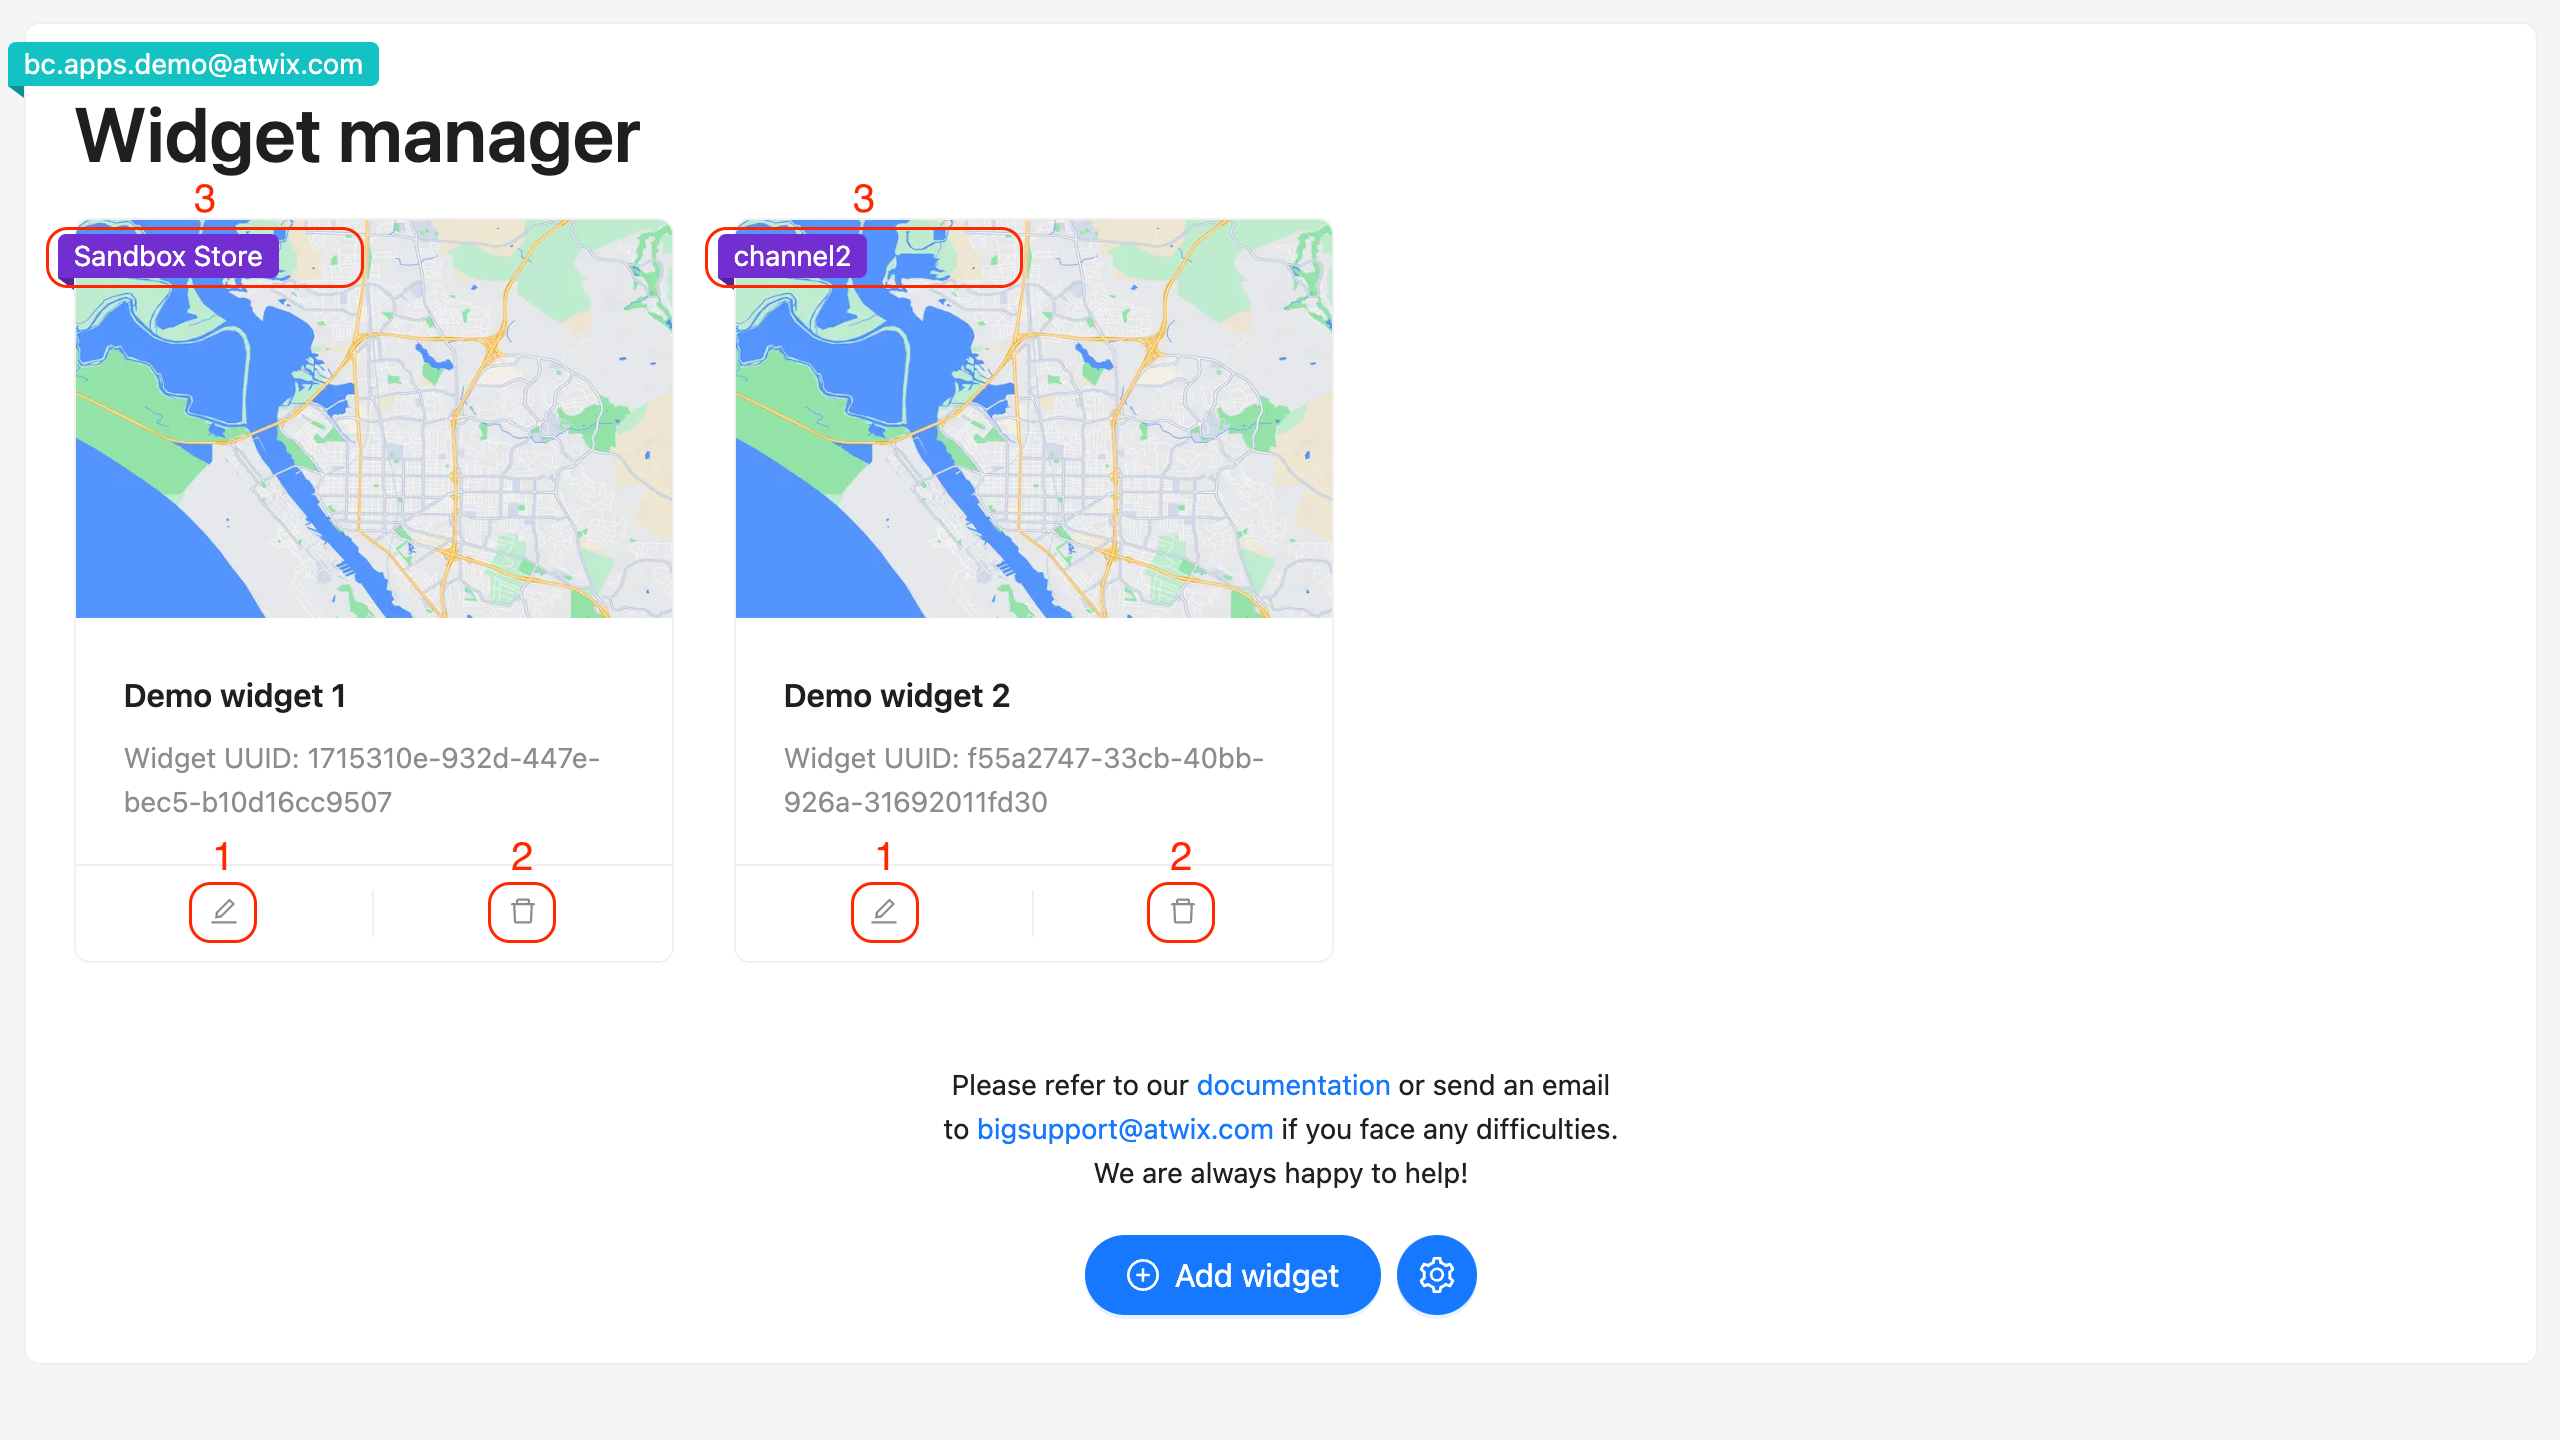
In the widget manager, you can view a list of all the Store Locator widgets that have been created for the current store. To edit a widget, click on the edit button (marked as number 1 in the screenshot). Any changes made to a widget will be applied to all instances of the widget, even if they have already been added to the storefront using the page builder.
To delete a widget created for the current store, click on the delete button (marked as number 2 in the screenshot). Note that this action is irreversible and cannot be undone.
Our application supports multi-channel storefronts, and each widget is labeled with the channel where it is available (marked as number 3 in the screenshot). It is not possible to change the channel of an existing widget.
To use a store locator widget created in the application admin panel, open the BigCommerce page builder. The created widget will be available there, and you can simply drag and drop it to the desired region in the page builder and publish changes.
If you do not see the created widget in the page builder, please ensure that you created the widget for the correct channel.