
After successfully installing the ChatGPT Product Description application on your BigCommerce store, you will be redirected to the application's admin panel. Within this admin panel, you can effortlessly configure your OpenAI API key, initiate content generation tasks tailored to various products within your store, as well as conveniently modify and apply the generated content as needed.
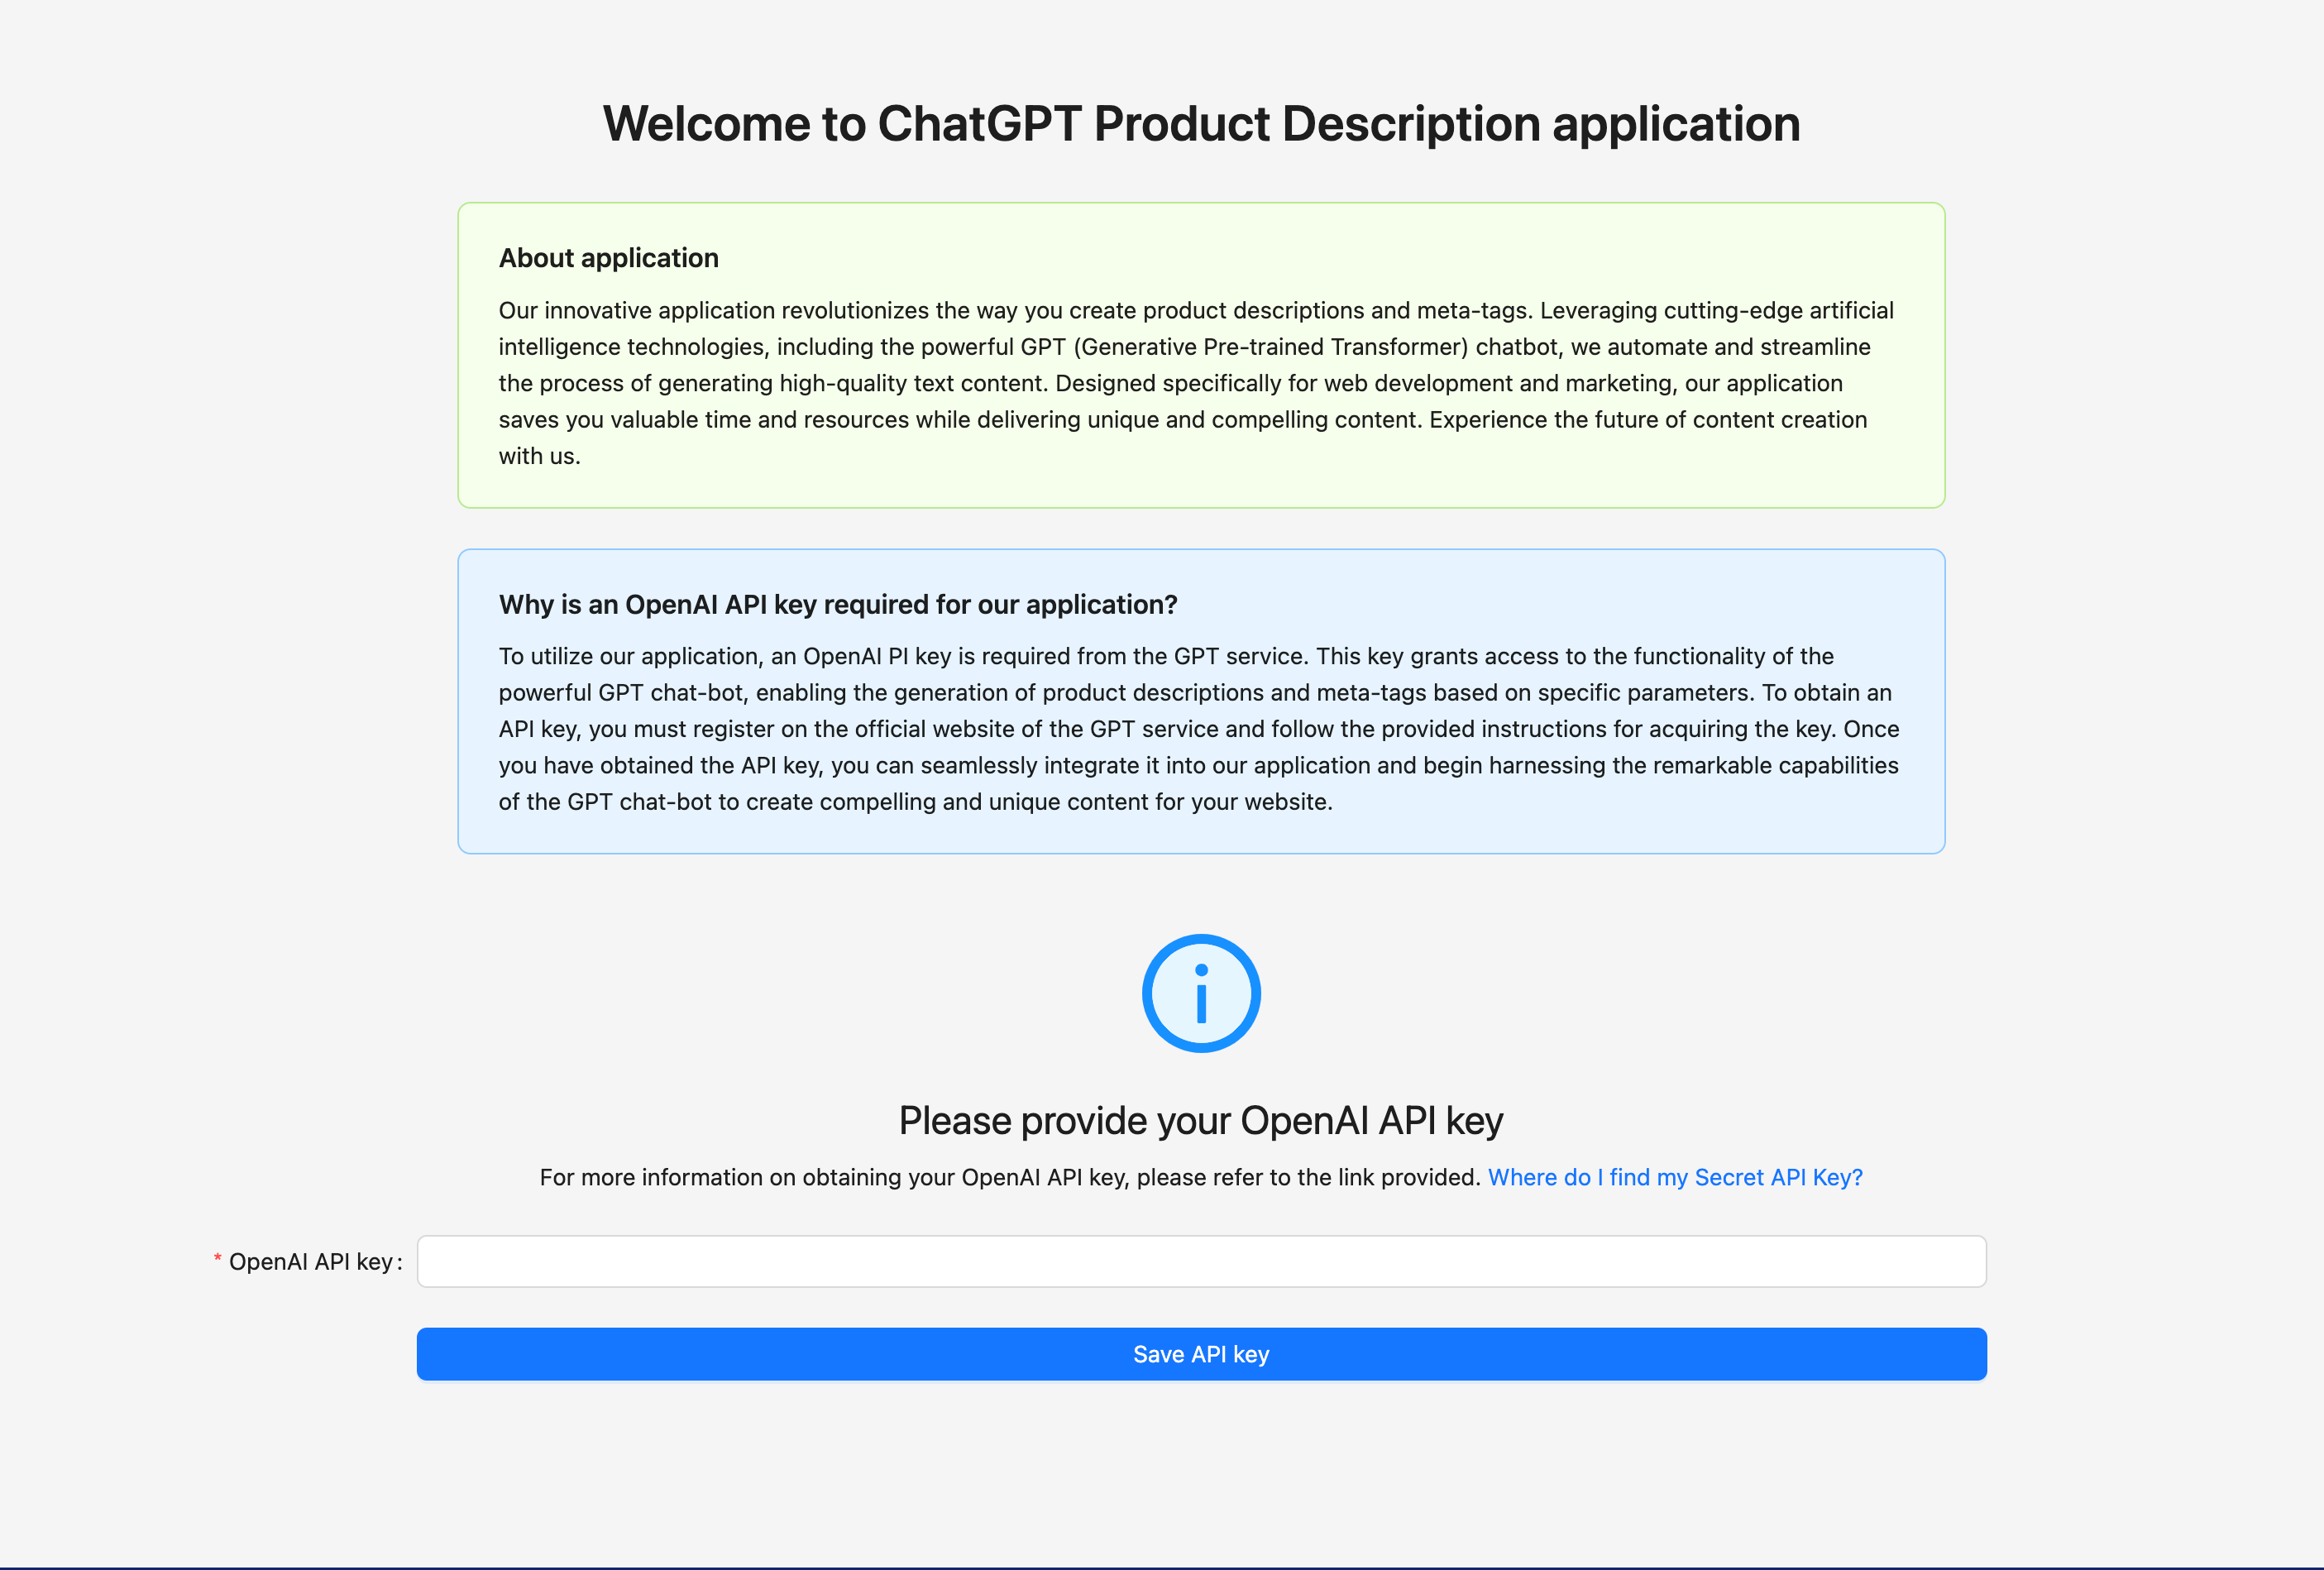
When launching the application for the first time, you'll be prompted to enter and save your OpenAI API key, which is required to proceed using the application.
You can generate OpenAI API key by following the steps outlined in the official OpenAI documentation, which can be found here - Where do I find my Secret API Key? | OpenAI Help Center, OpenAI Platform.
Tasks: In this section, you can find and manage all content generation tasks you have created.
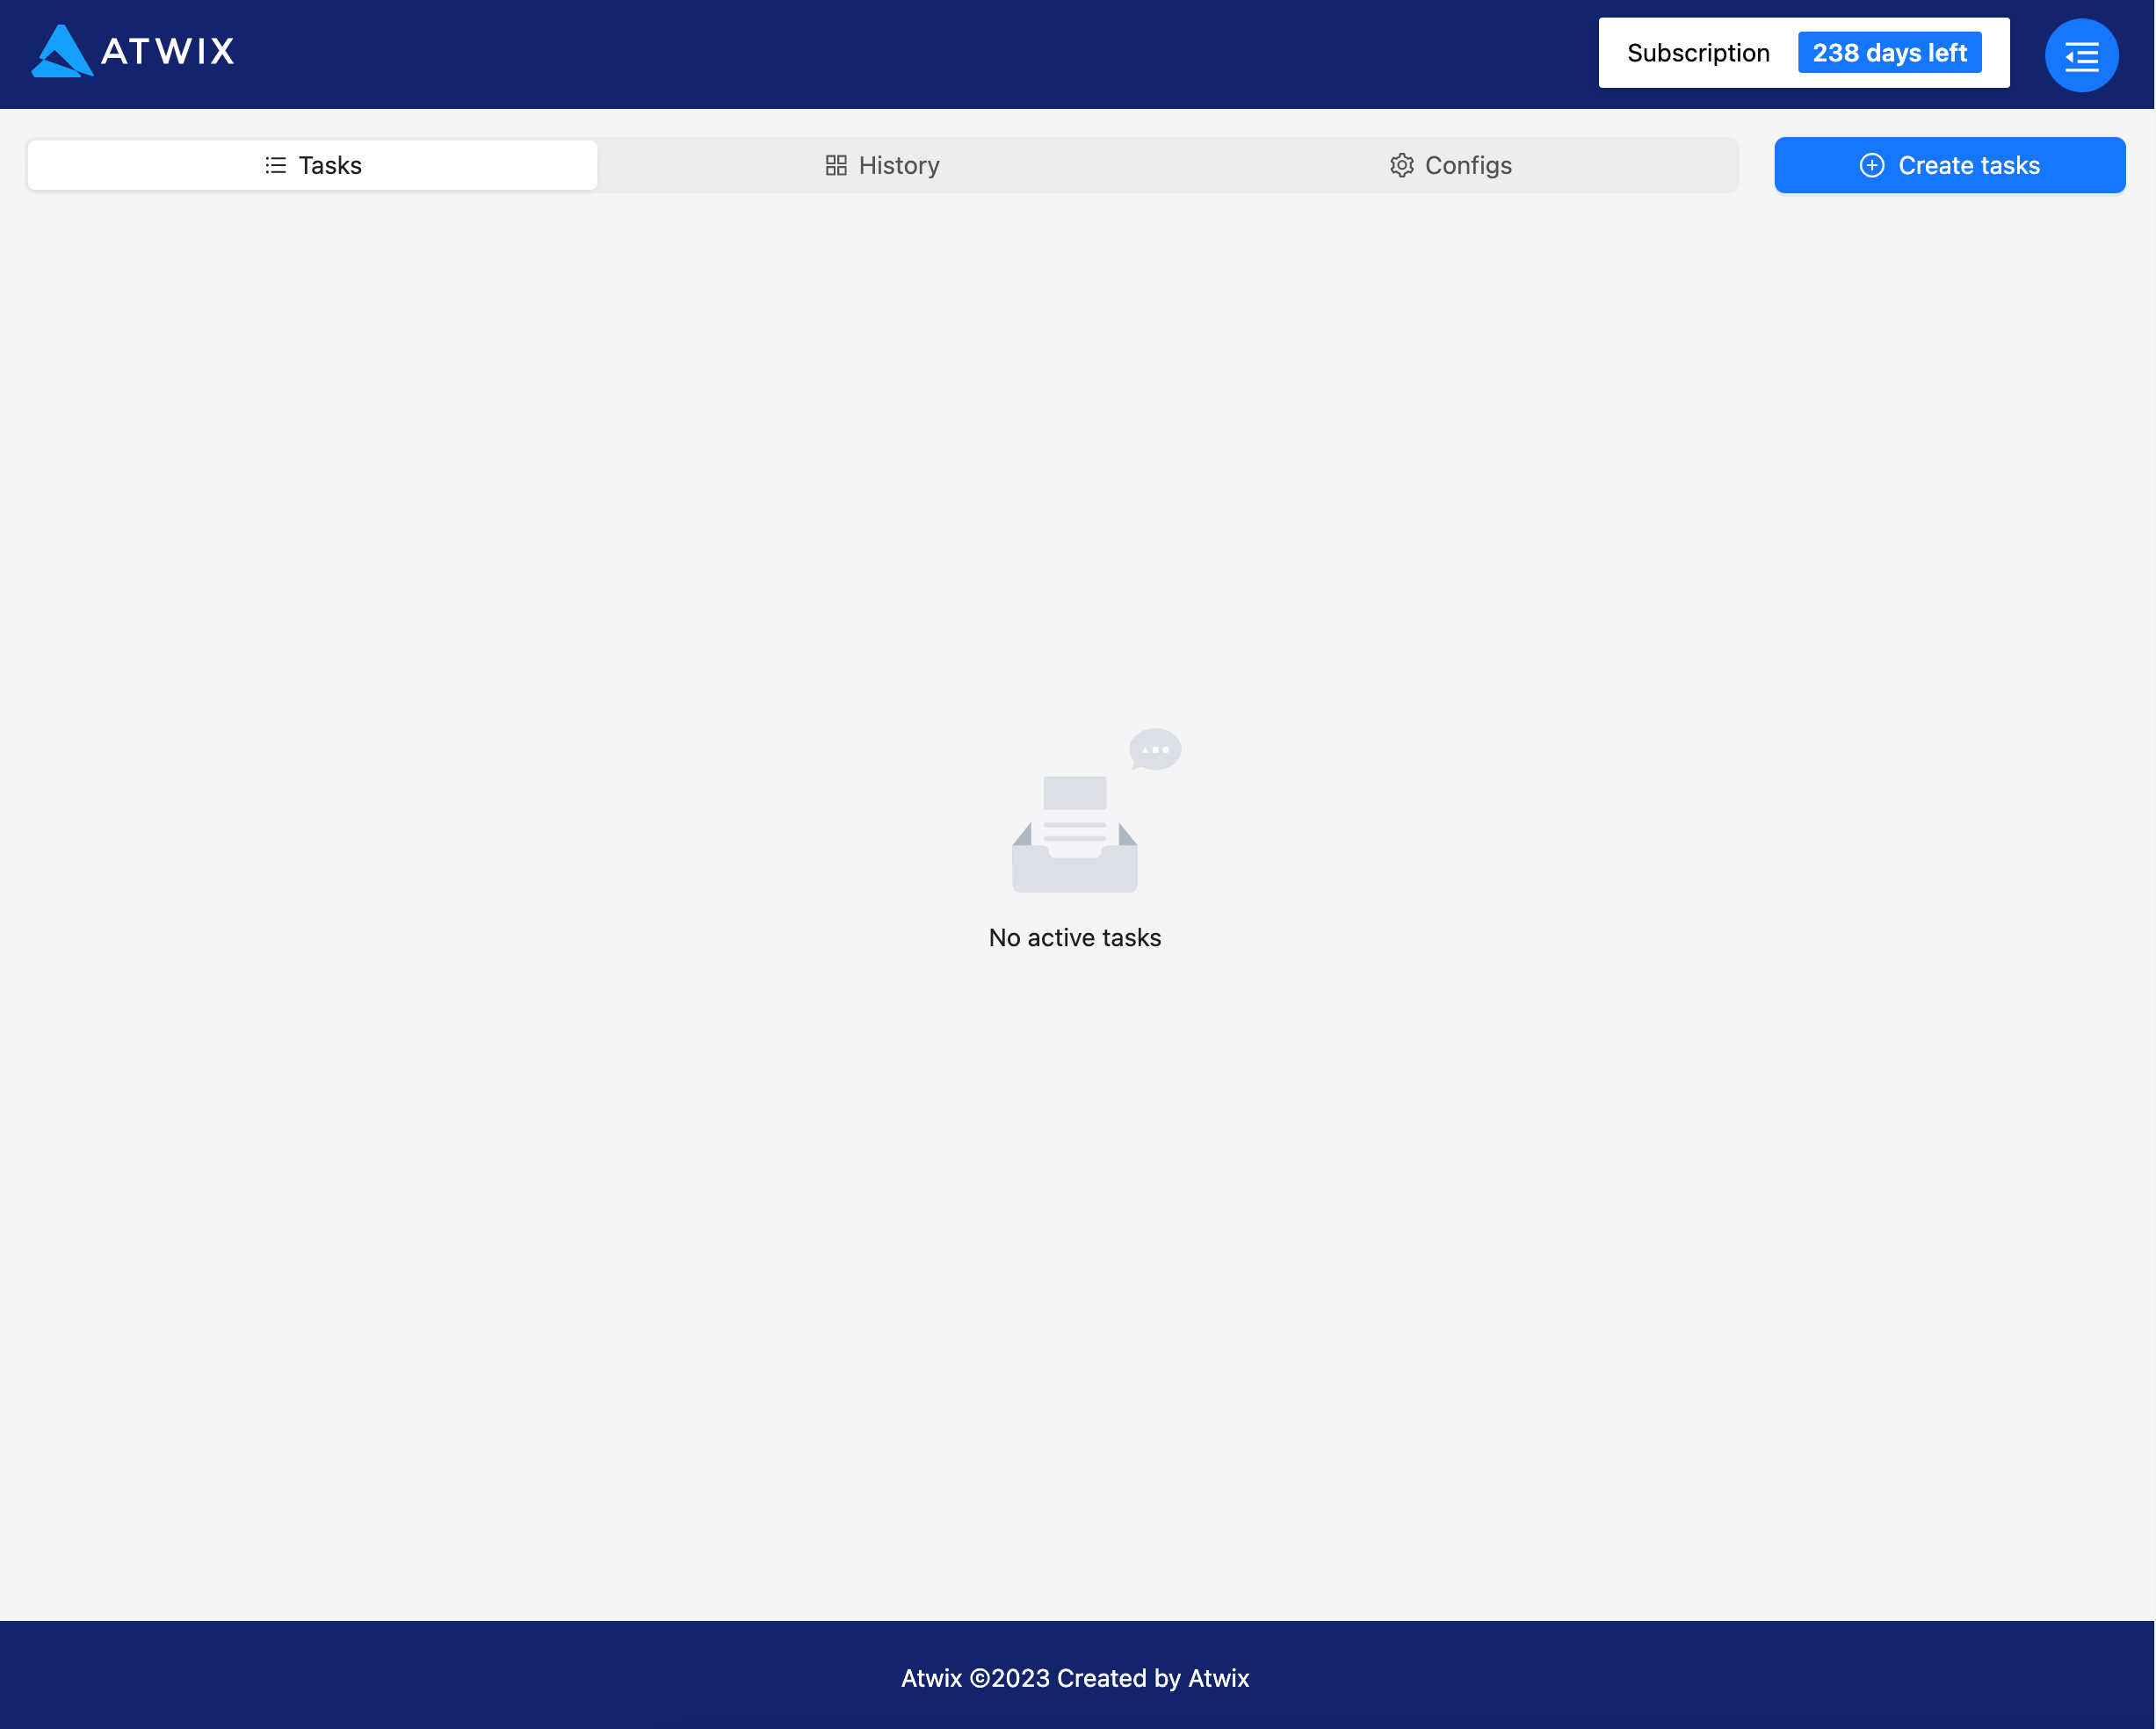
History: This section will contain records of all completed content generation tasks.

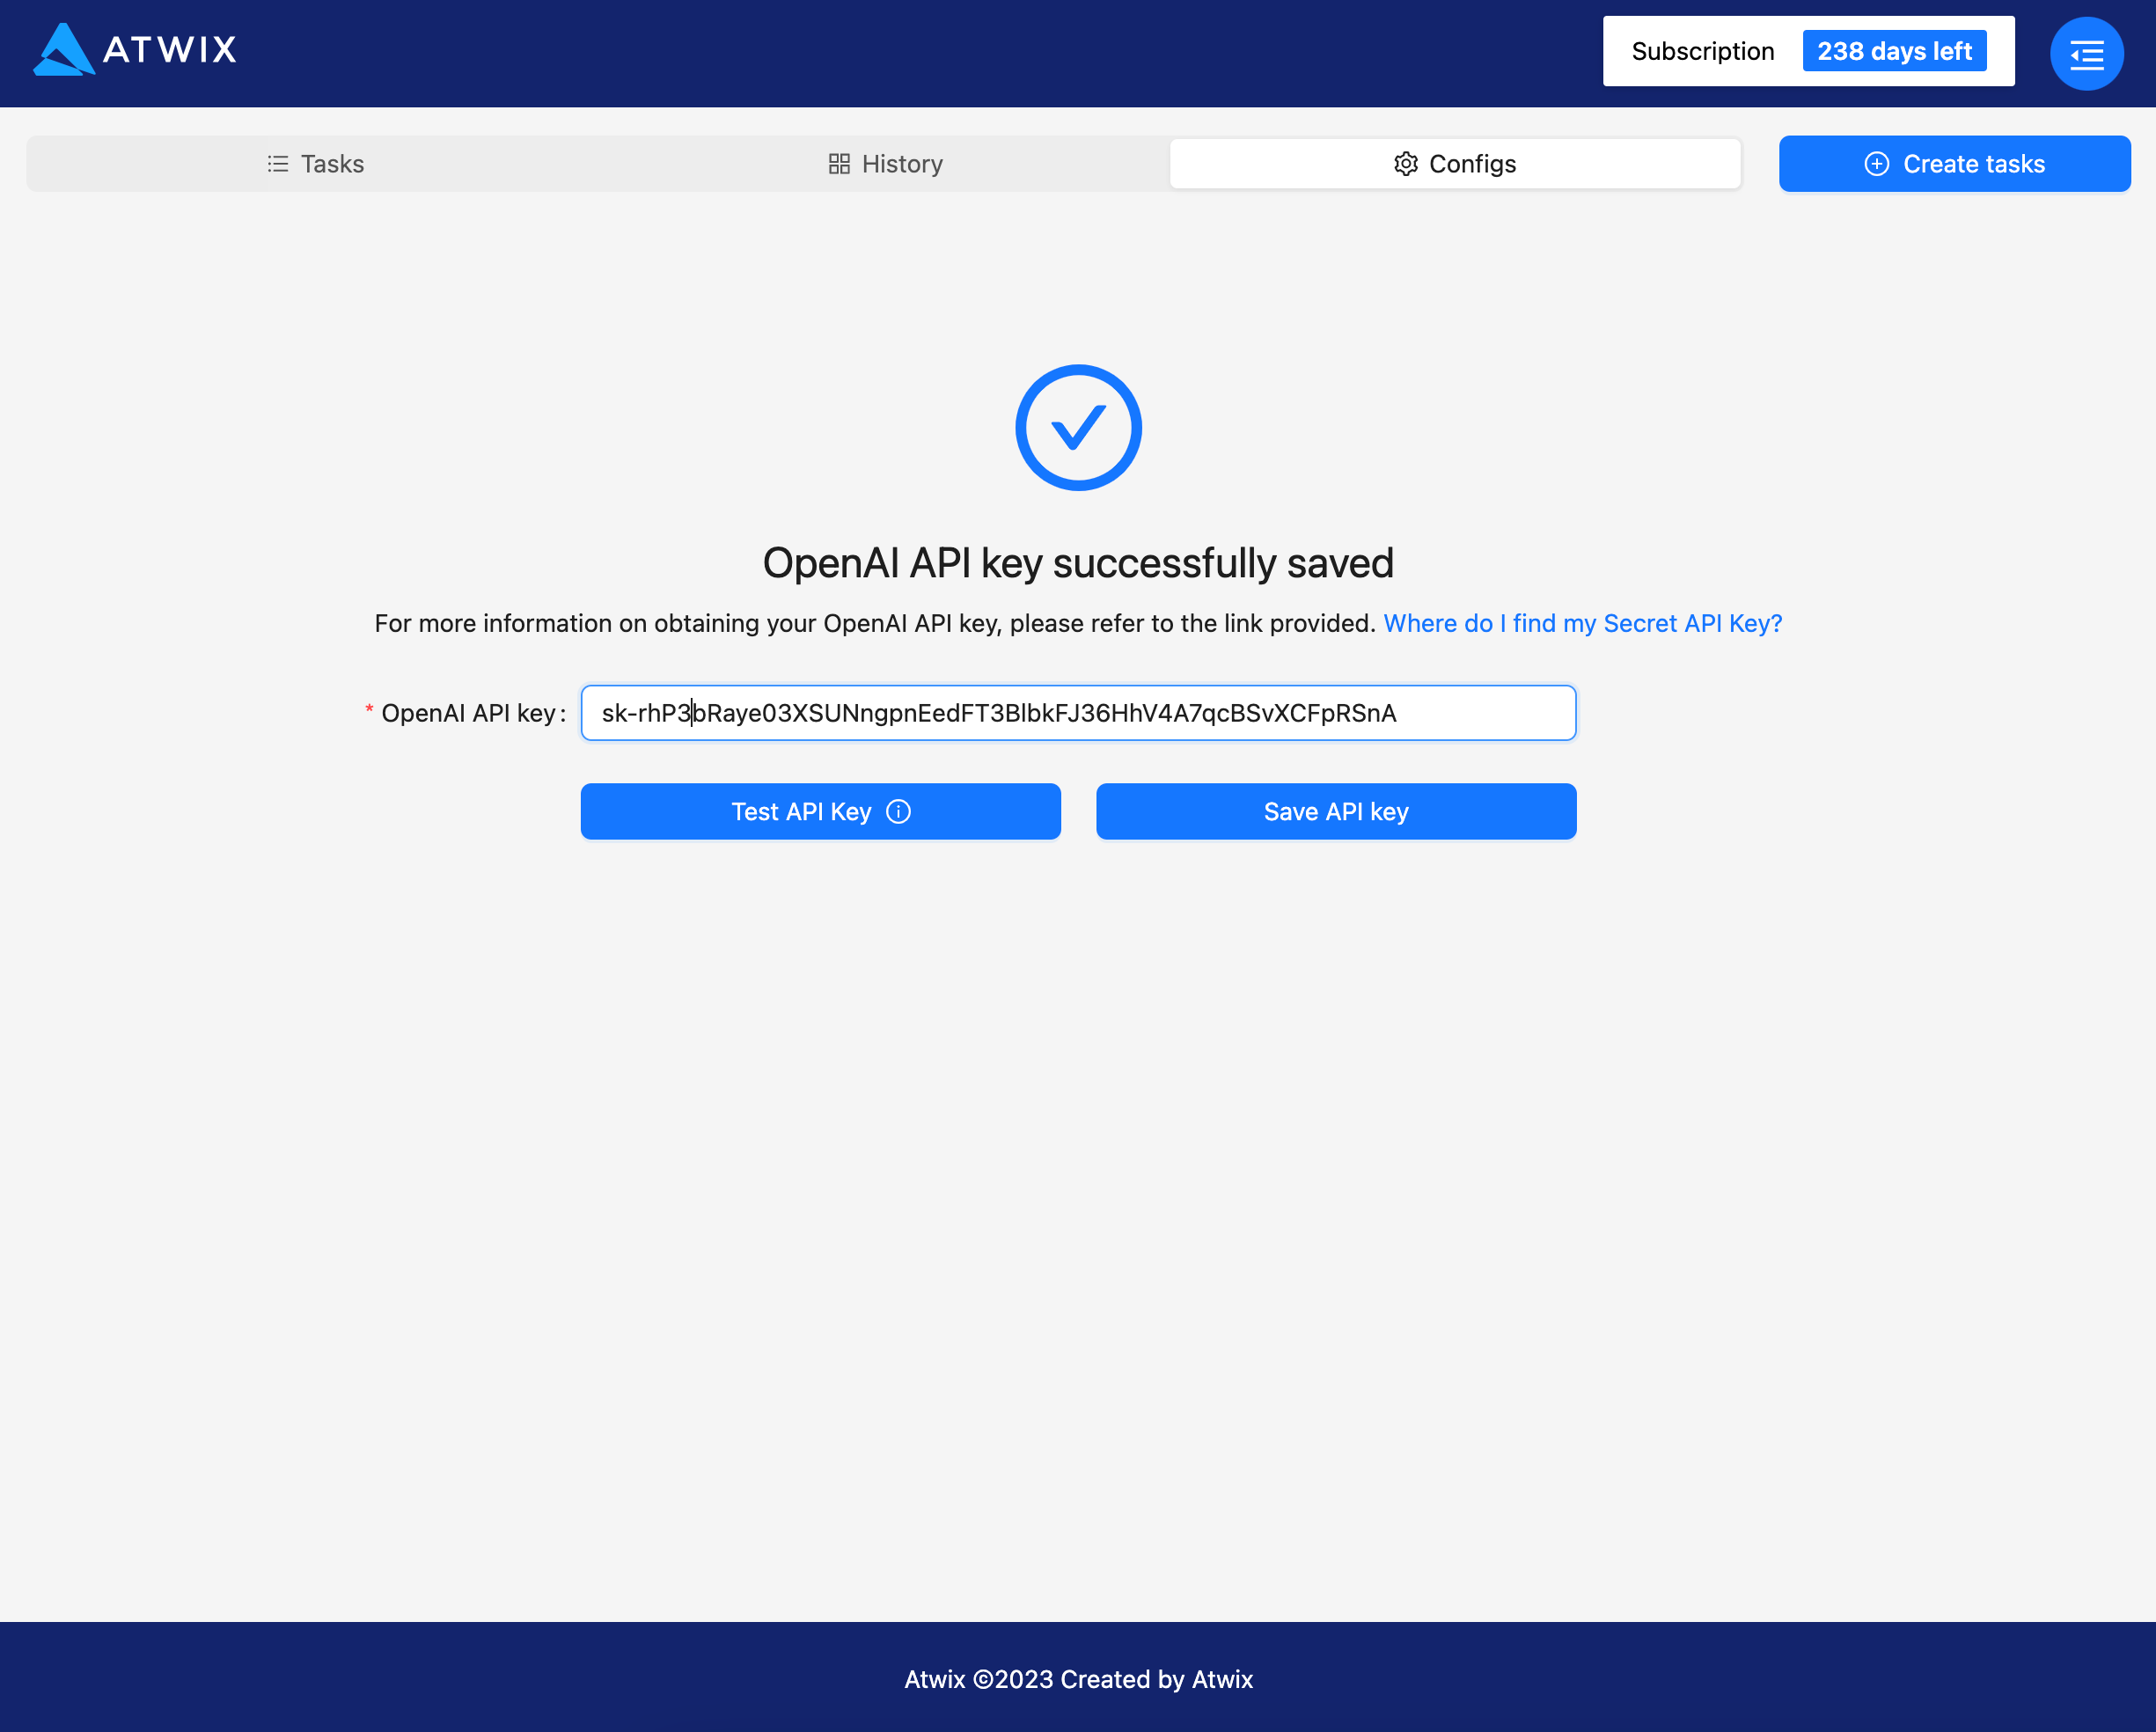
Configs: In this section, you have the option to either configure a new OpenAI API key or test the API key that is currently configured.
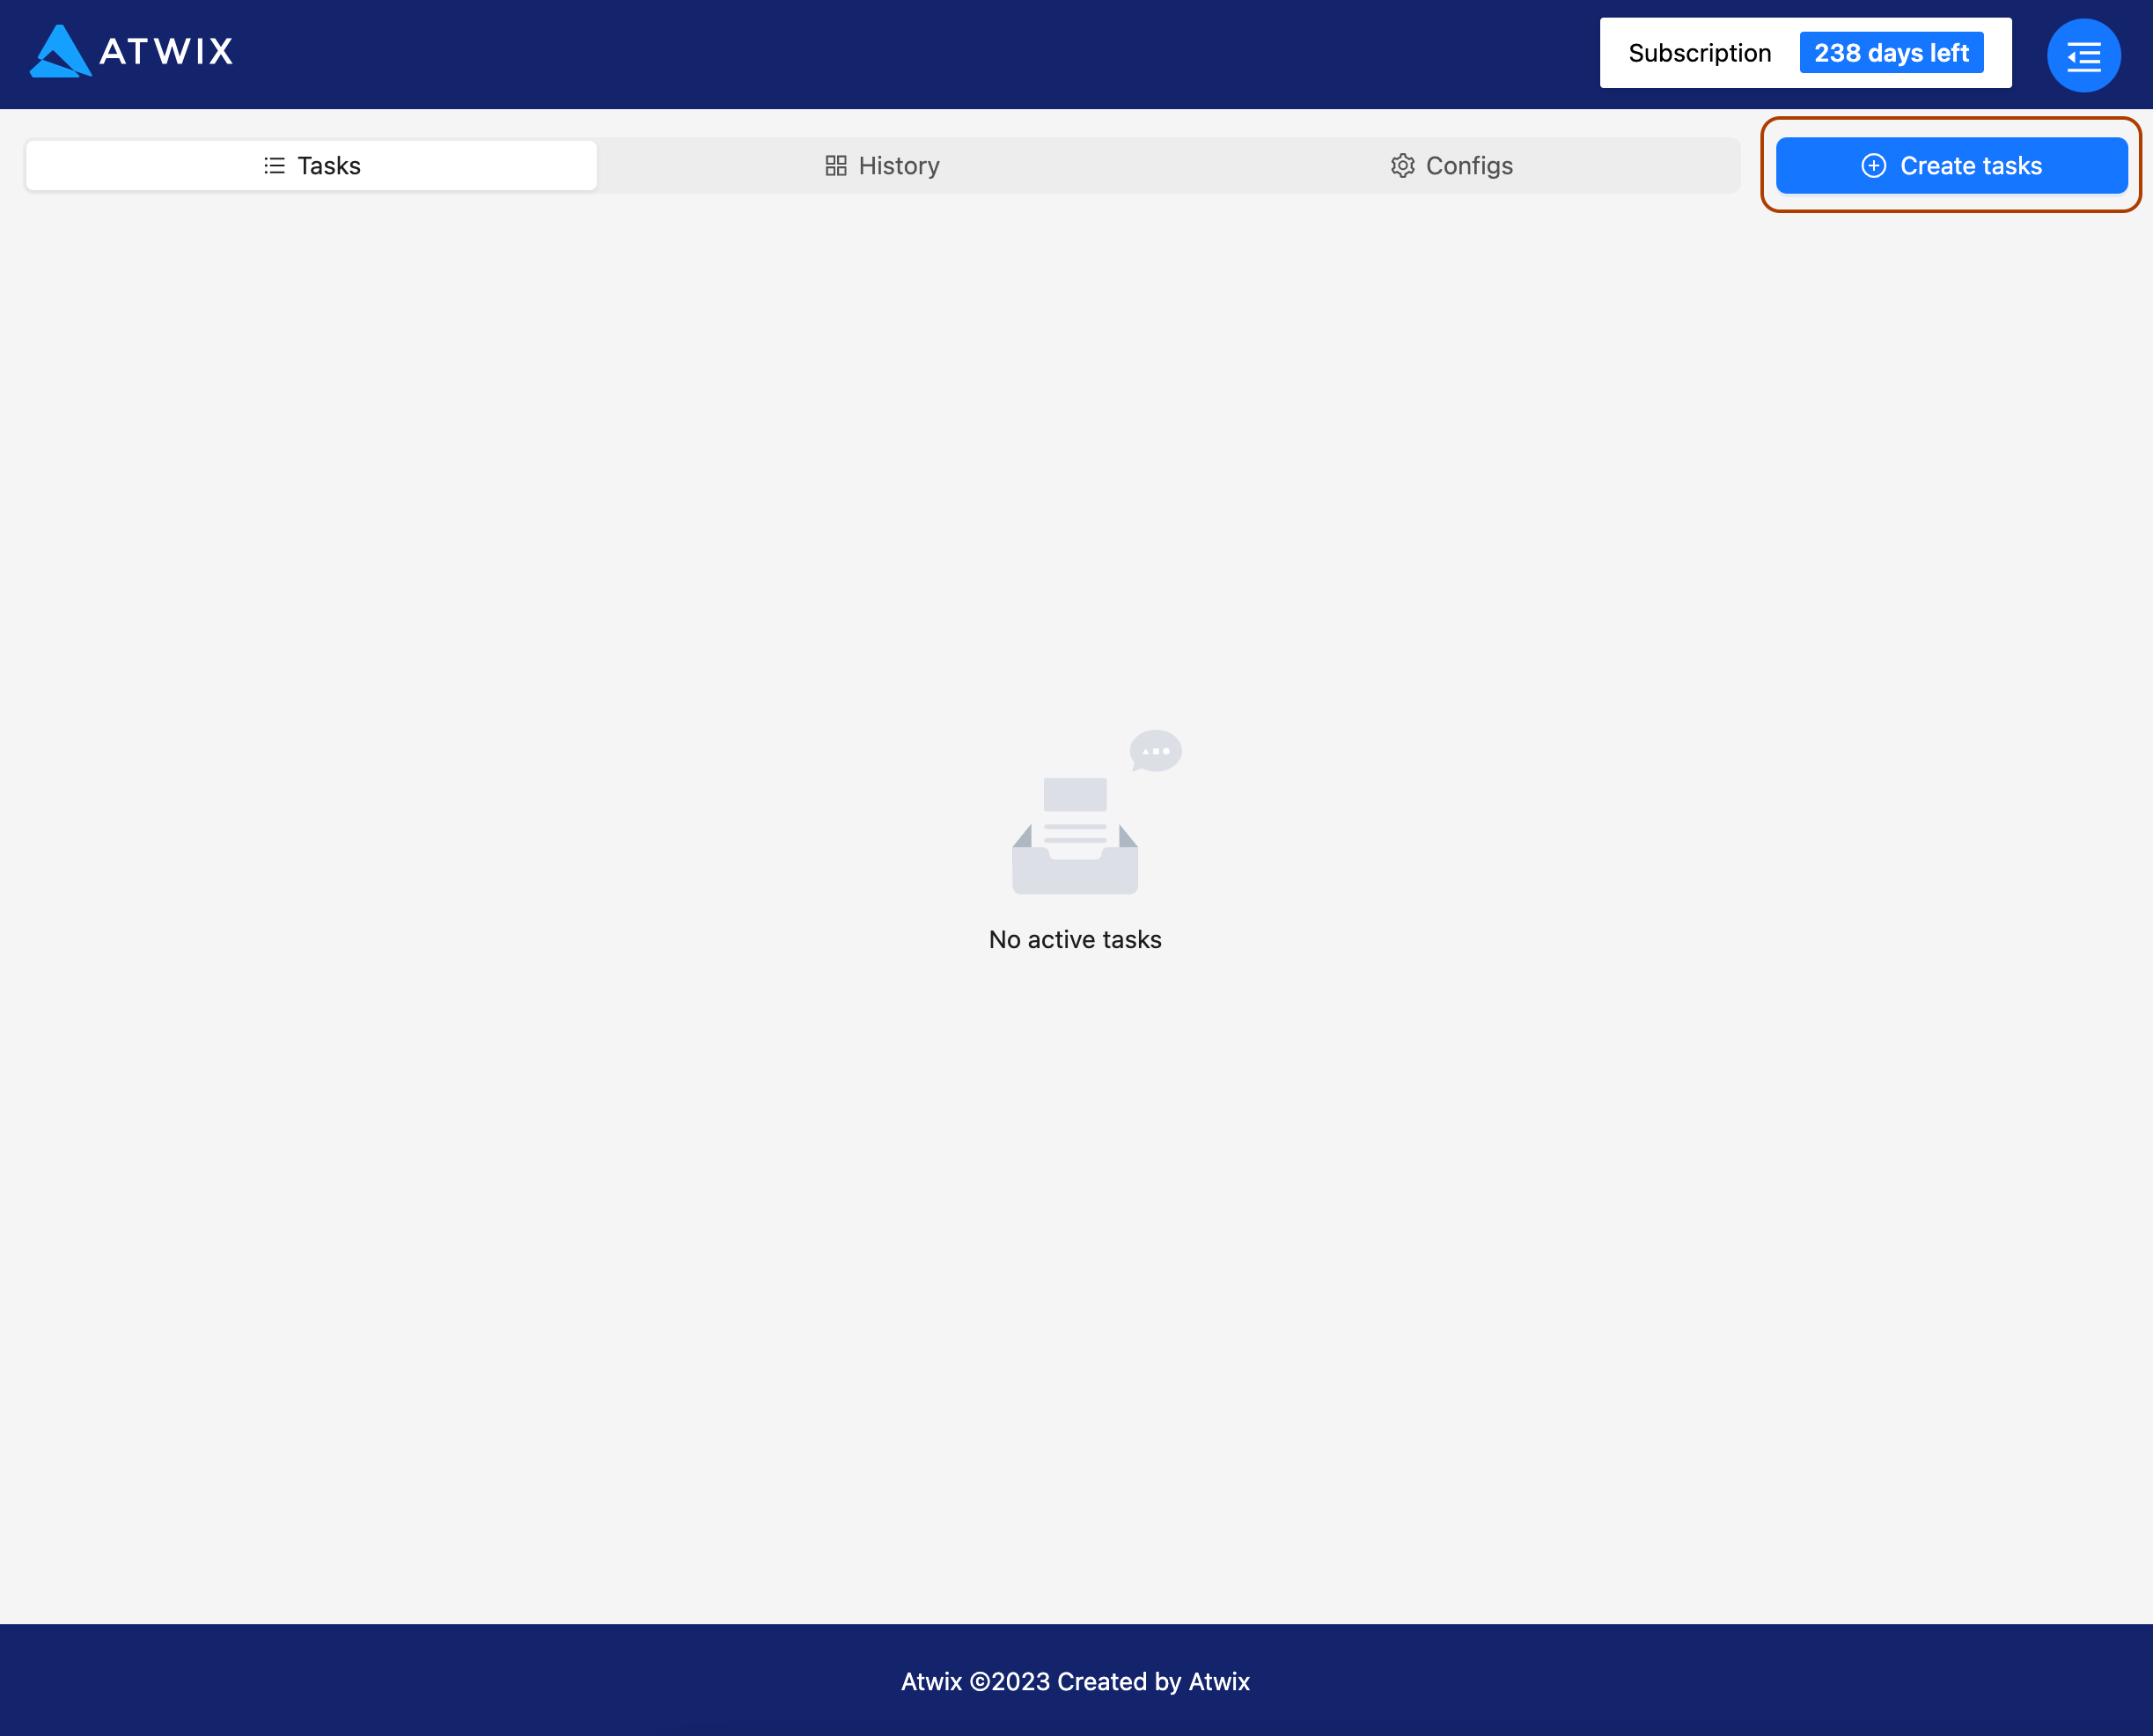
Click on the "Create tasks" button in the “Tasks” section of the application.
After clicking on the "Create tasks" button, a “Tasks creation” modal window will appear.
⚠Please be aware that upon clicking the "Create tasks" button, we'll validate your OpenAI API key's authenticity and the availability of tokens needed for content generation. If your OpenAI API key lacks sufficient tokens for content generation, you won't be able to access the "Tasks creation" modal window.
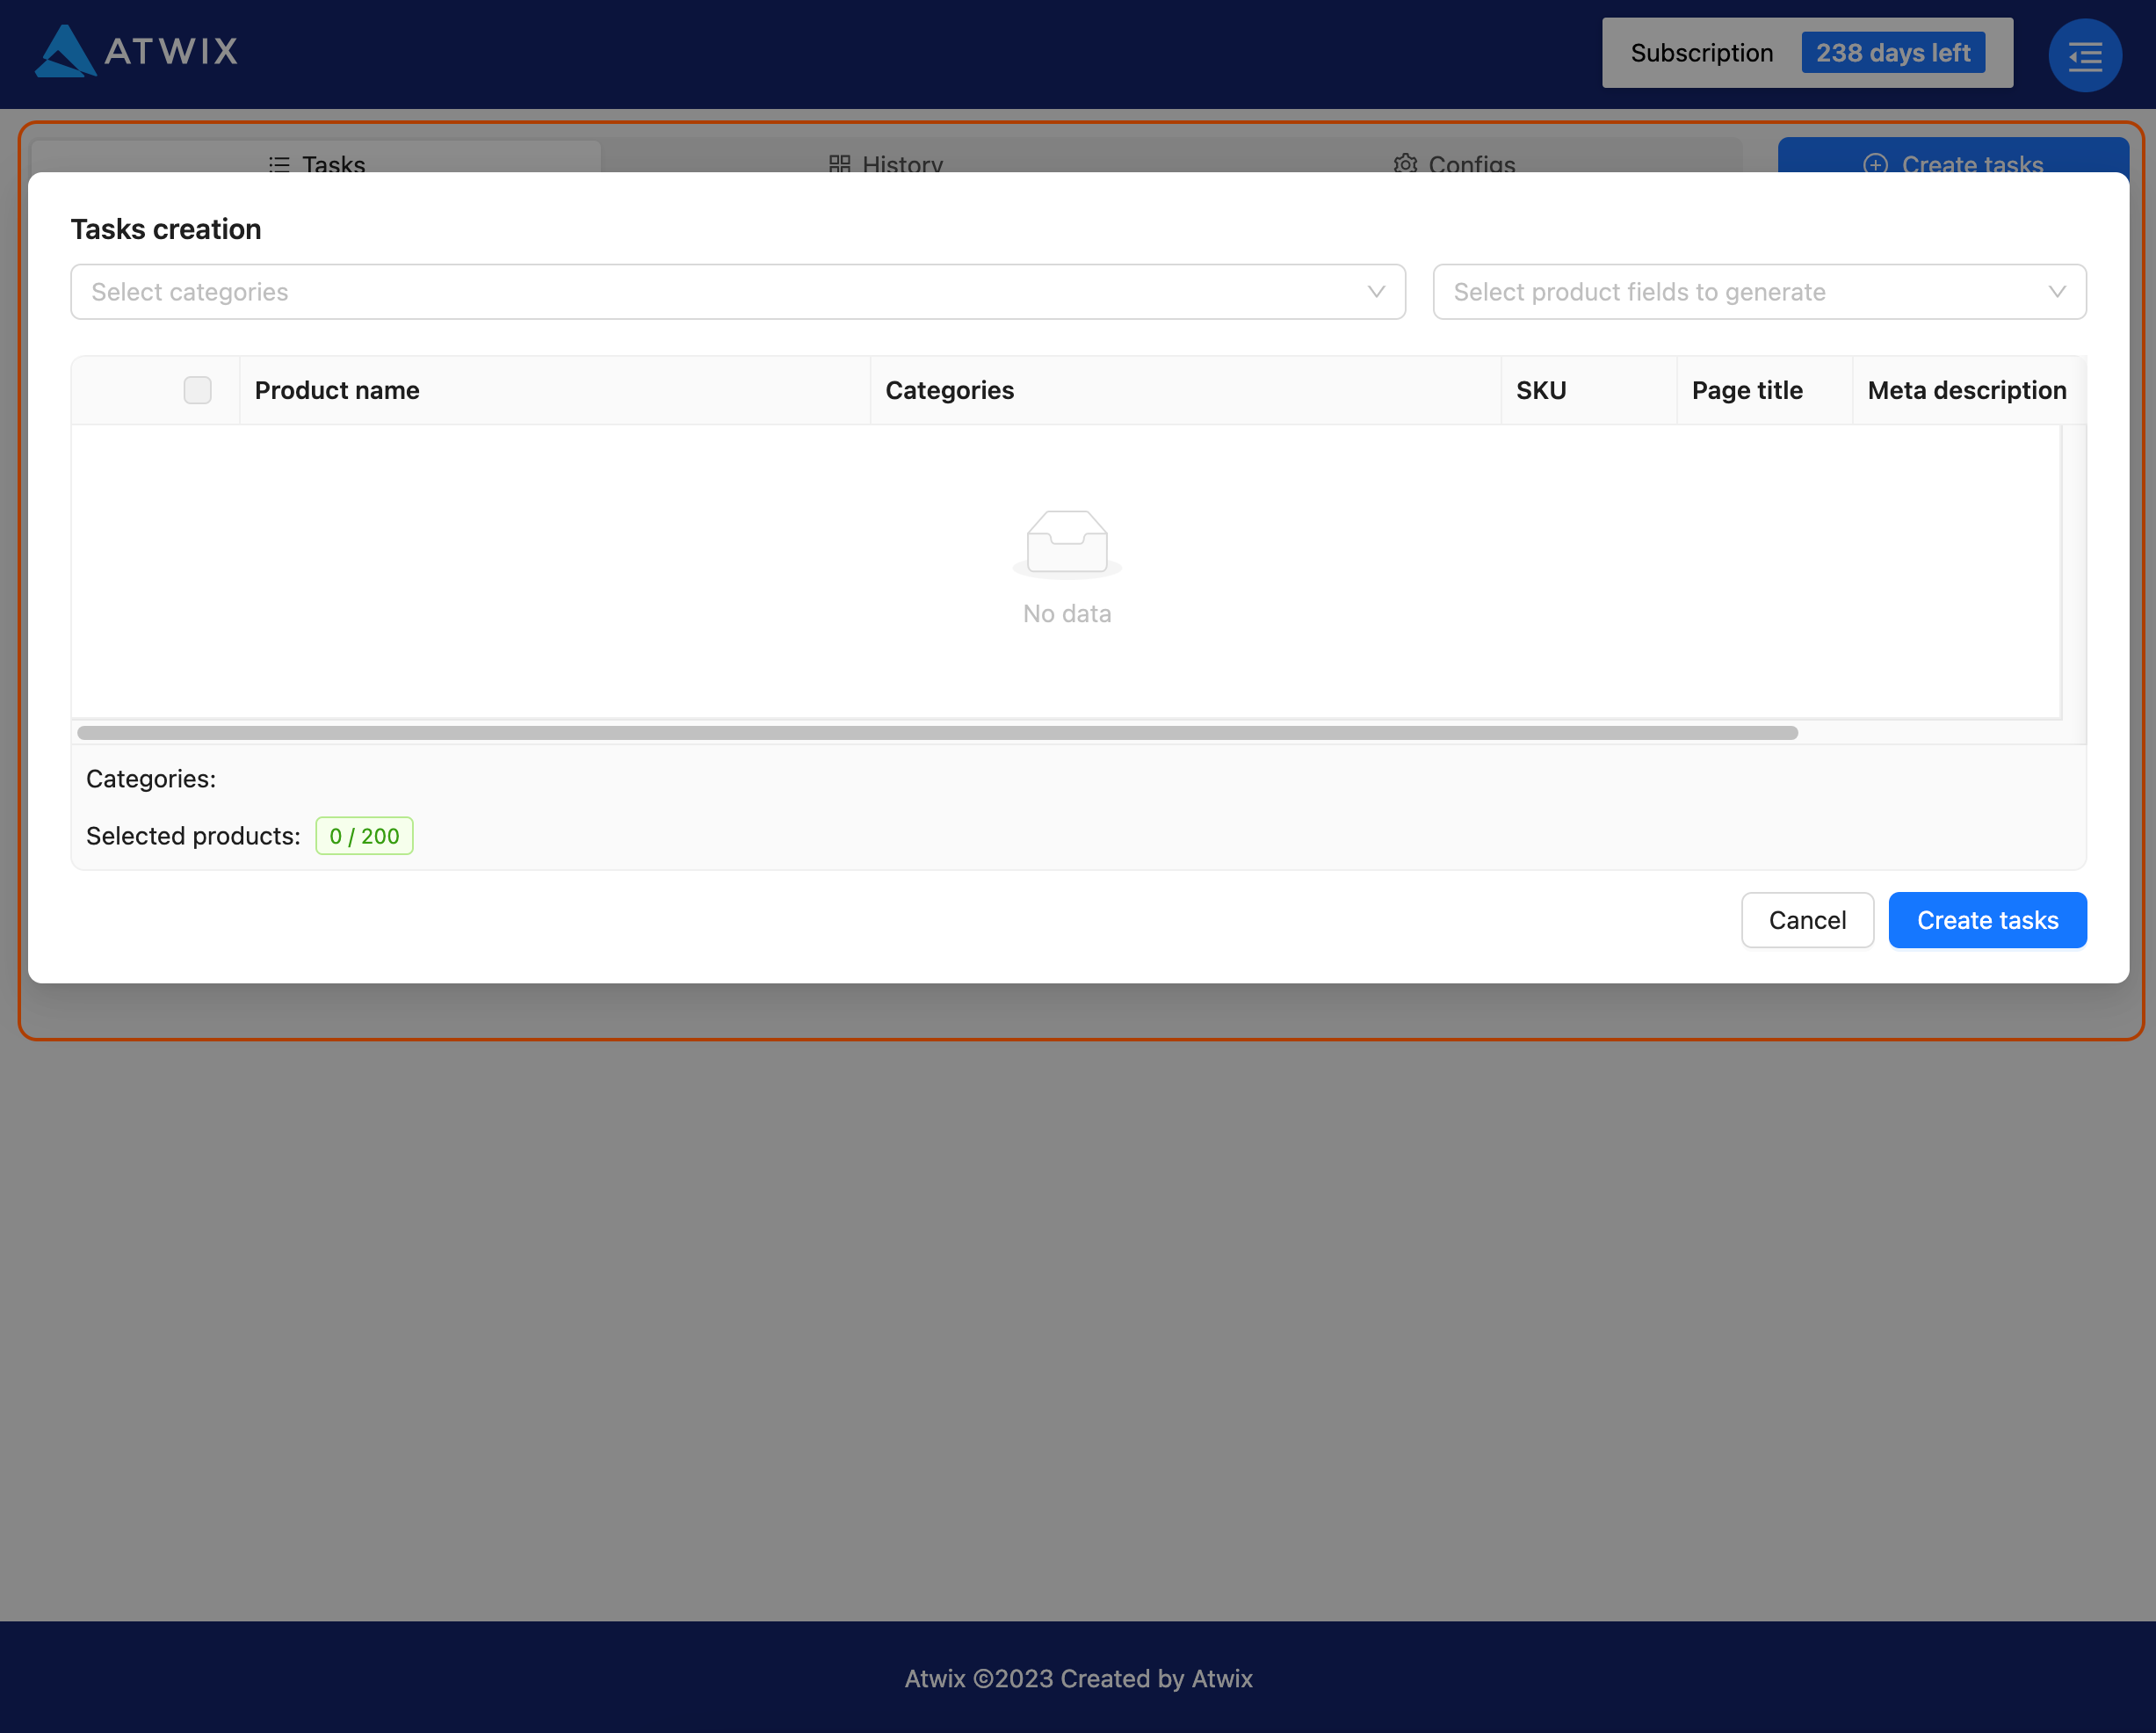
To create a content generation task, you need to choose the essential components: Select the products for which you want content to be generated and specify the type of content you wish to create. Once you've made these selections, simply click the "Create tasks" button to create content generation tasks.

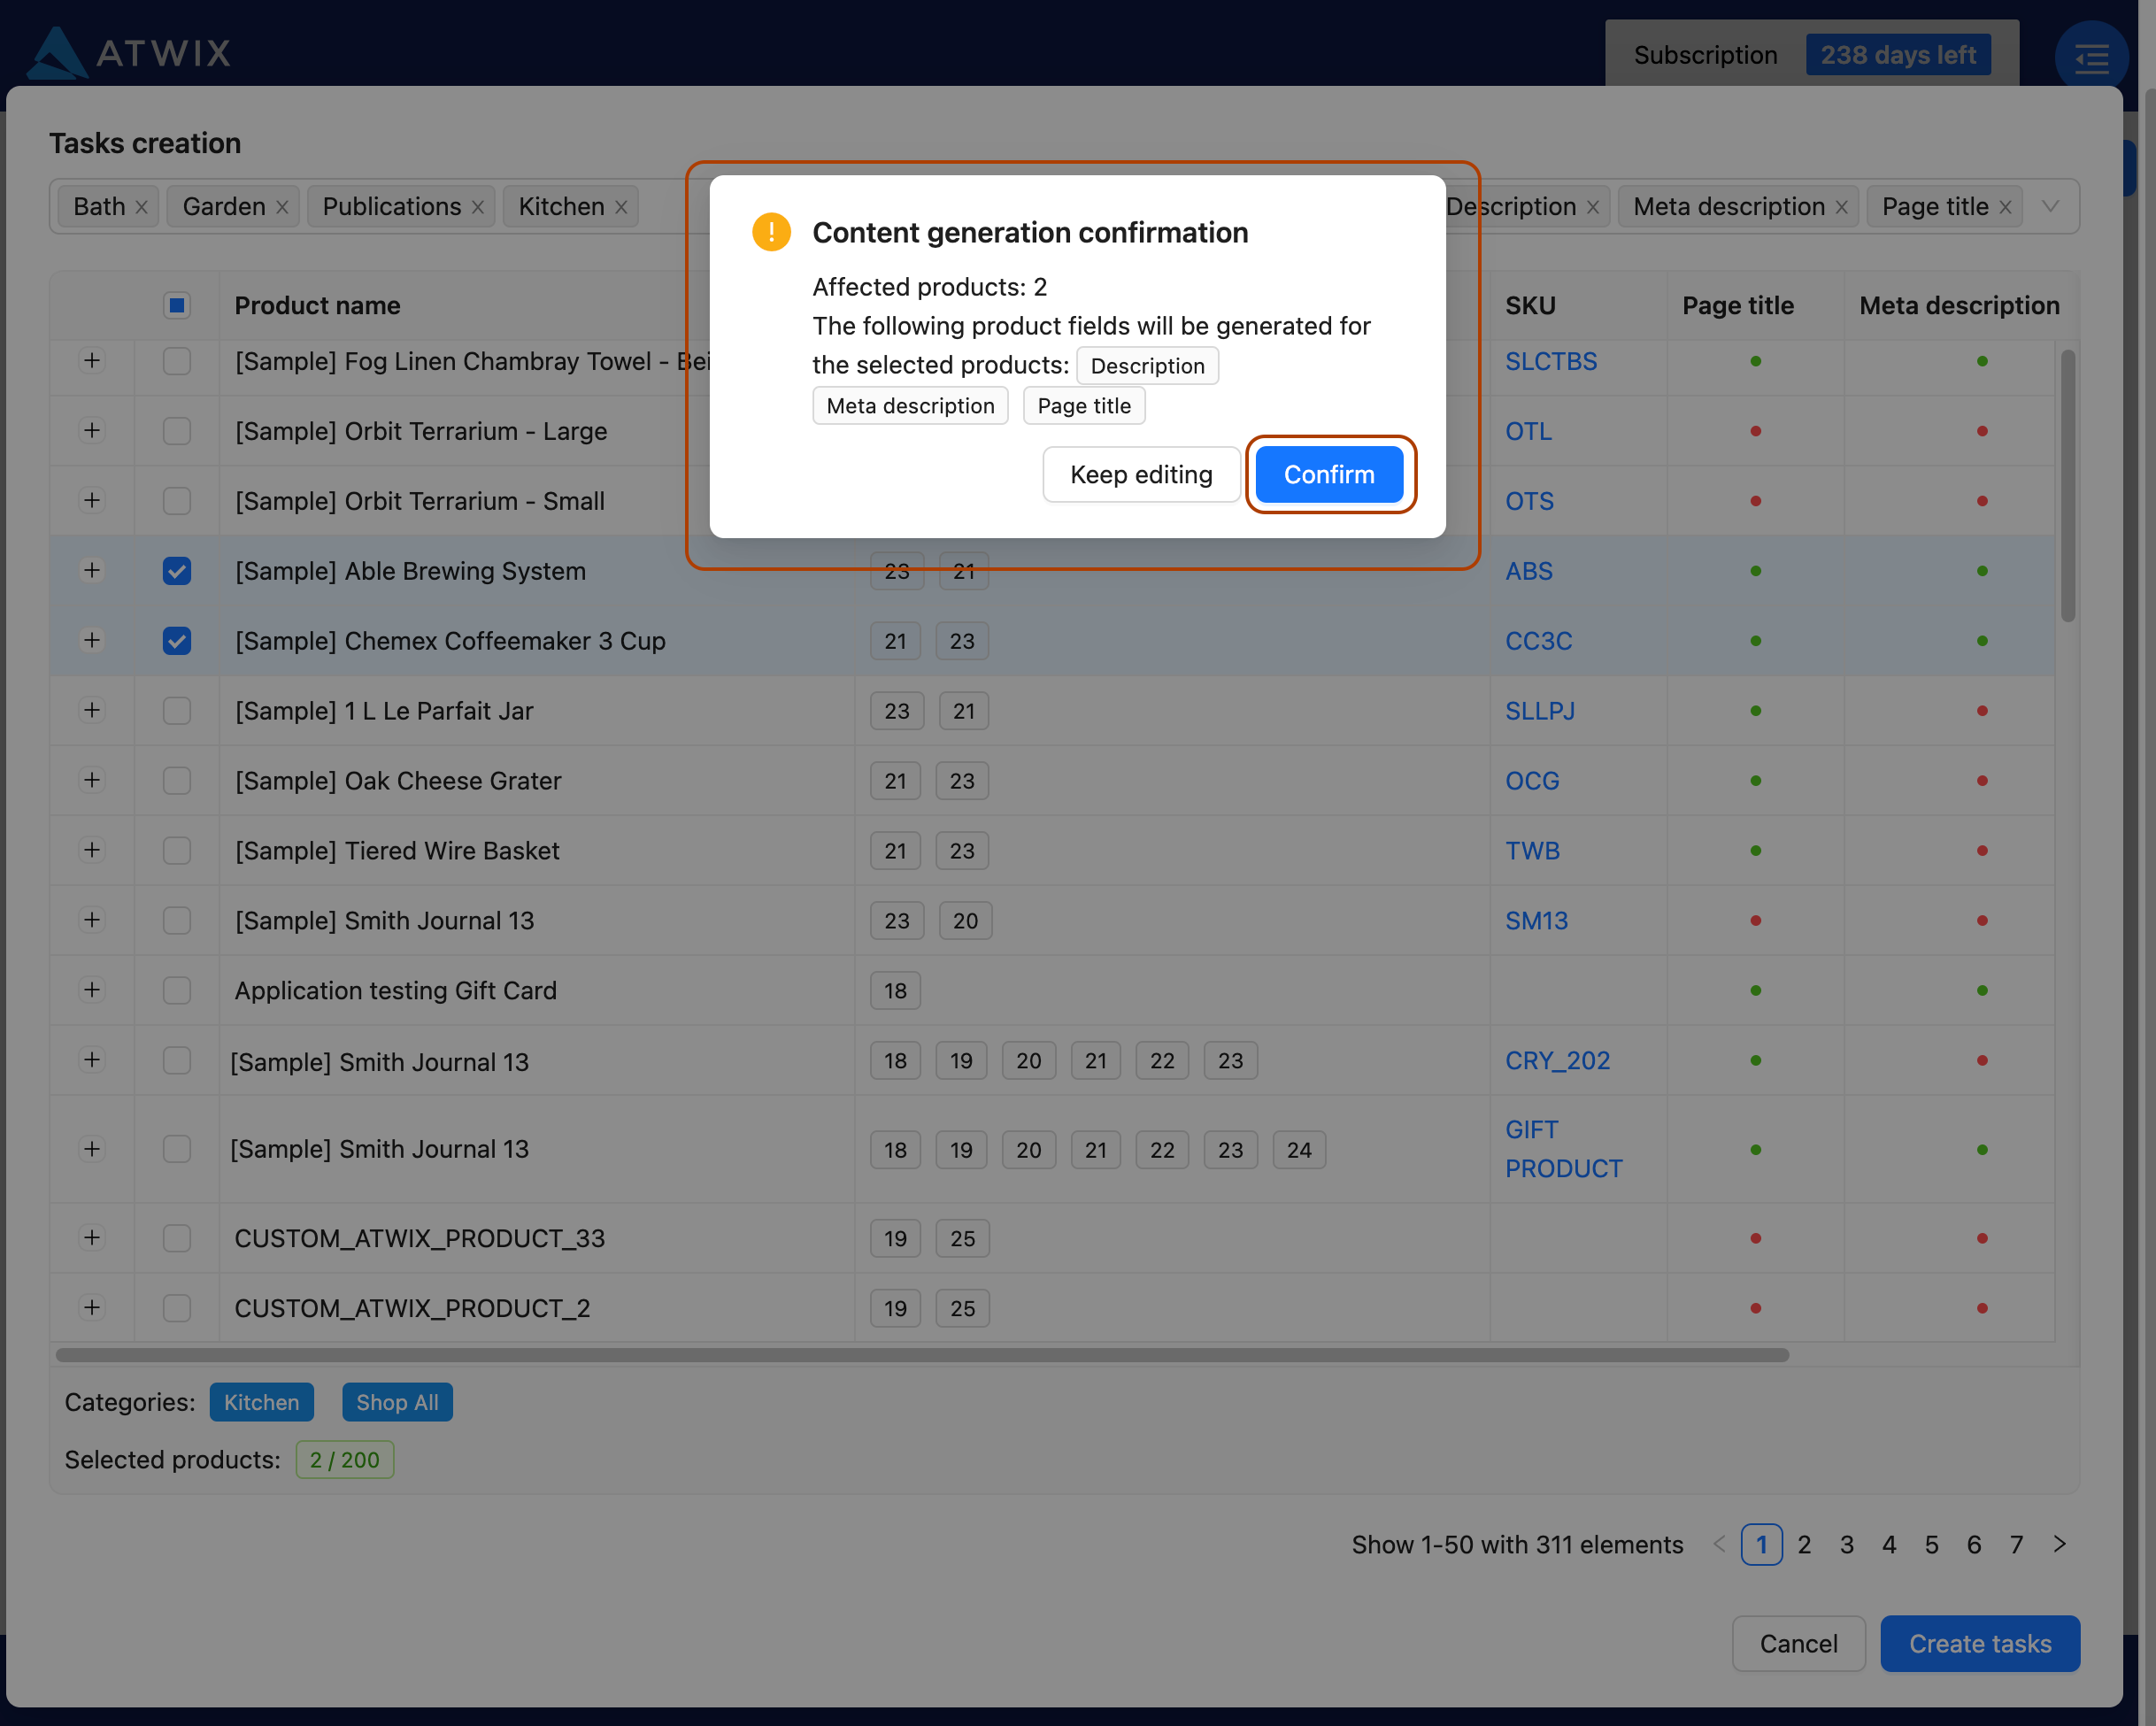
Upon clicking the "Create tasks" button, an additional modal window will emerge, displaying both the count of selected products and specific content types that is set to be generated.
Click "Confirm" to initiate the process or "Keep editing" to return to item selection.
Congratulations! Your first content generation task is now underway. Feel free to continue using the application or close it. The content will be generated in the background, allowing you to return later to review and apply the results.

Content generation tasks have 4 different statuses.
Scheduled - tasks that are queued for execution.
In Progress - tasks that are currently being executed.
Completed - tasks that have already been completed.
Failed - tasks with errors.
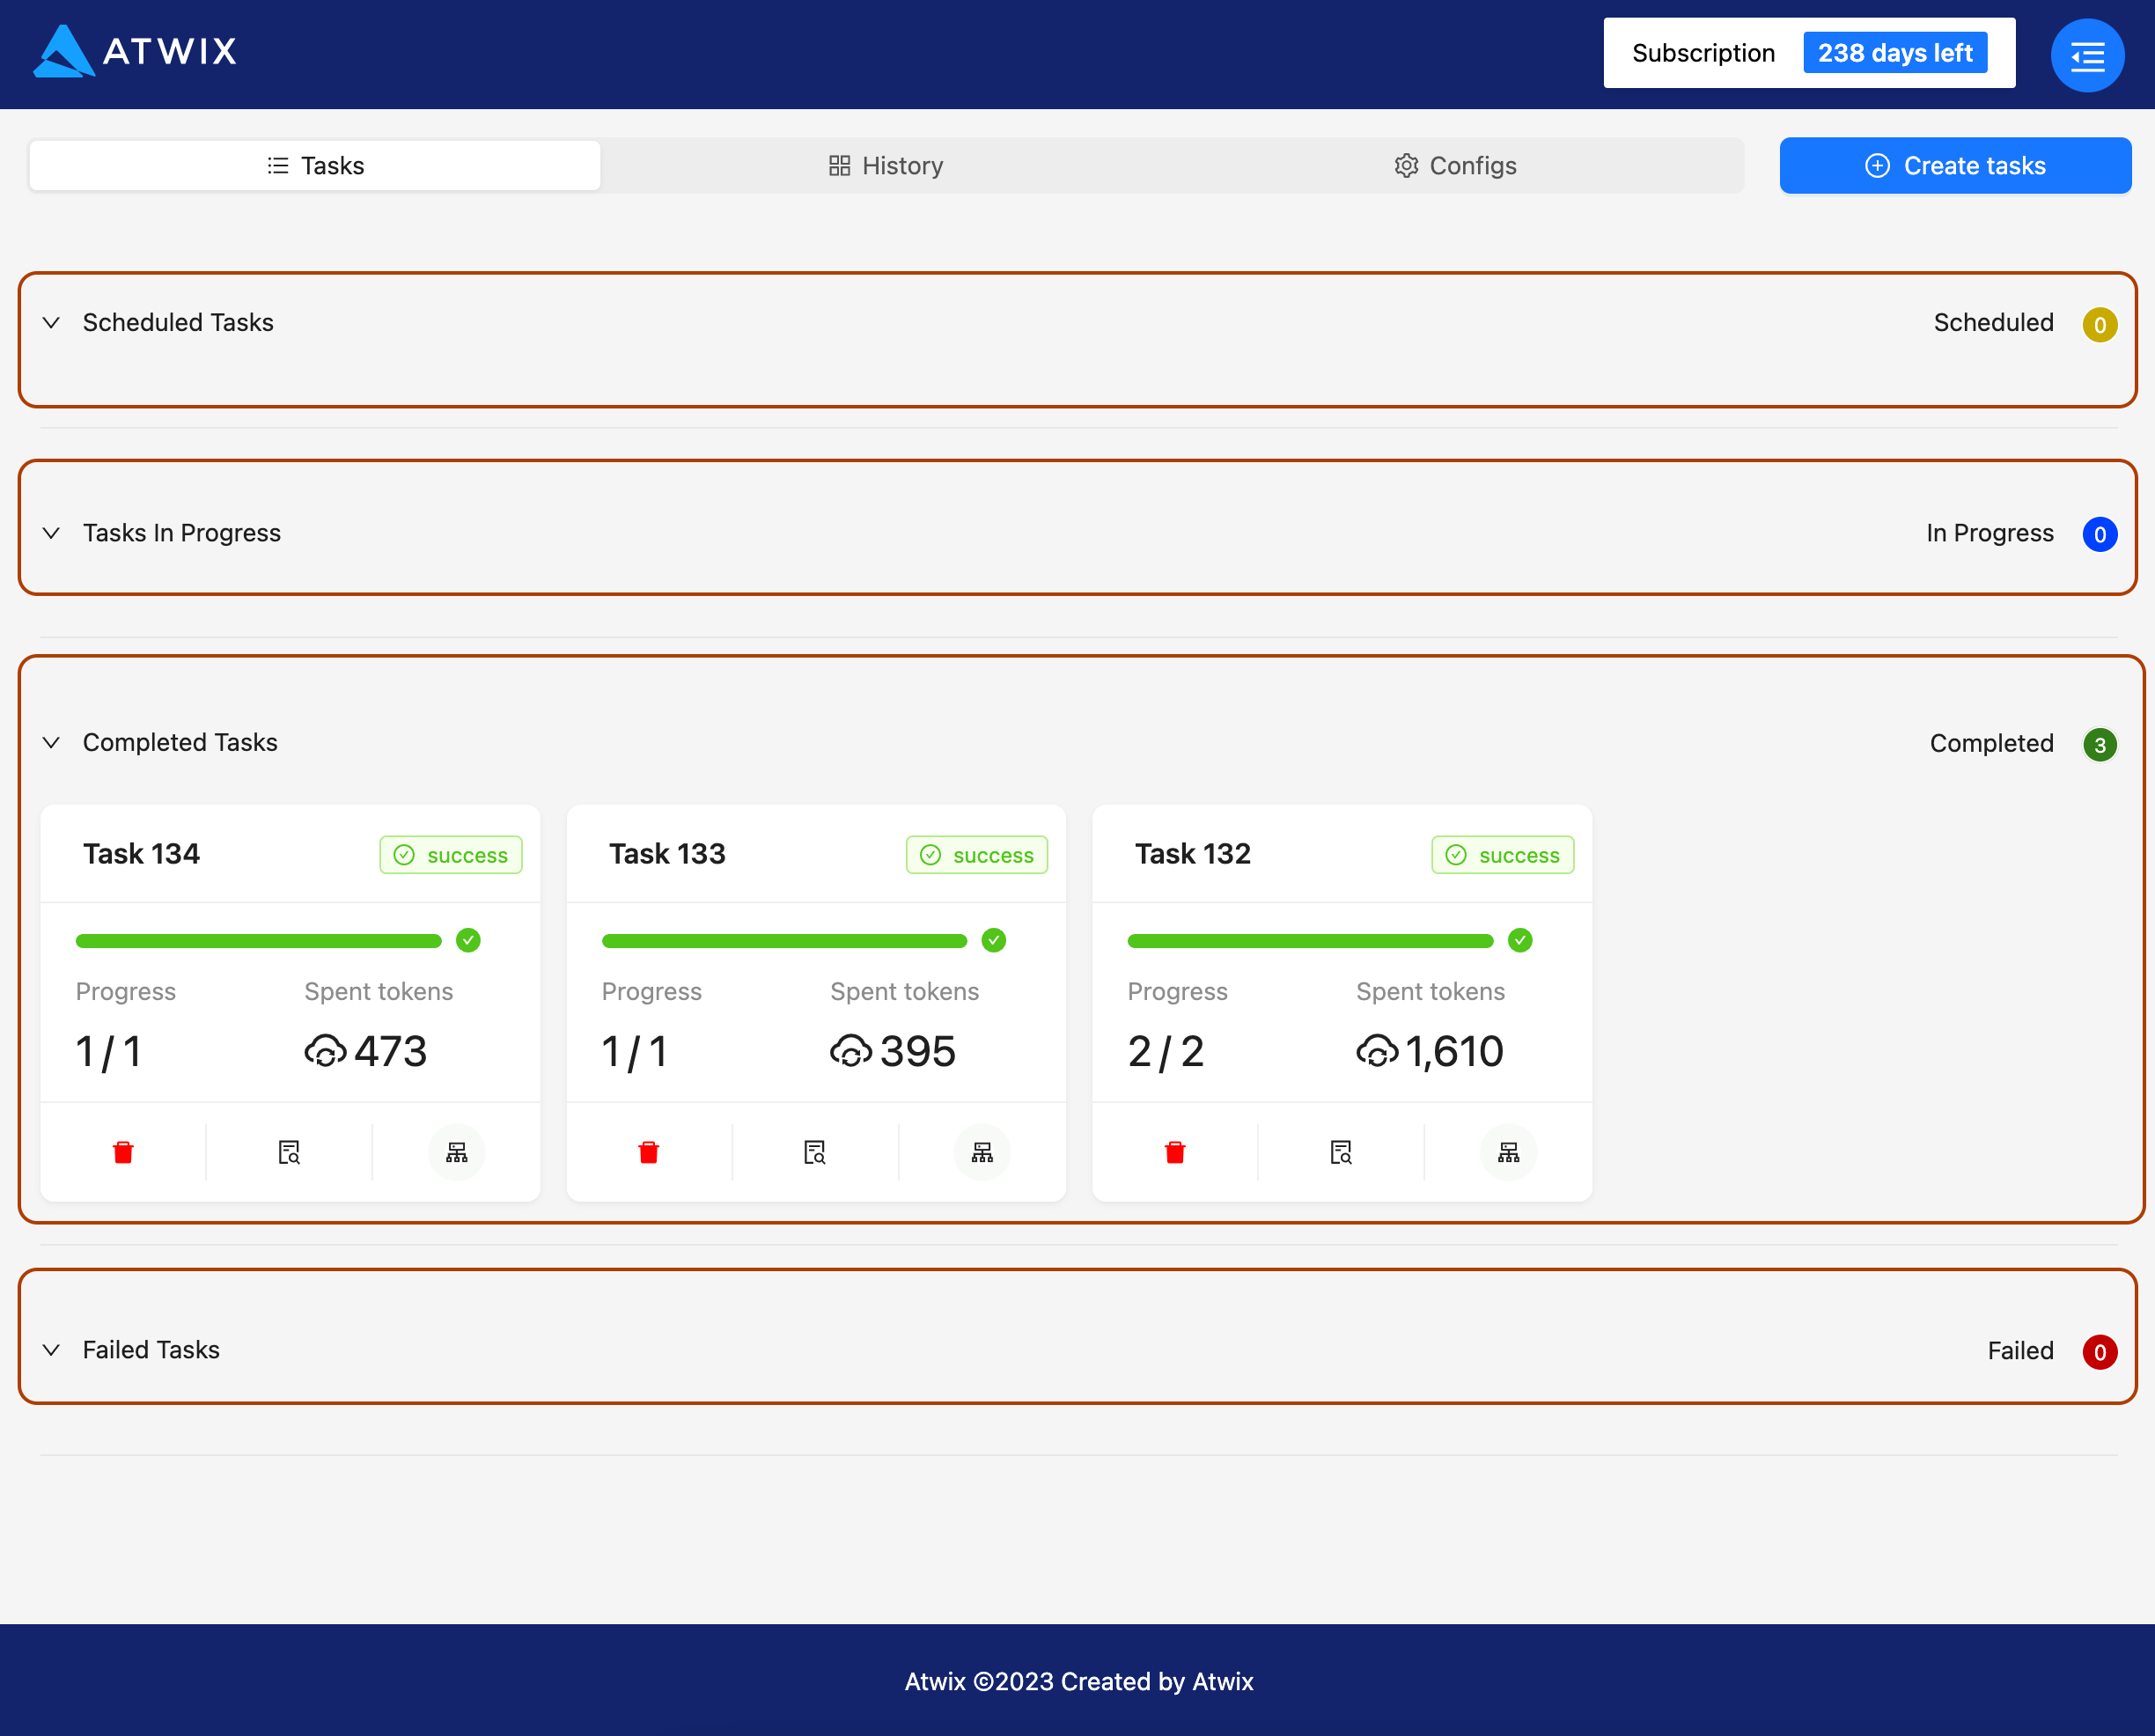
You can view the list of products scheduled for modification at each stage, and if necessary, delete any tasks using the buttons on the task card.
For every stage, you can also check the estimated number of OpenAI tokens that will be used.
Tasks progress through statuses automatically. When tasks reach the "Complete" status, it's time to review the generated content, make adjustments as required, and apply changes to your store. To begin reviewing the content, simply click on the icon marked by a pulsing green light on the completed task card.

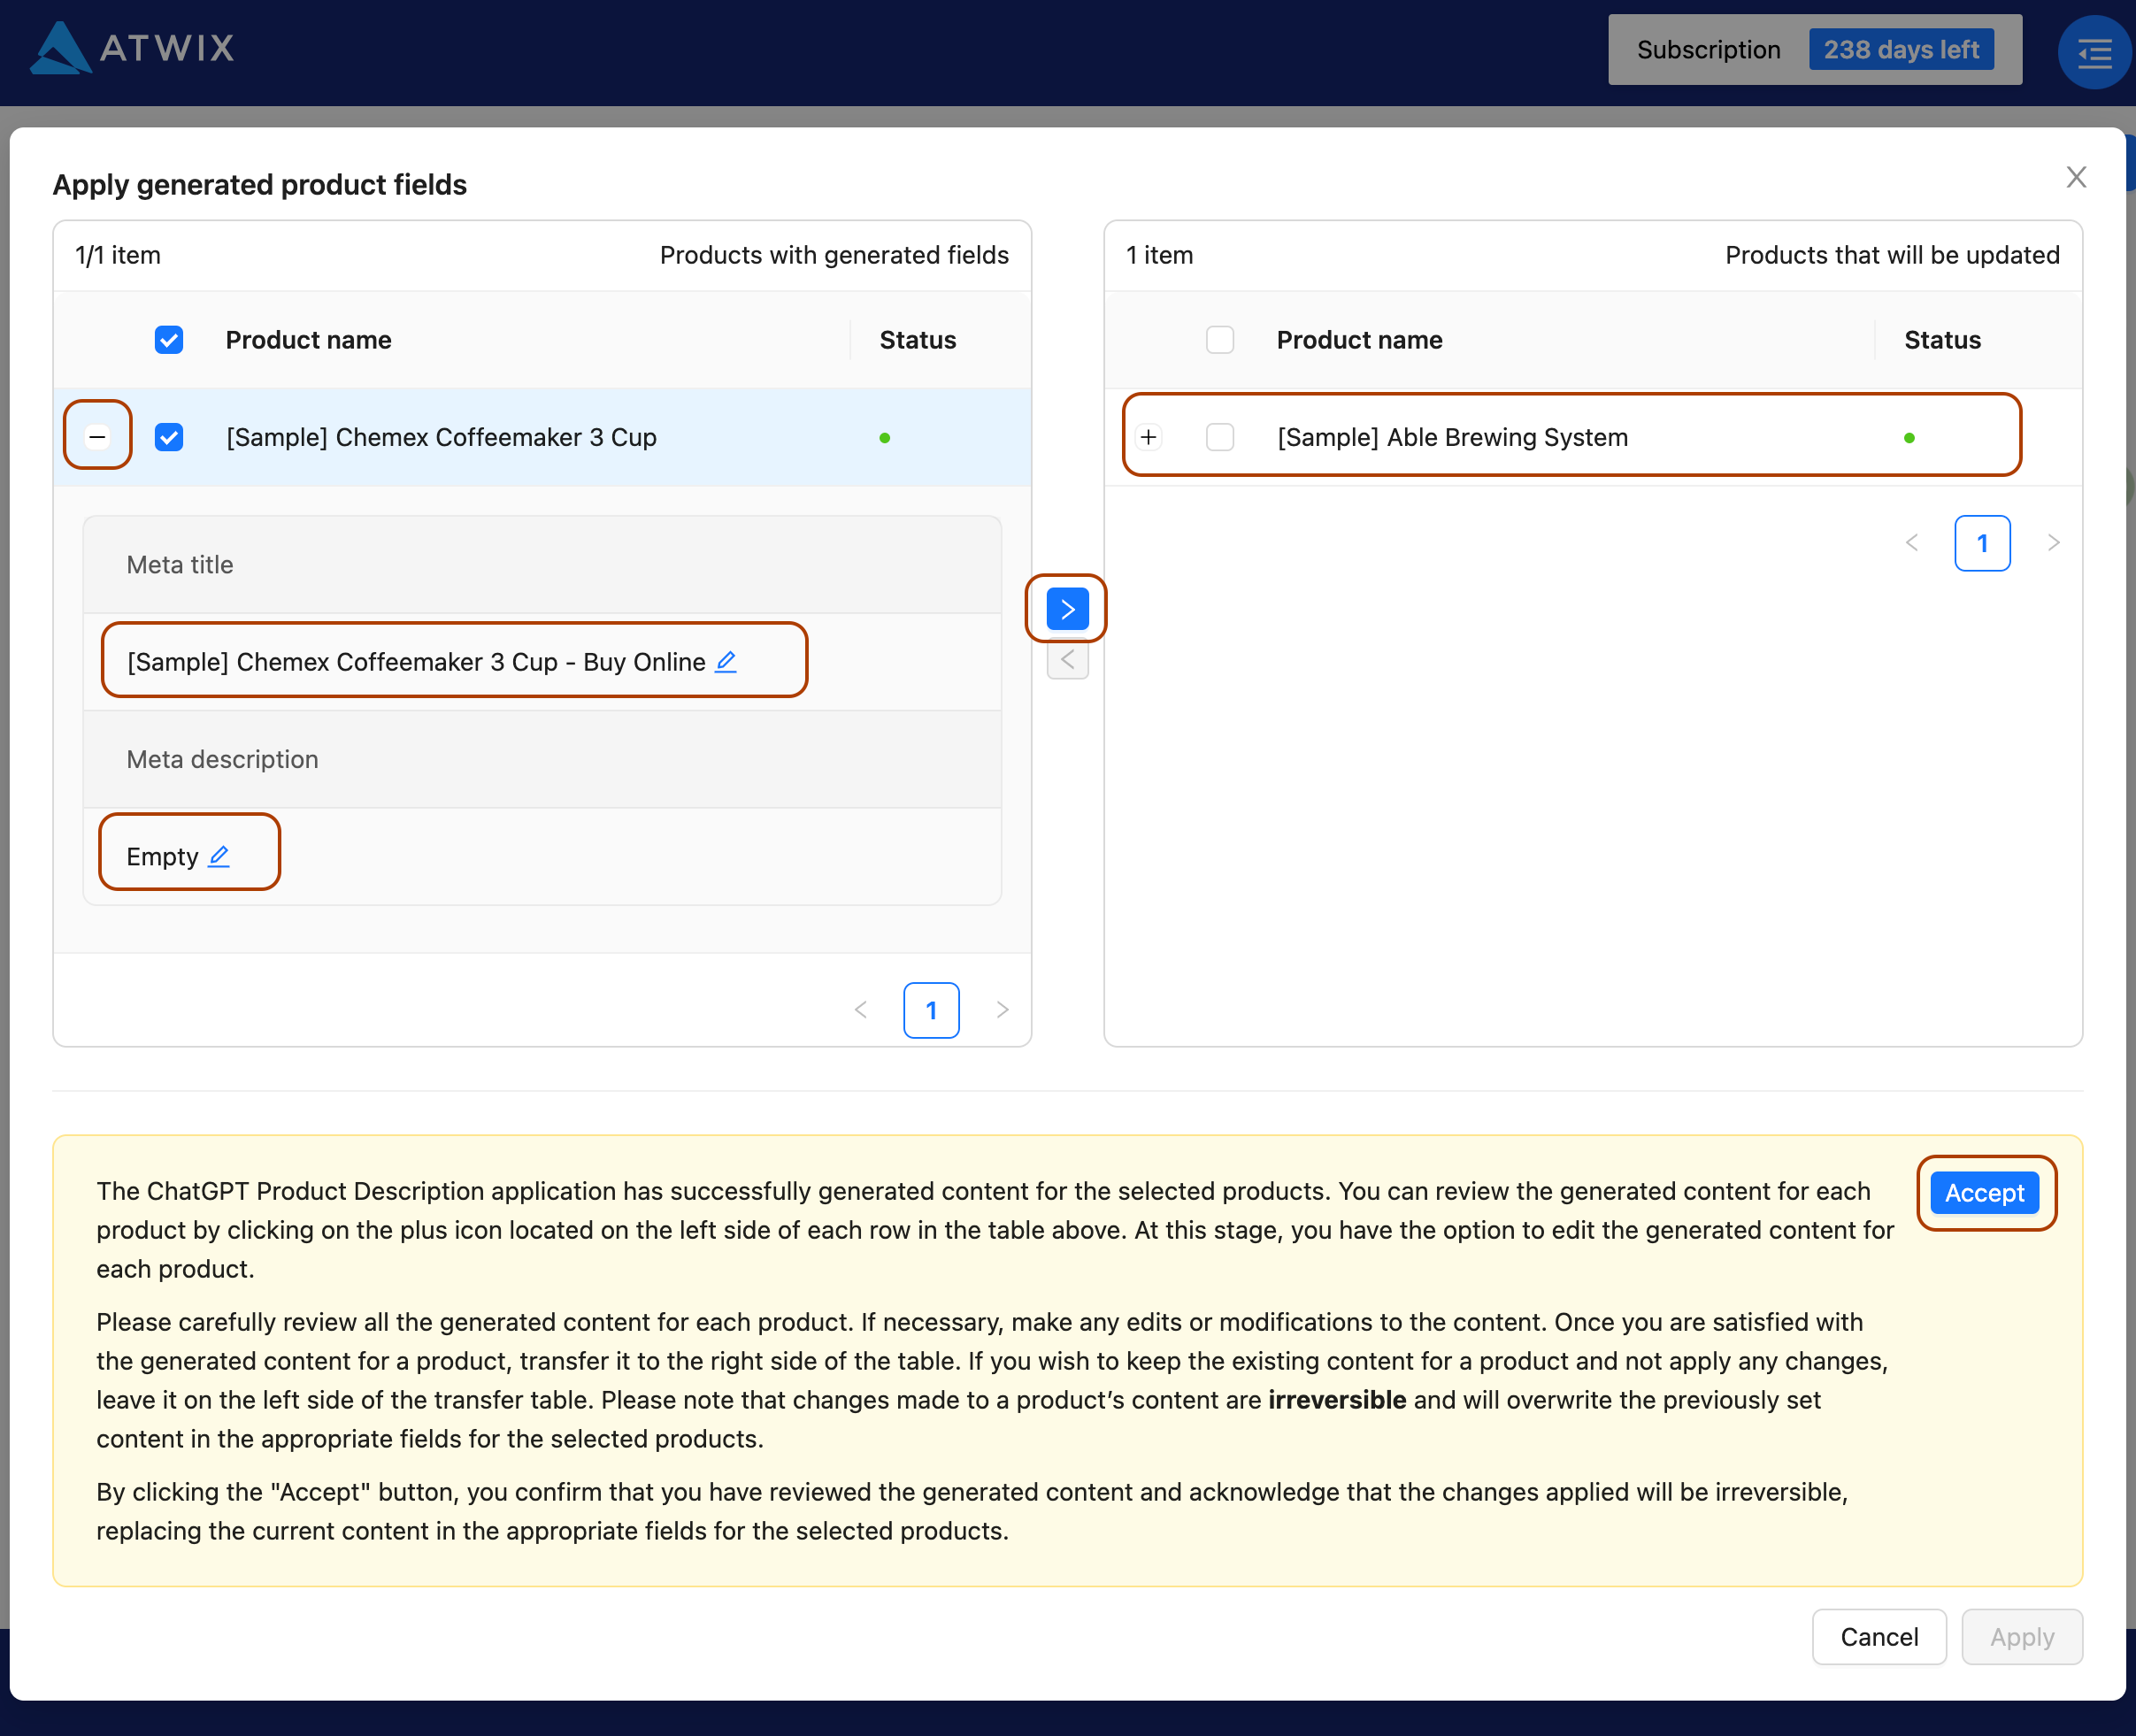
When you begin reviewing and applying the generated content, you'll come across the "Apply generated product fields" modal.
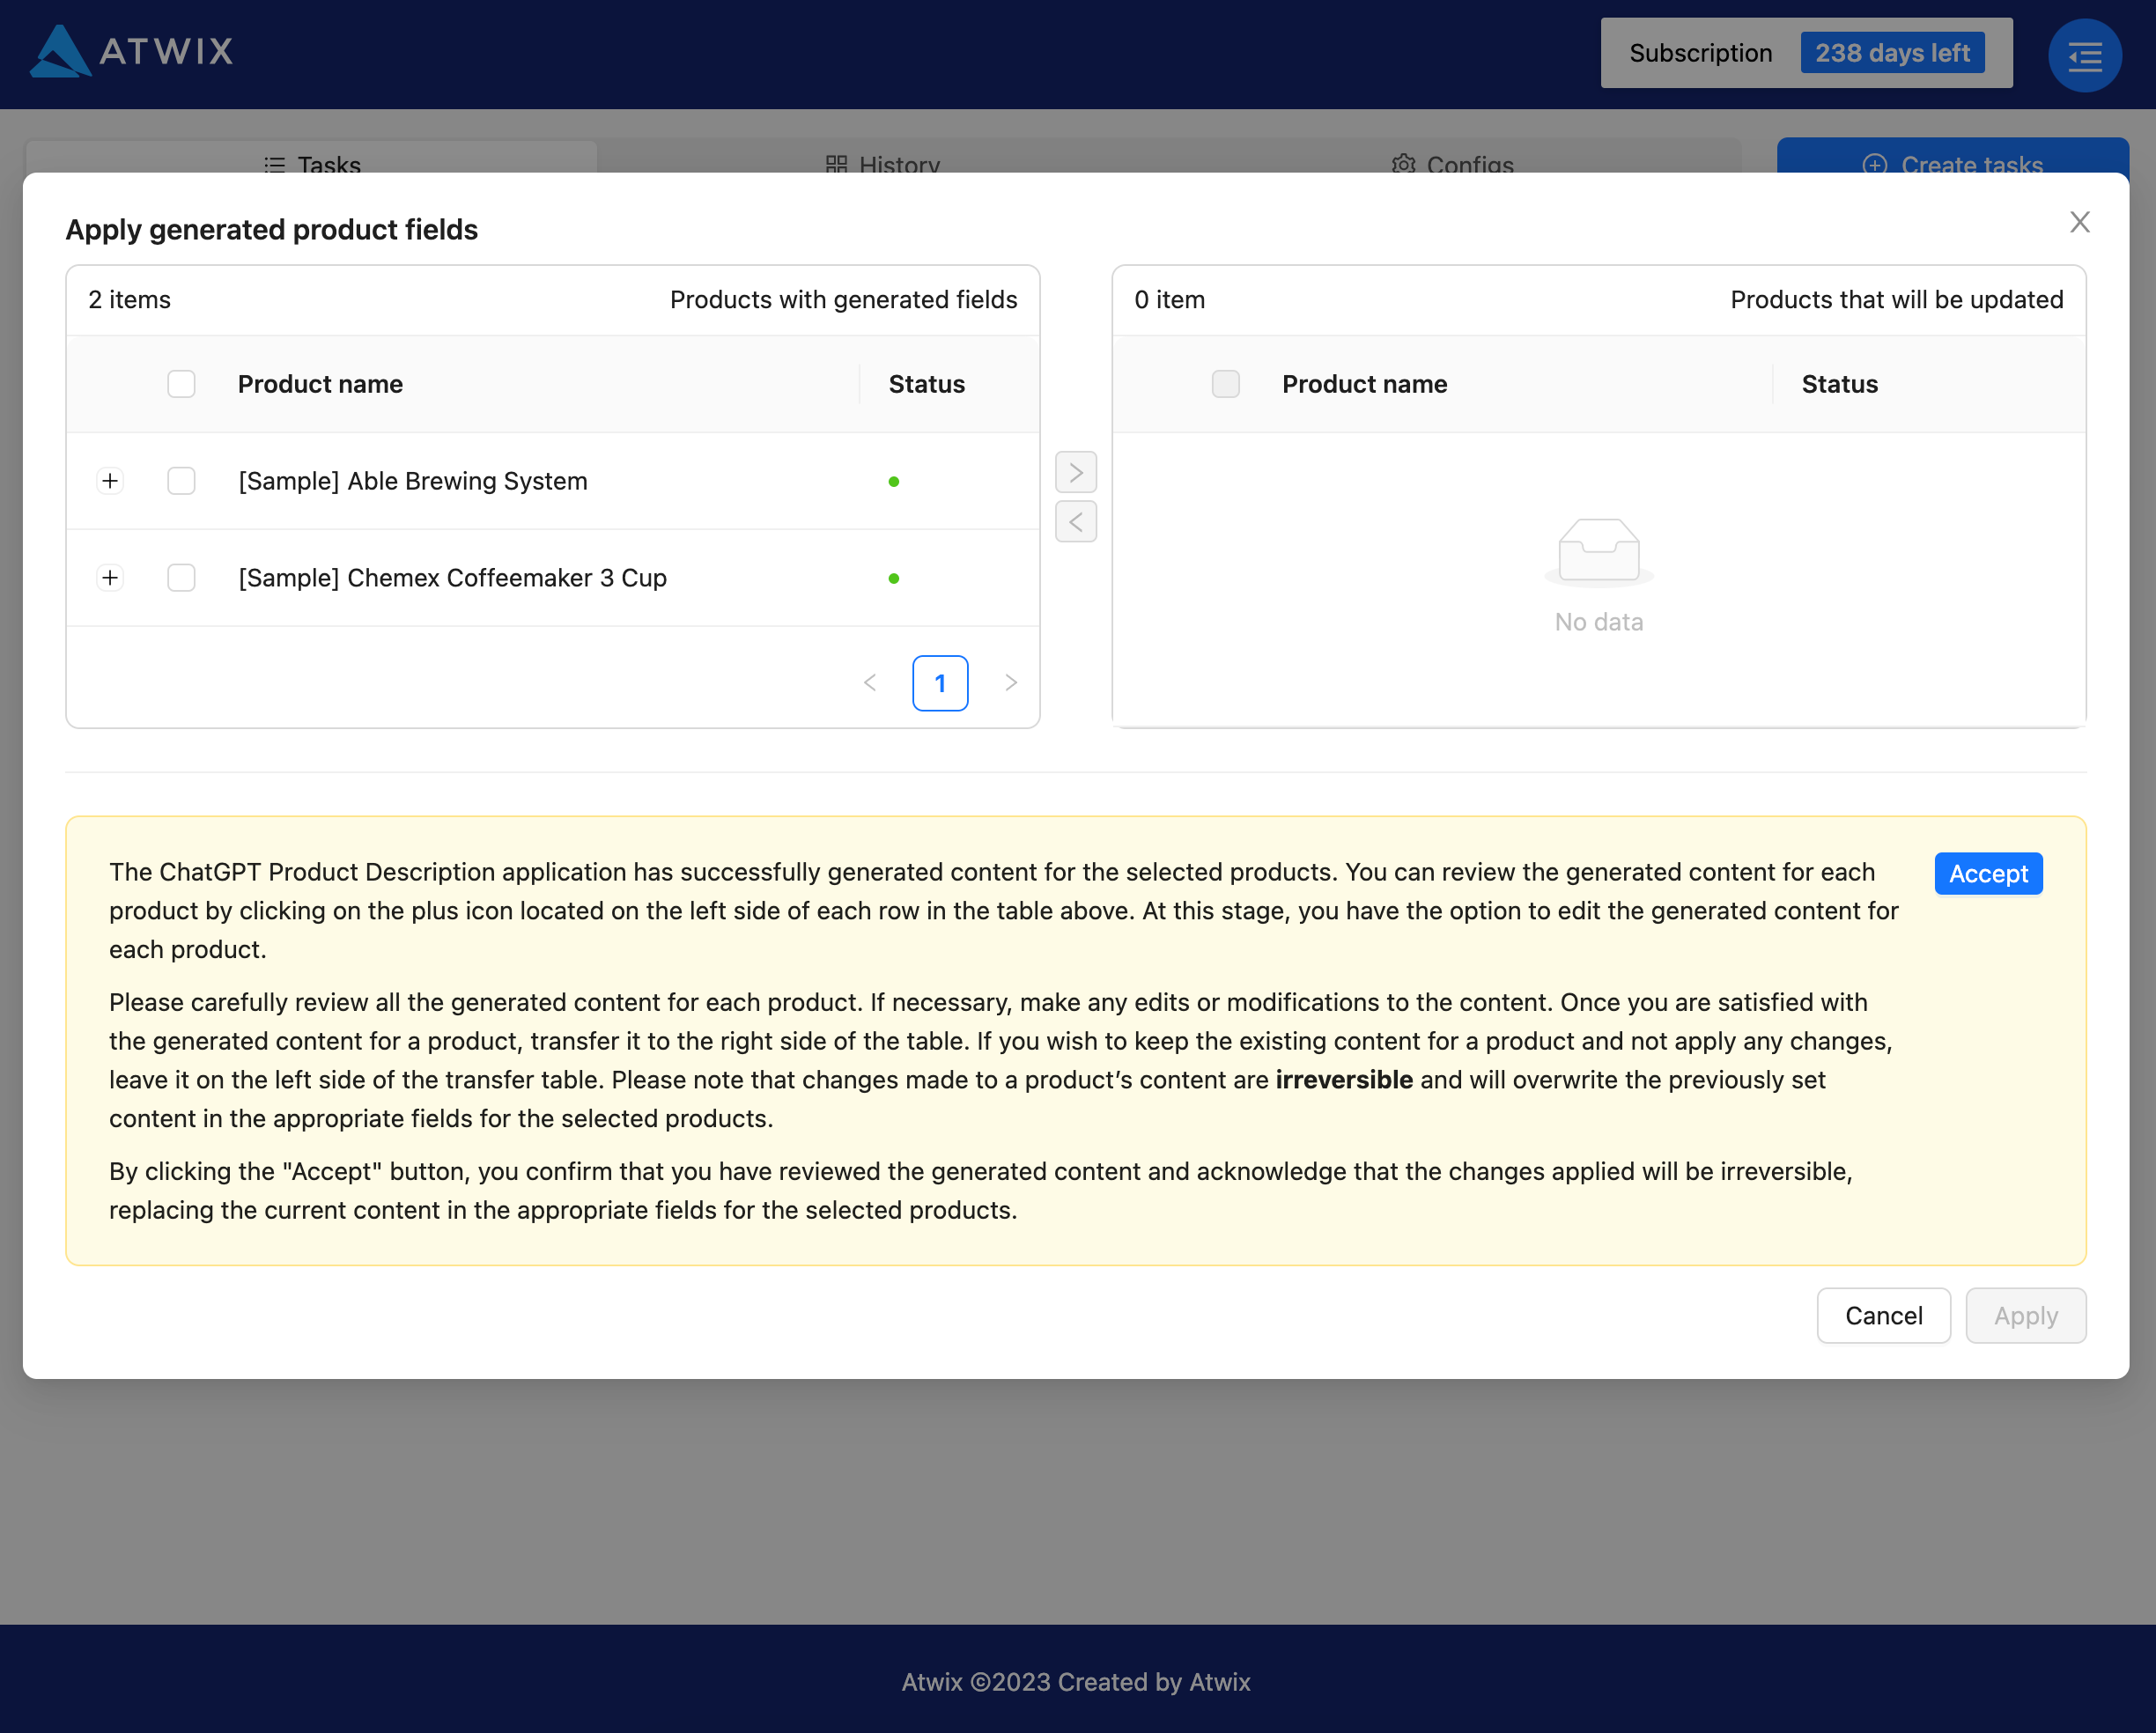
In the "Apply generated product fields" modal, you should review all the generated content. If you find the generated content unsatisfactory for any reason, you can easily make your own edits for each field.
Following the content review, proceed by shifting the products that should be updated to the right side of the modal window.
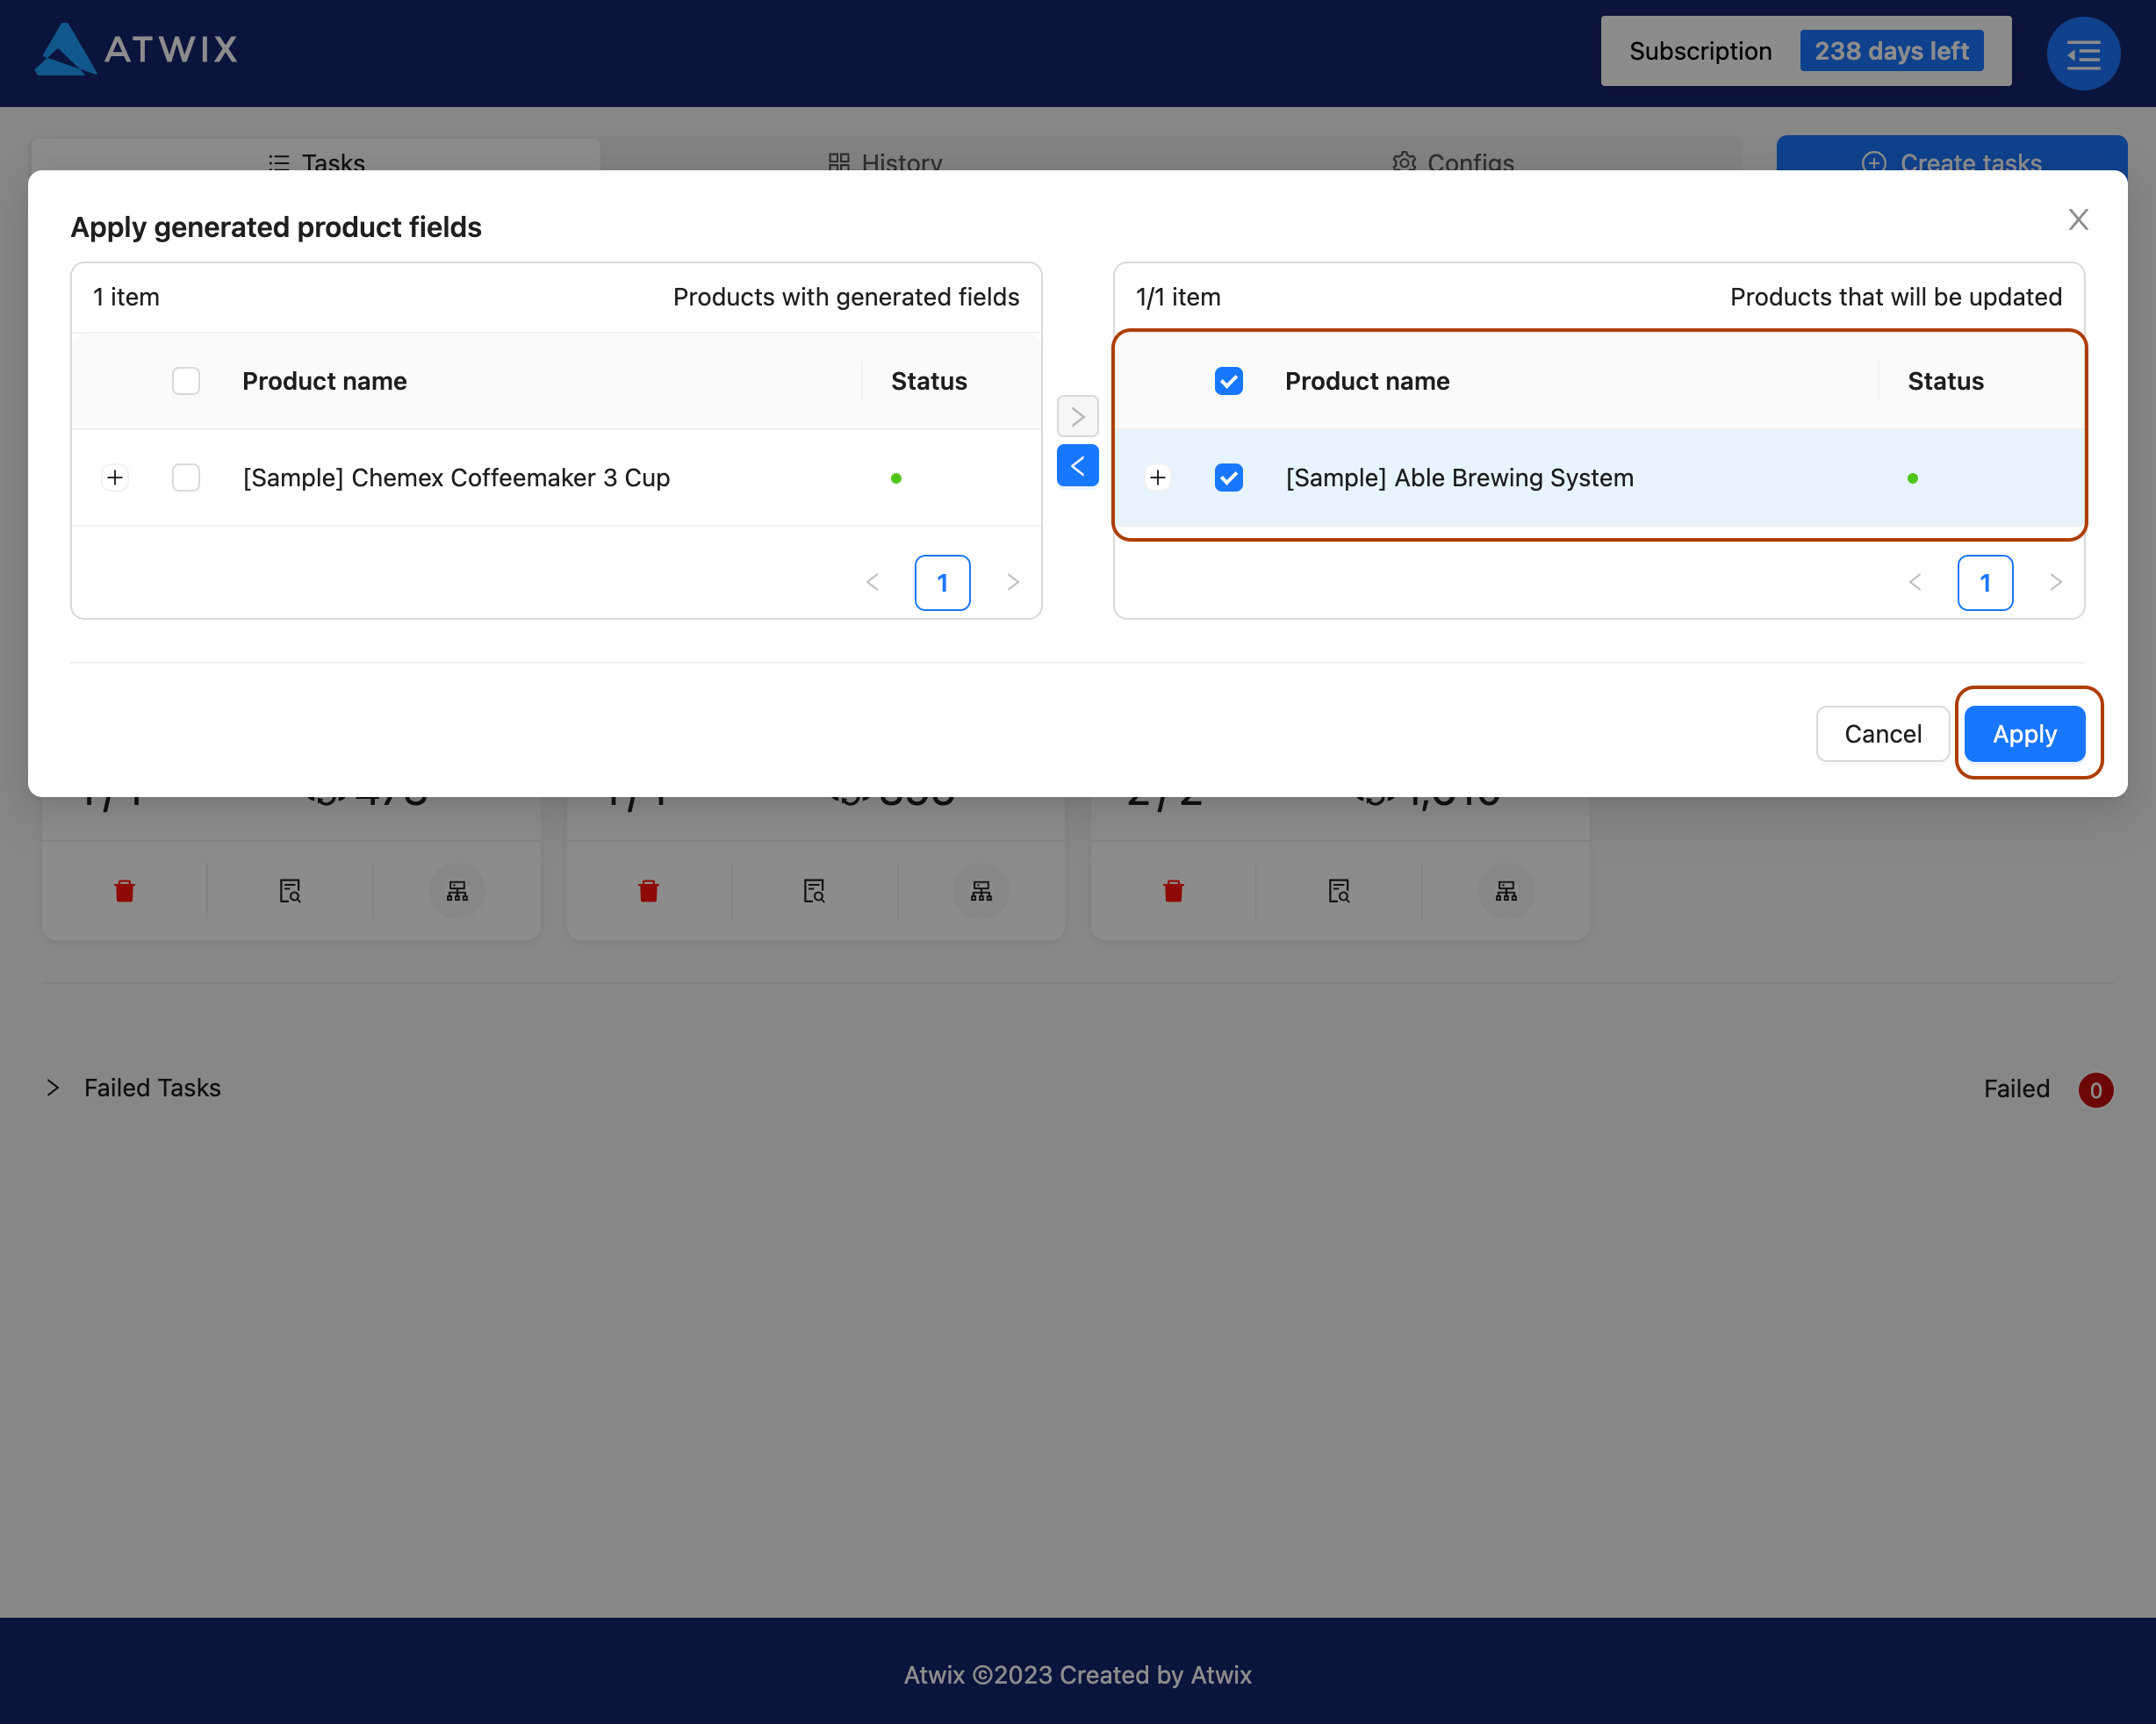
Choose the products for updating from those moved to the right side of the modal window. Simply click the checkbox in each product's row.
Make sure to read notification at the bottom of the modal window and finalise the process by clicking the "Accept" button.
Once you've made your selections, click the "Apply" button.
⚠Please be aware that updating products is irreversible and cannot be undone. Also, keep in mind that if you don't select certain products for updating, any generated content for those products will be lost.
The history of tasks can be accessed in the history section. This area contains information about all tasks that have been successfully completed. Here, you can find specifics about the impacted products, the token consumption for each task, the date of preservation, the updated fields, and more.


